How to link templates together? Video
The pre-built workflow templates are designed to work on their own, but you can also link them together using tags. Linking workflows allows you to create an automated but customized journey for your contacts and customers. To do this, you need to select the same tag for the Tag action used in one workflow and the Tag assigned condition starting another. As a result, another workflow is triggered for a specific segment of contacts with that tag.
Below, we show you examples of how you can link workflows for a tailored hands-off communication campaign. We explain how to move from a single welcome template to a multi-workflow series where you welcome new contacts, promote and share your online course with them, track contact engagement, and plan a remarketing strategy. If you need help setting up individual workflows, head to the Help resources for specific instructions.
There are a few things you should remember if you decide to create a series:
- Make sure you’re not adding contacts to multiple workflows at once, because they can get too many, or duplicate, messages. Also, you should use the recommended delays to time your sendings.
- when creating new workflows, you can work with only one template at a time. Click Save and exit if you want to keep them as drafts until you’ve configured all the workflows in the series. Once you’ve finished, you can publish them from the Manage workflows page.
- Tags used here are just example tags. You should create your own tags that best suit your marketing strategy.
Working with one template
Let’s say you’d like to welcome new contacts to your mailing list and send them a follow-up message. To begin, head to the Marketing automation feature space, click Create workflow, and select Welcome new contacts. To complete setup for the elements used in the template:
1. In Subscribed via, select the list you want to welcome contacts to. Keep the subscription method set to Any to track all subscriptions to that list. Otherwise, select a specific subscription method.
2. In Send message actions, select the messages you want the new contacts to get–for example, a welcome message followed up with a message with a link to a survey that can tell you more about what kind of content they’d like to receive.
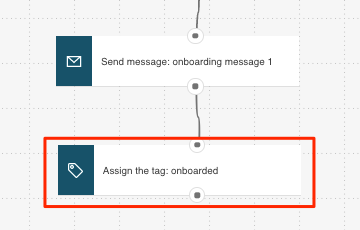
3. Optionally, in the Tag action, select the tag to assign to your contacts, for example, “onboarded”. Doing so will help you identify these contacts in the future. You can remove the Tag action if you’re not using tags. Click the trash icon that appears when you hover over the element to remove it.
Once you save and publish this template, new contacts will get your messages upon subscription. If you need step-by-step instructions for this template, please go to Welcome new contacts.
Linking two templates together
Here’s an example of how you can link two workflows together to start promoting your online courses to new contacts you’ve just welcomed to your list. For this, you’ll need Welcome new contacts and Course promotion.
To link these two templates together:
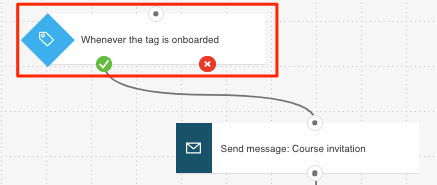
1. In the “If tag” condition triggering Course promotion, select the tag you used to setup the Tag action in Welcome new contacts. For example, as soon as the contacts are tagged as onboarded…
…they can have the course promotion workflow triggered for them.
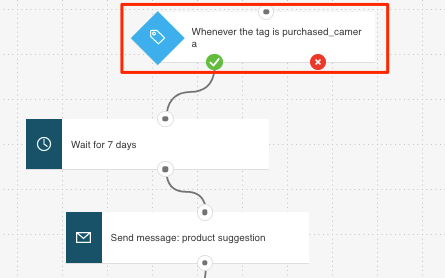
2. In the Wait action used in Course promotion, we recommend you keep the preset delay to give your contacts some time between messages (in general, timing messages increases message opens).
Finish up setting up Course promotion setup by selecting messages to send. Additionally, you can assign specific tags to your contacts based on whether they clicked to join or not. You can use these tags to plan the next step for your contacts, which would be delivering course content to them.
Once you save and publish these templates, new contacts will get your messages upon subscription. They’ll also be able to sign up for your online course. If you need step-by-step instructions for the templates suggested for this series, please go to Welcome new contacts and Course promotion.
Want more?
Here are other workflows you can use with Welcome new contacts:
Linking multiple templates together
You can link multiple workflows in a series, using tags applied at the end of one workflow to trigger another workflow. For example, you can link three or more templates to welcome new contacts, promote your courses, and deliver course content. For this you’ll need the following templates:
Here’s how you can set up this series:
1. In Welcome new contacts, apply tag “onboarded” in the final element.
2. In Course promotion, use “onboarded” for the condition triggering the workflow. Contacts who get this tag will start receiving course promotion materials.
3. In Course promotion, apply tag “interested_in_course” if they clicked to join the course.
4. In Basic email course, use the “interested_in_course” or the condition triggering the workflow. Contacts who get this tag will start receiving course materials.
5. In Basic email course, apply the tag “completed_course”. It will help you identify these contacts in the future.
Once you save and publish these templates, new contacts will get your messages upon subscription. They’ll also be able to sign up for your online course and automatically receive course content. If you need step-by-step instructions for the templates suggested for this series, please go to Welcome new contacts, Course promotion, and Basic email course.
Want more?
You can continue to use appropriate tags to link the remaining Online courses templates: Advanced online course and Post-course retargeting.
Additionally, if you use the tag applied to contacts in Welcome new contacts at the beginning of Basic scoring plan, you can set up basic scoring plan to track engagement. A workflow built using this template will continually add or remove points depending on whether your contacts click or don’t click the links in the messages you send to them in this series. This way you not only send your contacts targeted messages but also can use the score they get to either reward them for their loyalty or delete them from the account.
Trigger two different templates with one template
You can use one template to trigger two different workflows that will target specific groups of customers. In this case, the first workflow is used to segment your customers based on their interests and the two workflows it triggers to follow up with them by delivering appropriate content.
For example, you’d like to find out what products your contacts may want to buy or what content they are interested in. Then, you plan to launch an upselling campaign for a specific group of contacts who reacted positively to your offer and start a retargeting campaign for those who aren’t interested in any of the content you’ve presented so far. So, you’ll need the following templates:
Here’s how to link the templates together:
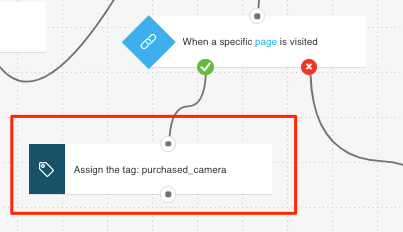
1. In Converting contacts to customers, select the tags that would indicate customer interest based on the kind of page they visited and select a tag for customers who are not interested at all.
2. In the “If tag” condition triggering Upselling, select the same tag you used to setup the Tag action linked to the “if yes” (green) connector of one of the URL visited conditions. (There are three URL visited conditions in Converting contacts to customers, so you can create three separate Upselling workflows.) For example, as soon as contacts are tagged as “purchased_camera” in Converting contacts to customers…
…they can be sent recommendations that feature other products that go with that purchase.
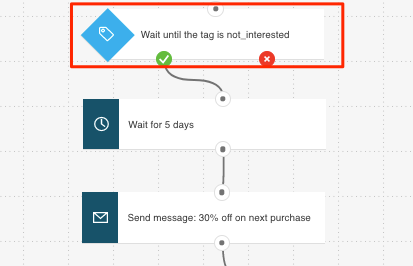
3. In the “If tag” condition triggering Customer retargeting, select the tag you used to setup the Tag action linked to the “if no” (red) connector of the final Visited URL condition. For example, when contacts are tagged as “not_interested” in Converting contacts to customers…
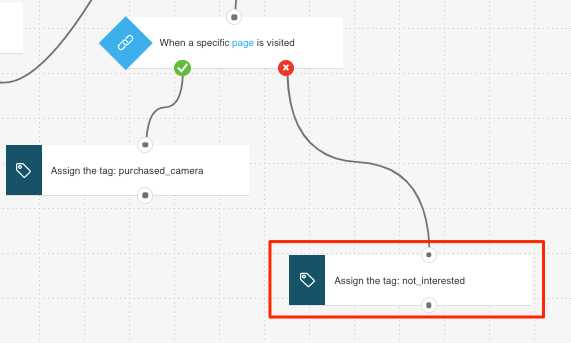
…they can be sent other content that might encourage them to check out your products via Customer retargeting.
If you need step-by-step instructions for the templates suggested for this series, please go to Converting contacts to customers, Upselling, and Customer retargeting.
Want more?
You can trigger Win back to target those contacts who showed no interest in content presented to them in Customer retargeting.


