How to use the Prompt for push permission action (web channel)?
The Prompt for push permission action is a new element available in GetResponse automation workflows. It triggers a custom browser prompt asking site visitors to opt in to receive web push notifications. This allows you to grow your push notification audience by requesting permission directly within an automation scenario.
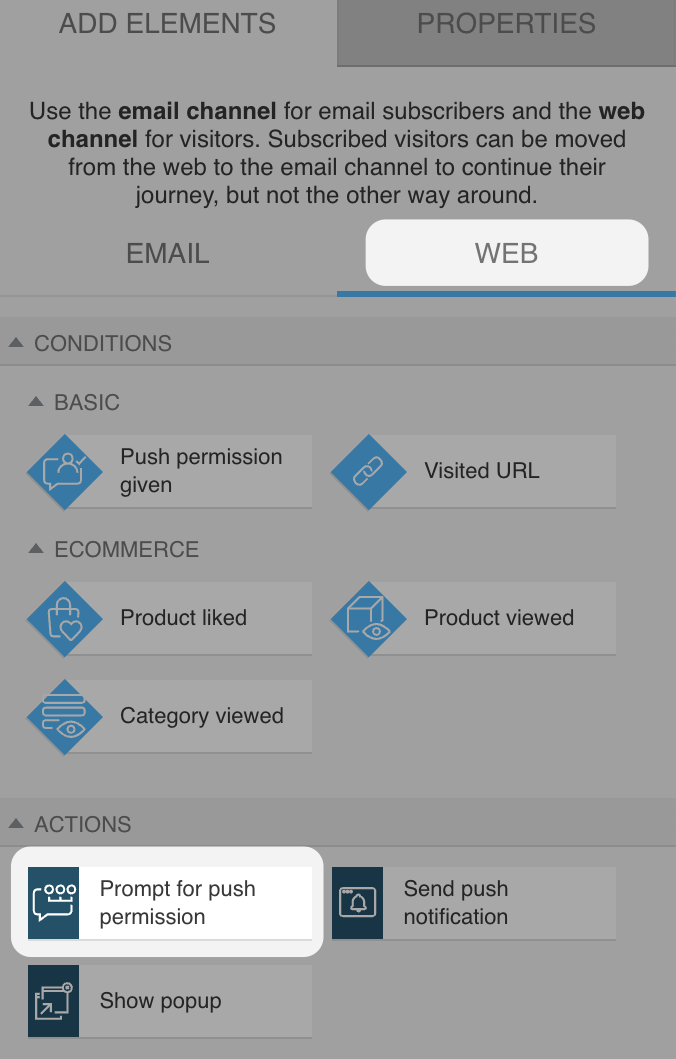
Automation now has two channels: Email and Web. The Email channel is used to reach your email subscribers, while the Web channel allows you to engage both email subscribers and non-subscribed website visitors. Subscribed users can move from the Web to the Email channel to continue their journey, but not the other way around.
This article covers an element from the Web channel. If you’re looking for the equivalent in the Email channel, click here.
The Prompt for push permission block has two exits: true (green) and false (red), and the exit a person takes when going through the flow depends on the consent given:
- A website visitor who has already given consent on the selected website for the prompt configured in the “Prompt for push notification” element will follow the green path;
- A website visitor who has already given consent on the selected website, but for a different prompt than the one configured in the element, will follow the red path;
- A website visitor who has not given consent will be shown a request for permission. A visitor who rejected the native request will follow the red path.
What is new
The Prompt for push permission action is used to request consent to send push notifications. It can be shown to both email subscribers and non-subscribed visitors, as long as you have a tracking cookie on your site.
In contrast, the Send push notification action in the Email channel sends an actual message only to users who already subscribed to web push notifications and, at the same time, are your email subscribers.
You can use Prompt for push permission to build your audience, and Send push notification to engage them after they’ve subscribed.
Configuration
- Drag Prompt for push permission element from the Actions section in WEB channel in the automation workflow editor.
- From the dropdown menu, select the site for which push notification prompts have been defined in your GetResponse account.
- Select the prompt you want to show.
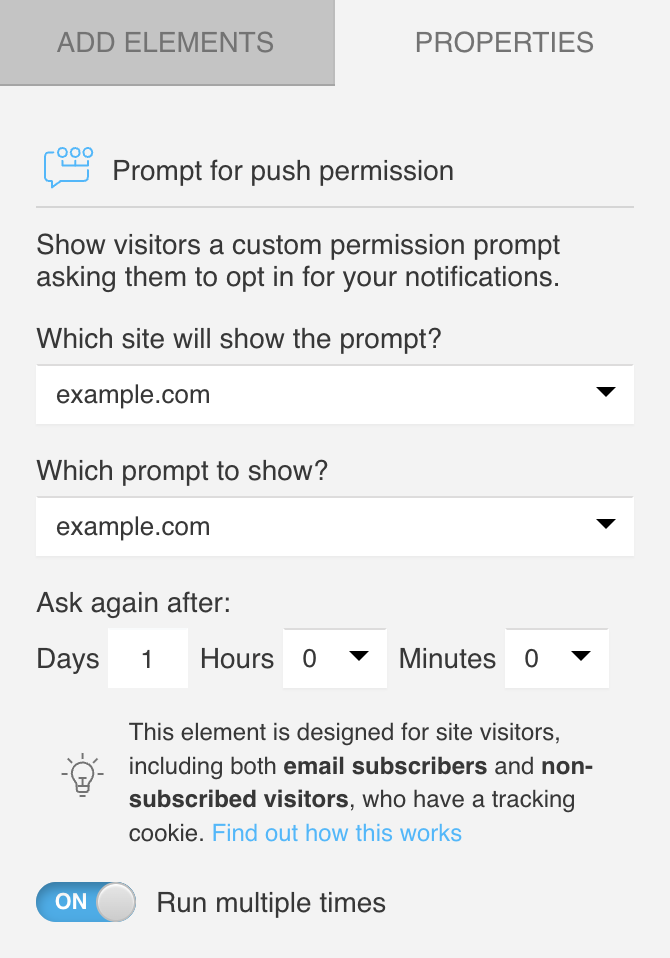
- Set a retry delay – choose after how many days, hours, or minutes the prompt should reappear if the user previously rejected the custom prompt. Note: if the user did not engage with the prompt at all, the custom prompt will be displayed again during their next visit.
- You can also enable Run multiple times for this action, so it will work every time the defined criteria are met.
Use cases
You can use the Prompt for push notification action to:
- Grow your push audience by automatically prompting new visitors to subscribe to web push notifications.
- Re-engage returning visitors who didn’t subscribe the first time by showing the prompt again after a set delay.
- Convert visitors into engaged contacts
- Complement email flow by offering an additional communication channel.
- Trigger prompts during key user behavior to catch visitors when interest is high.


