How to link push notifications with a GetResponse website or landing page?
You can easily create a Push notification for a website or landing page created in GetResponse. The following article describes the first steps of that process – adding your website or landing page to push notification menu.
Before you begin, you need a GetResponse website or a landing page created and published. It also helps to have it opened in edit mode in another browser’s tab.
Site information
The first step is Site information, where you provide basic information about your website or landing page. To do that:
- Go to Tools > Push notifications.
- Click Add site (if your site is already listed there, you can access these options by hovering the action button beside it and clicking Edit).
- Provide a name for your site (up to 150 characters).
- Provide your website/landing page URL.
- (Optional) Click Upload an image if you want to add an icon. That would be a default image displayed in all your notifications and custom prompts. It can be your logo or a brand icon.
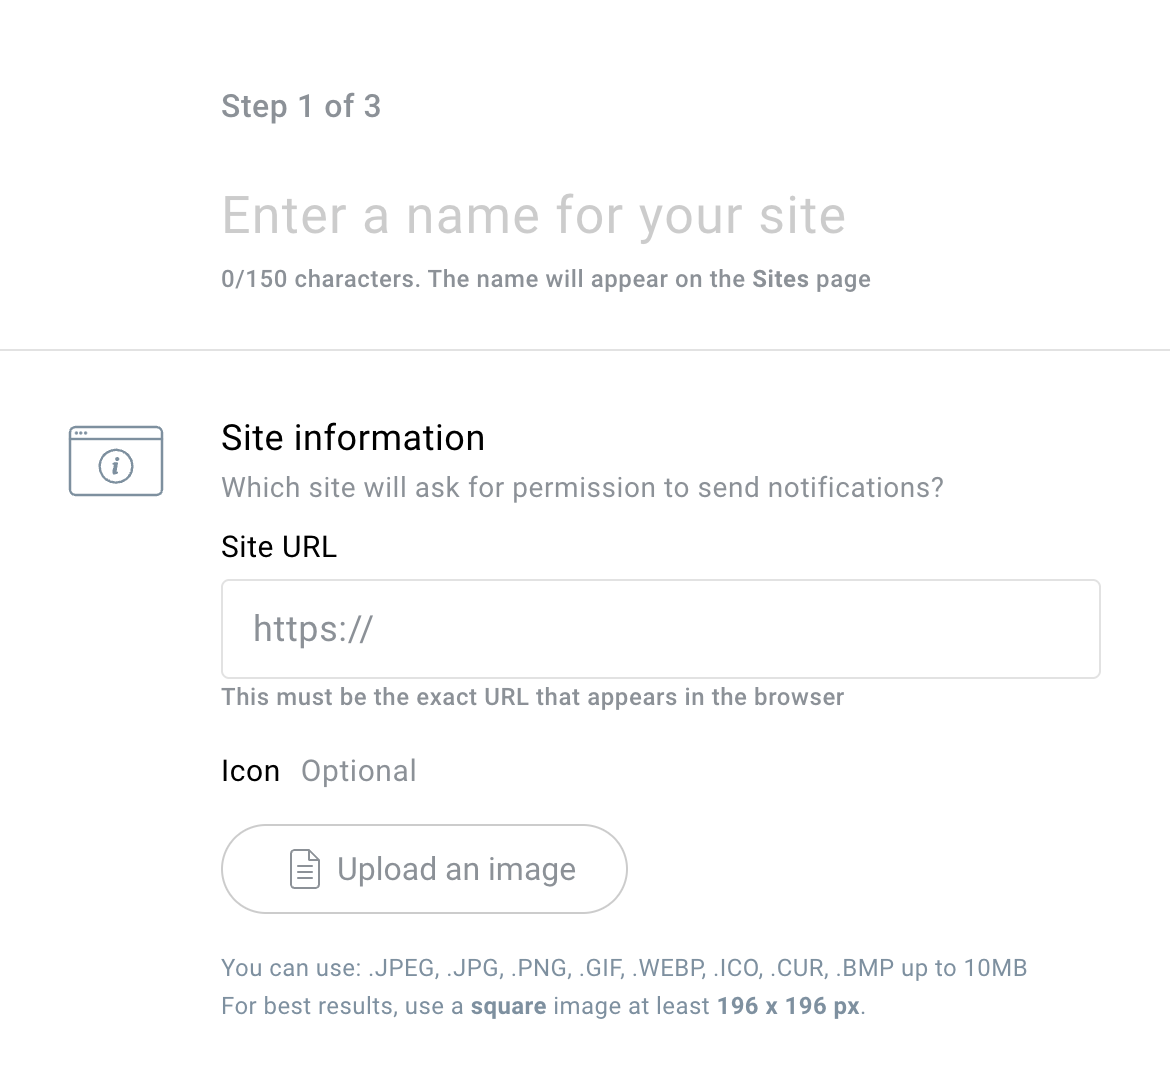
- Click Next.
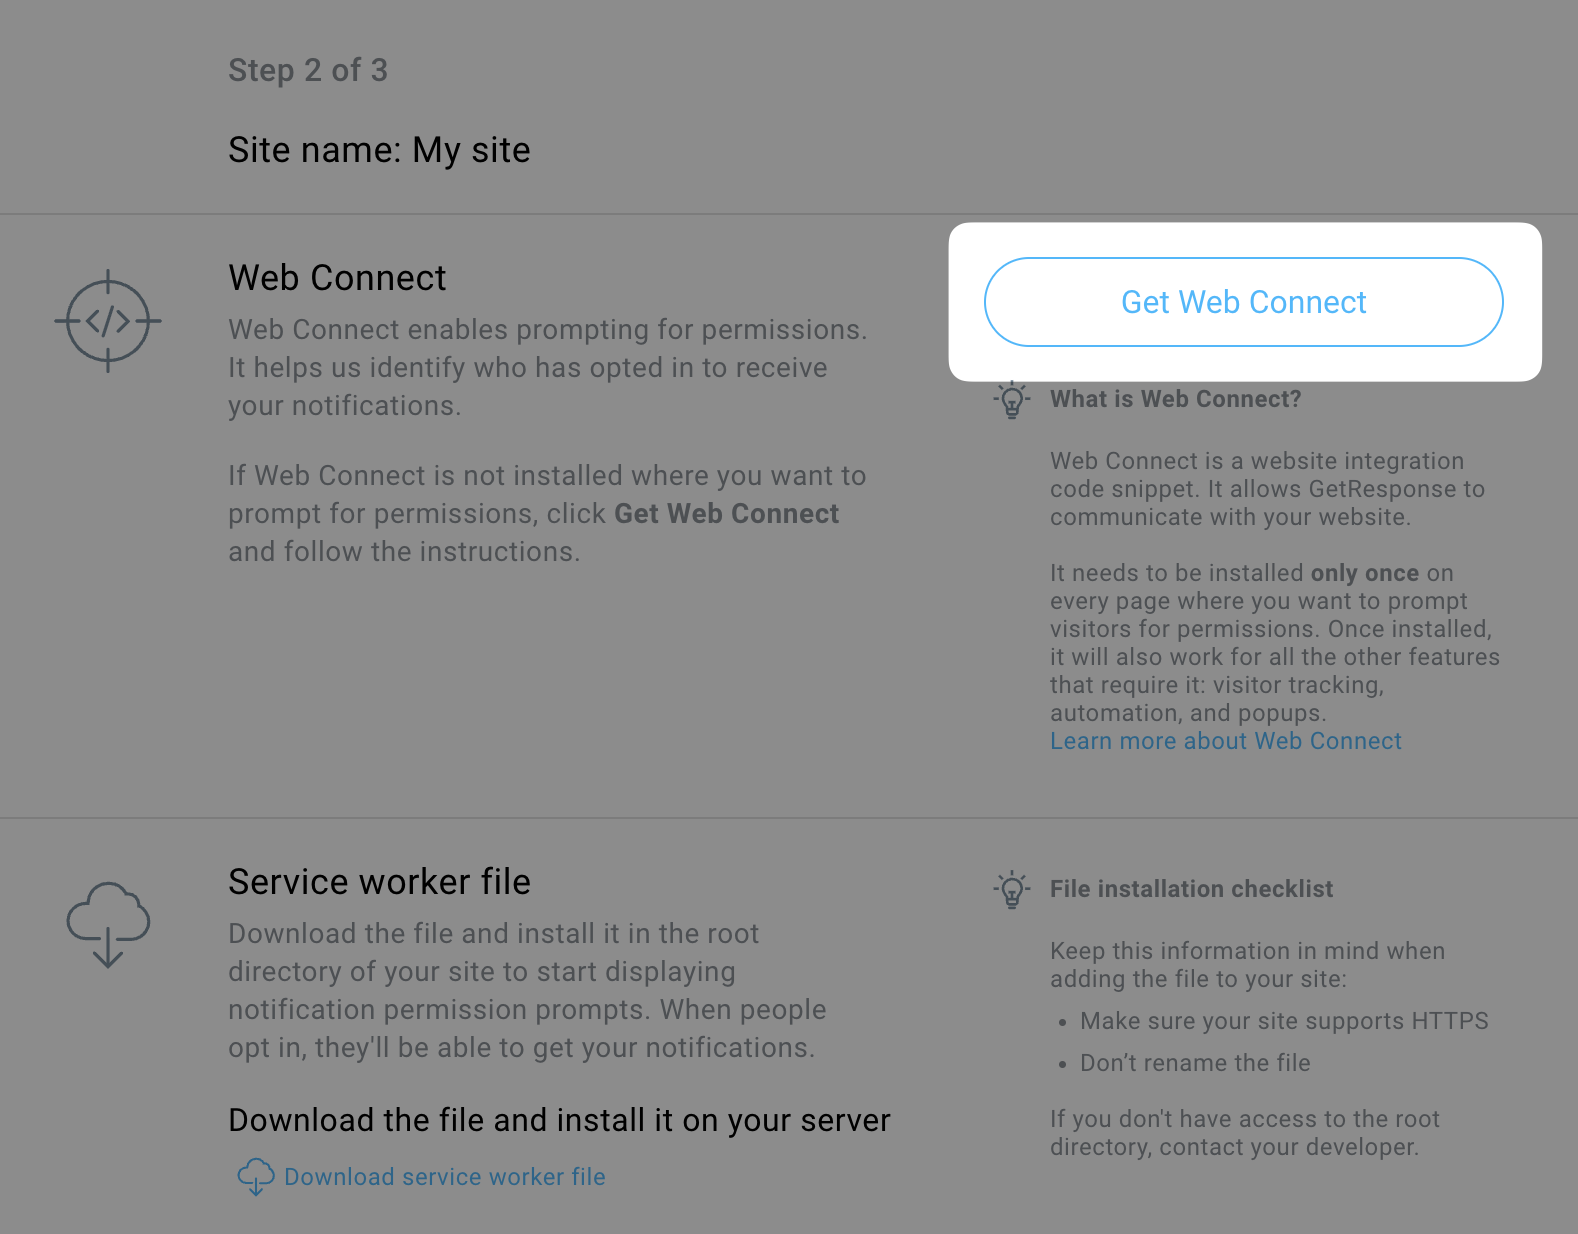
Installation codes
In the second step you get Installation codes for your website or landing page.
- Go to Push notifications > action button beside your site > Get code and service worker (you will be automatically redirected there if you’re doing this for the first time).
- Click Get Web Connect.
- Click Copy to clipboard under the snippet code.
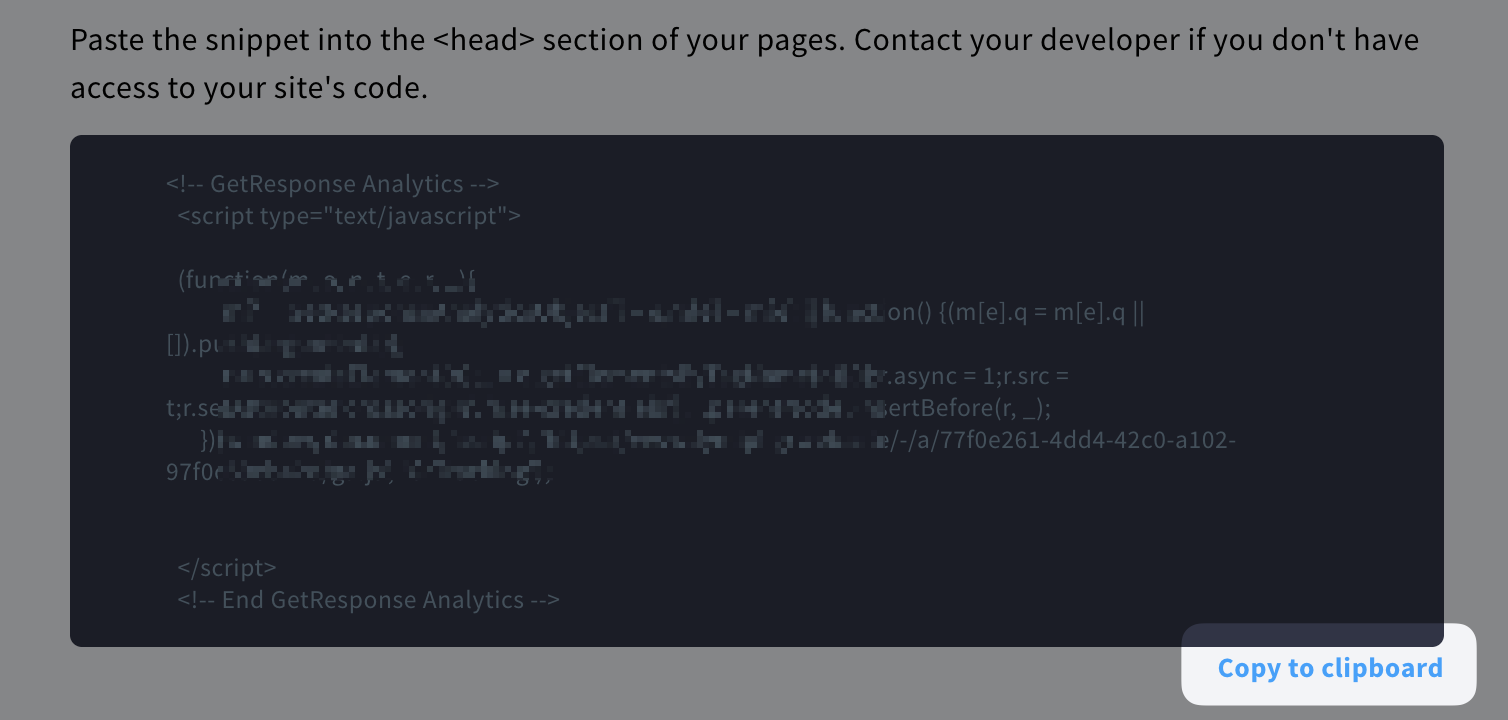
- Open your website or landing page in edit mode in a new tab and then:
- Go to Tools > Website builder or Tools > Landing pages.
- Hover over the action button beside your page and click Edit (for website) or Edit design (for landing page).
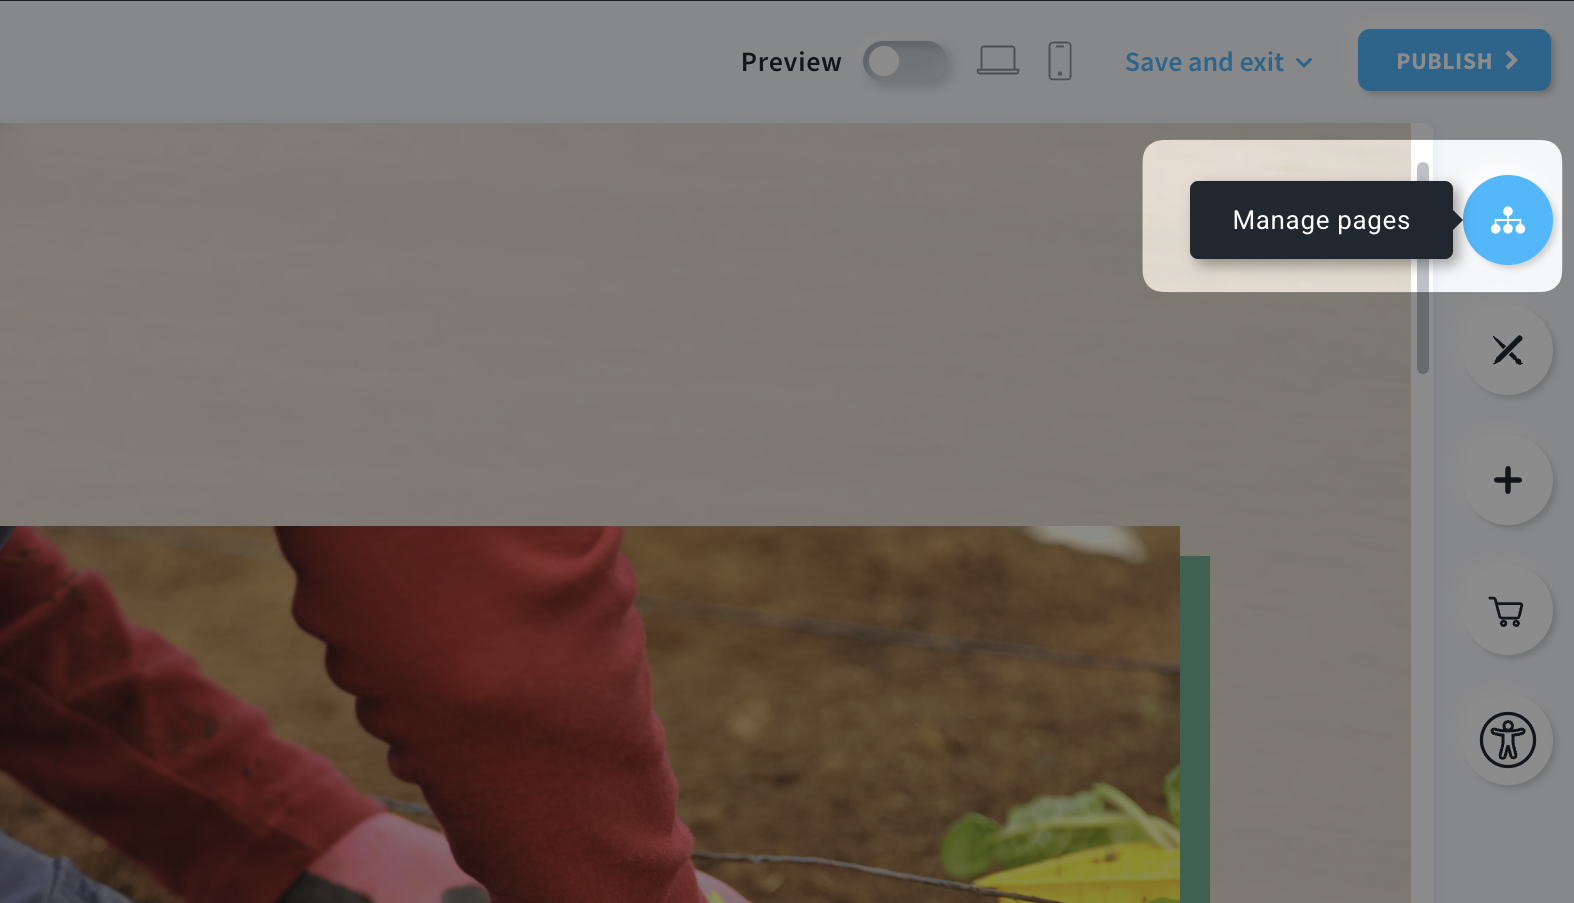
- Click Manage pages.
- Hover over the action button beside Homepage (in website editor) or Home (in landing pages) and click Settings.
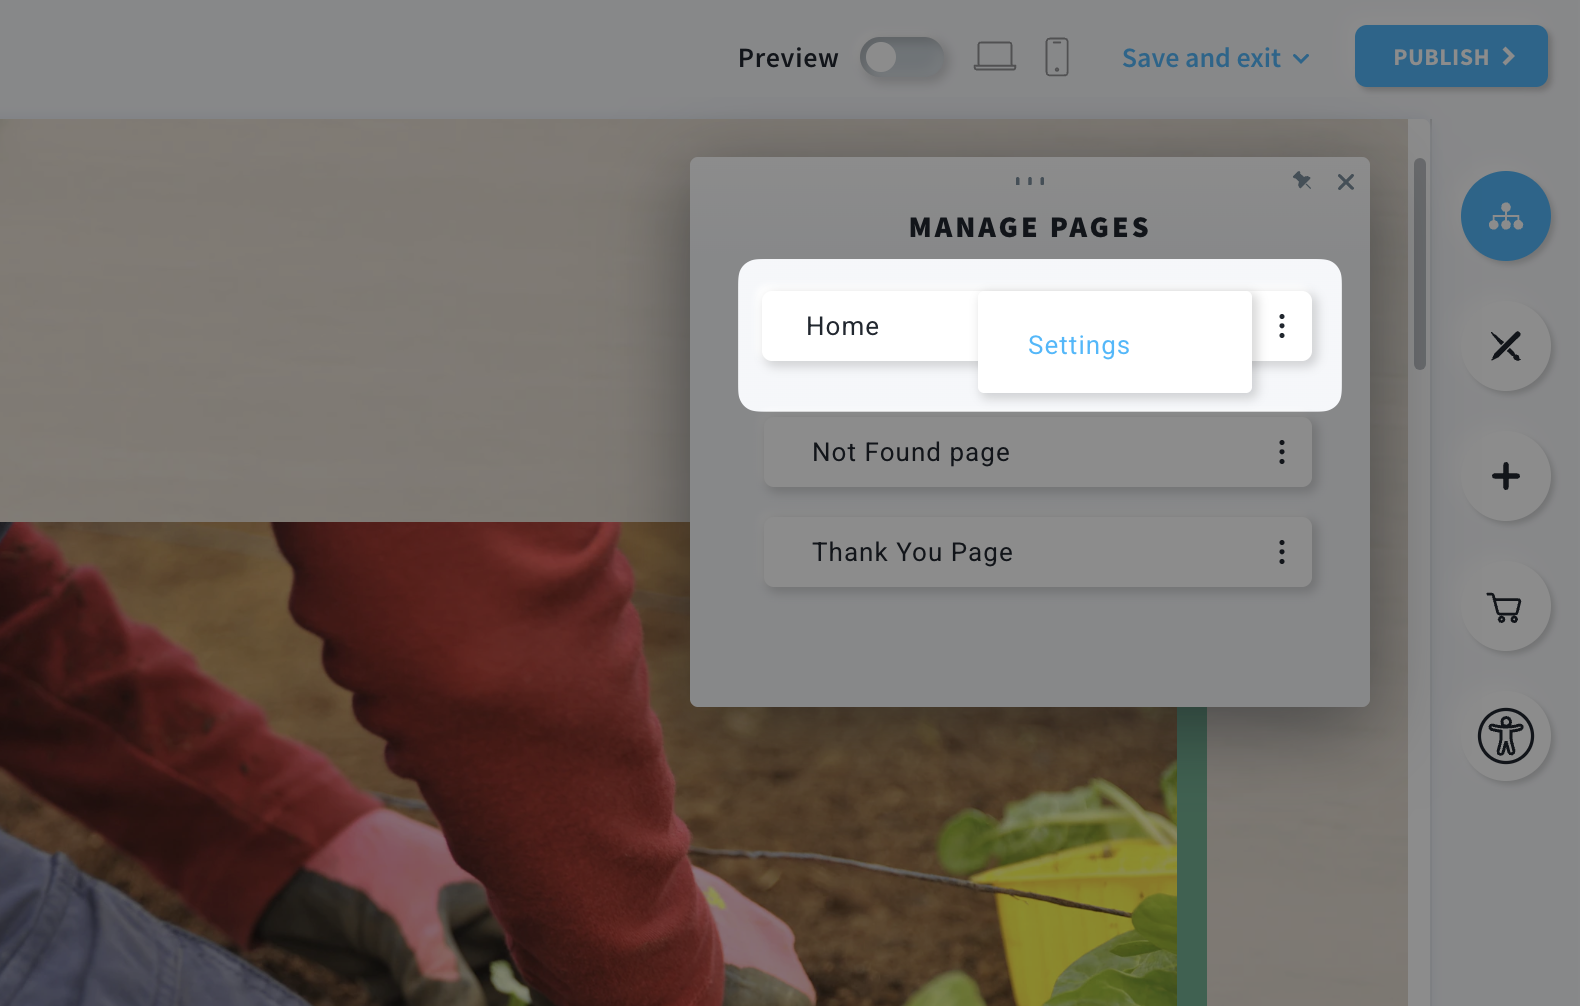
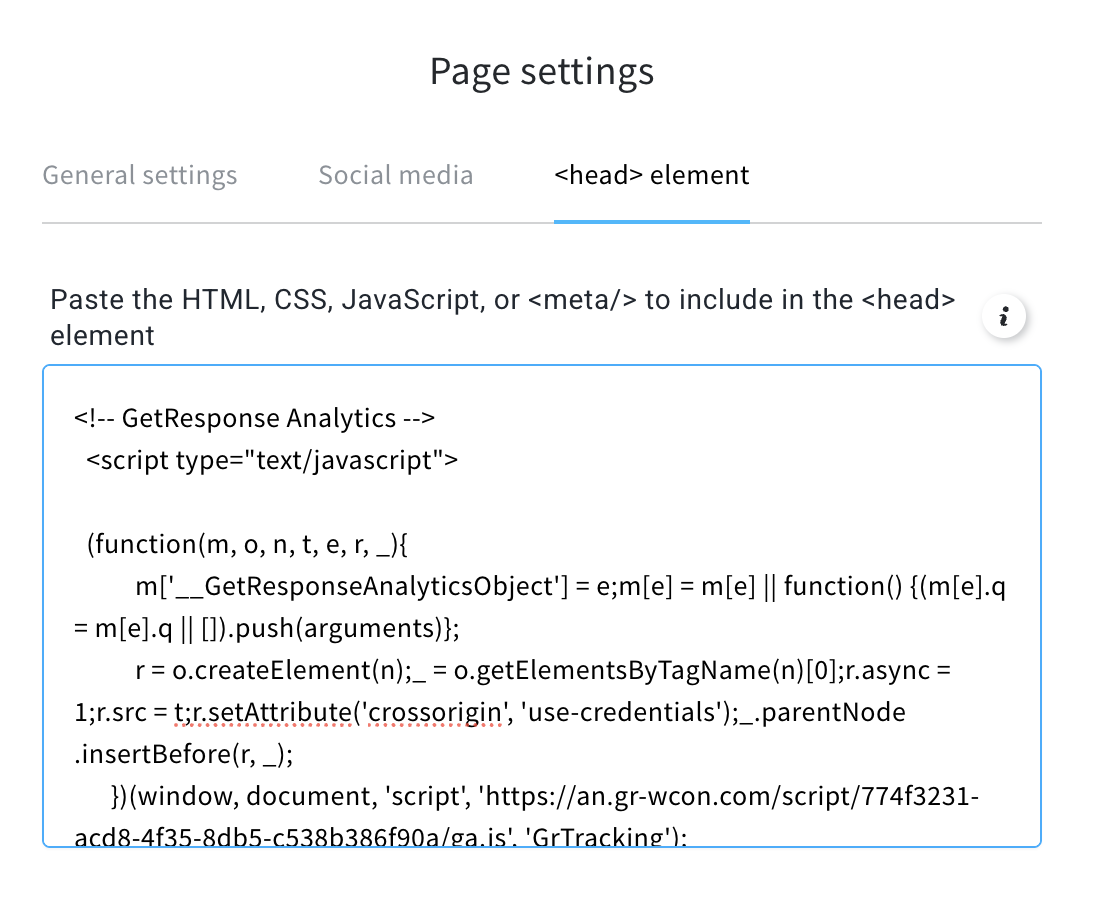
- Open <head> element tab.
- Paste the Web Connect code and close the Page settings window.
- Hover over Save and exit and click Save or Save and exit.
- Go back to your tab with Web Connect and click Back to return to Installation codes (Push) screen.

You can also get back there by going to Tools > Push notifications > action button beside your notification > Get code and service worker. - There is no need to Download service worker file for a website or landing page created in GetResponse, skip this part.
- Click Next to proceed to the next step.
Opt-in method
The third step is where you decide about Opt-in method and, optionally, create the branded prompt that shows before the native browser prompt. As the final step is the same also for sites not created in GetResponse, we described it in the following article.


