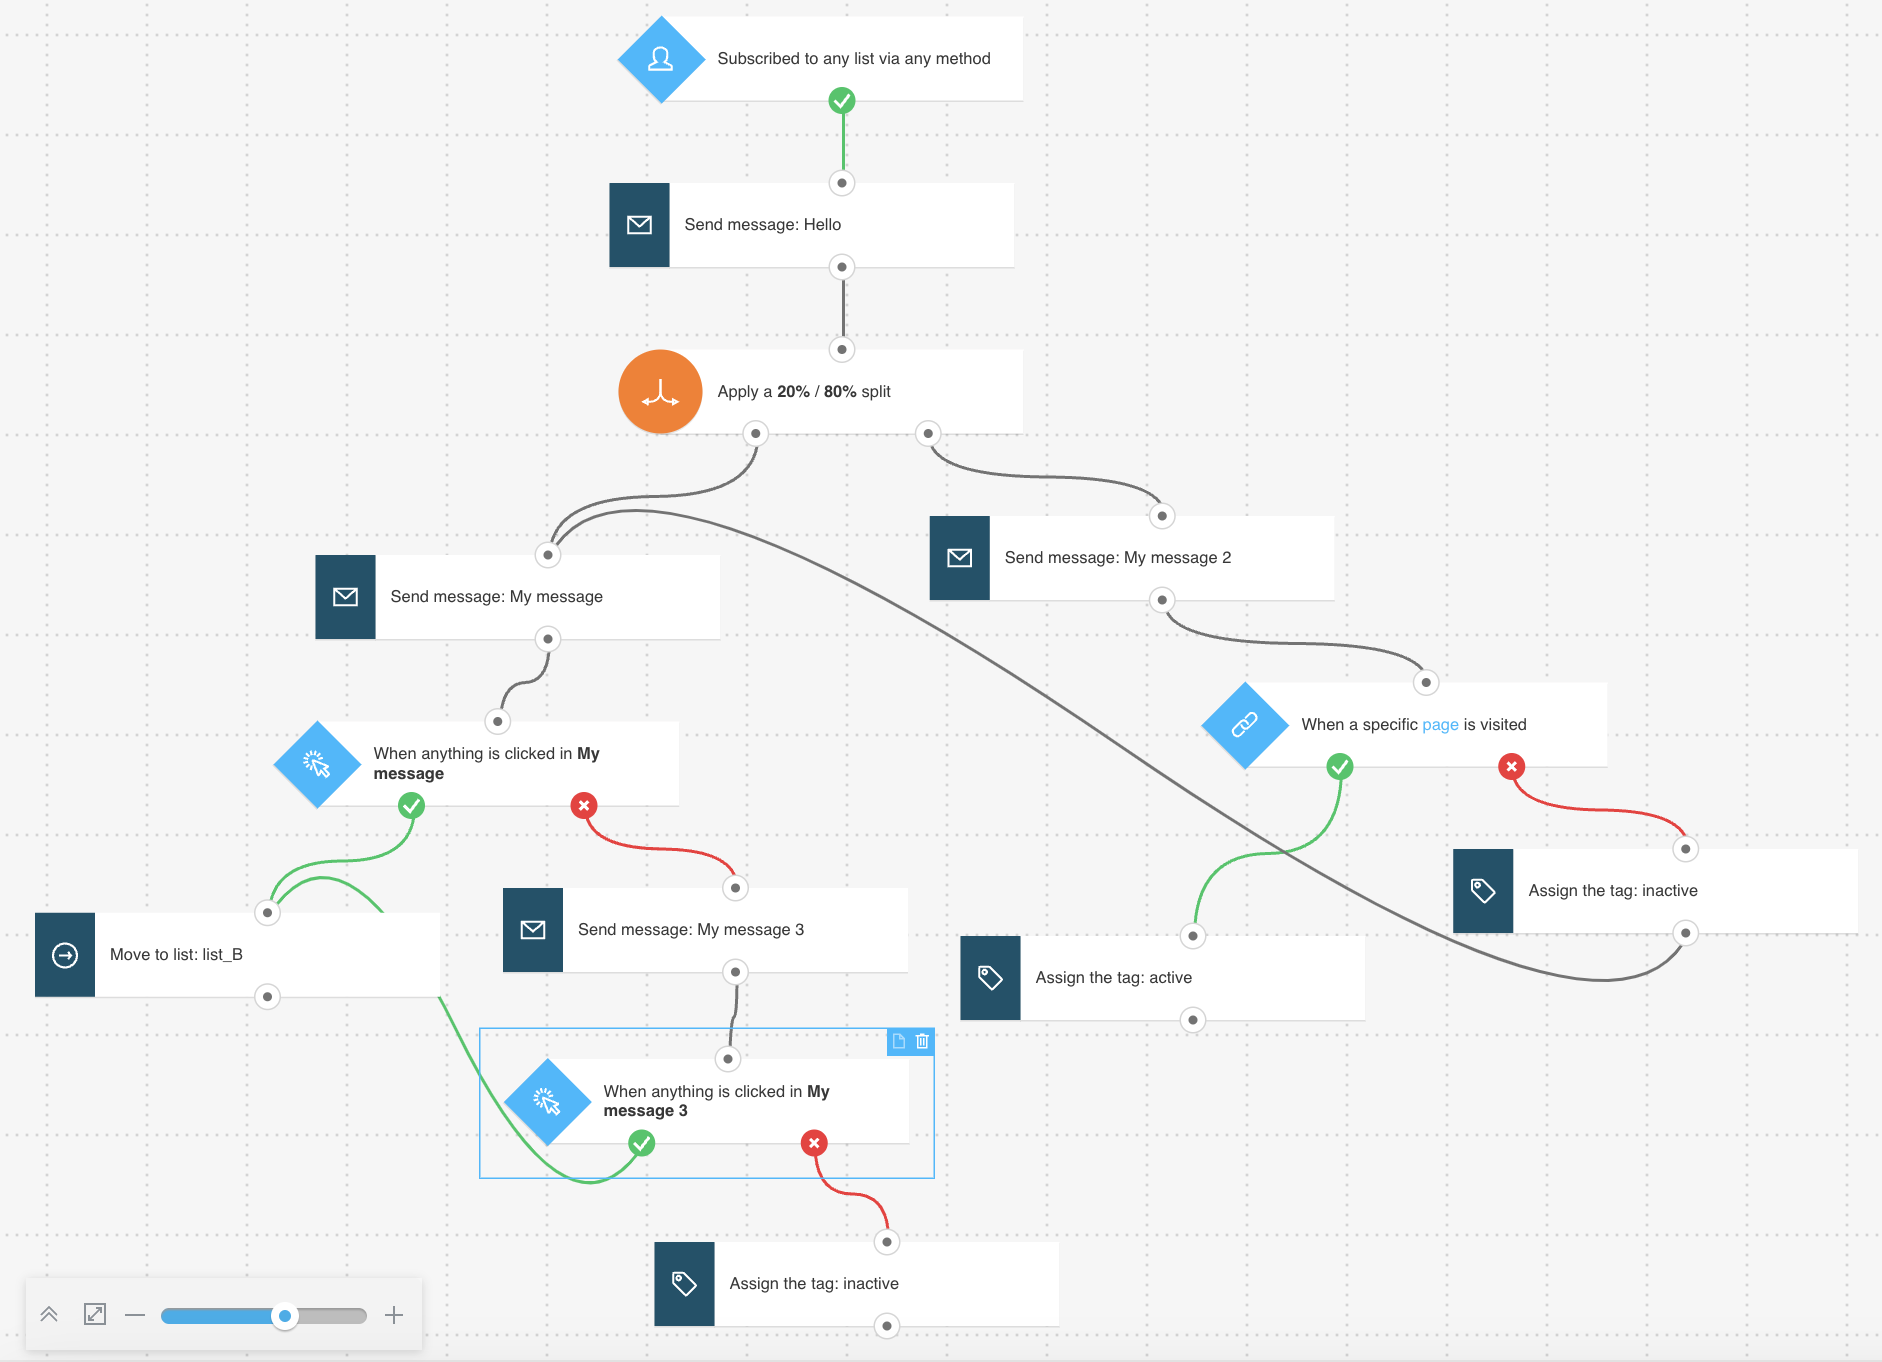
Advanced contact split
You can split the contacts in your workflow into two groups depending on the percentage of new contacts or customers set up in the properties of the element. This template is useful when you want to test a new sales or marketing strategy.
Template overview
Category: Welcome
Elements in template: 13
Minimum number of elements to configure: 10
Here’s what you’ll need to configure the elements and publish the template as a workflow:
- 4 automation messages or messages that can be converted to automation messages.
- Tags (optional). You can create tags as you’re building the workflow but it’s best to have a basic tagging plan. Tags will let you distinguish between contacts interested and not interested in your offer.
- WebConnect code snippet on the URL you want to track.
Configuring the template
If an element is greyed out, it means that you need to set its properties. Clicking an element opens its Properties.
- The Subscribed via condition is preset to any list and any method. Optionally, you can modify the settings to better suit your needs. Under the Properties tab for the element, use the drop-downs to narrow it down by list and method.
- For each of the Send message actions, use the drop-downs to select the message you want to use, e.g. a welcome message draft and three different follow-up messages with additional information about your offer.
- For each of the Link clicked element, choose Automation type of message and the link that you want to track. You can also track all links. You can only track automation messages used in this workflow. Note: Leave the time settings set to Never. This will ensure continuous adding of new leads and will even work for messages sent before you publish the workflow.
- For the Splitter element, set up the percentages on how you want to split your contacts (e.g. 50%/50%, 80%/20%).
- In the visited URL condition, enter the page URL you want to track. A more detailed instruction on how to configure this element can be found here.
- For the Move to list action, choose a destination list. If you have autoresponders linked with the chosen list, you can decide if you want to add the moved contacts to the cycle or not.
- For the Tag action connected to the “if yes” (green) connector, select the tag that will be assigned to your contacts based on the visited URL.
- For the Tag action linked to the “if no” (red) connector, select a tag (or two different tags) that will be assigned to those who never clicked on any link.
- Click Publish when you’re done setting up the template or Save and exit if you want to finish editing the template later (it will appear as a draft on the Manage workflows page).
Related workflows
Related articles
What are the Welcome templates used for?
How does the Splitter filter work?
How does the Link clicked condition work?
How to set properties for the URL visited condition?
How to use the Tag action in a workflow?
Can I move my contacts from one list to another as a result of a marketing automation workflow?


