What is a reconfirmation campaign?
Prior to sending a reconfirmation campaign, we recommend you consult if it is needed with our Compliance Team. They can be reached via email, at:
gr-compliance@cs.getresponse.com.
A reconfirmation campaign is the best way to proceed if you feel that your list is going stale. It will help you find out which of your contacts still want to get messages from you, and which of them are non-engaged. Non-engaged contacts are likely to bounce, issue spam complaints or unsubscribe, which will bring down your account statistics.
To run a reconfirmation campaign, you’ll need:
- a Newsletter message
- a website you can use as a thank-you page.
What should I put in a reconfirmation message?
Your reconfirmation message should contain two buttons: one for the contacts who wish to unsubscribe, and one for those who wish to stay on your list. This way you’ll be able to fully customize the reconfirmation message, making it distinct from an automated double opt-in message. This should result in lower complaint rates and higher engagement.
A button for those who want to unsubscribe
In the new newsletter editor:
- Add a button to the message from the Basic blocks taskbar.
- Click the button to open the settings window on the right.
- Select Dynamic content as the link type.
- Select Unsubscribe from the drop-down list in the field below.
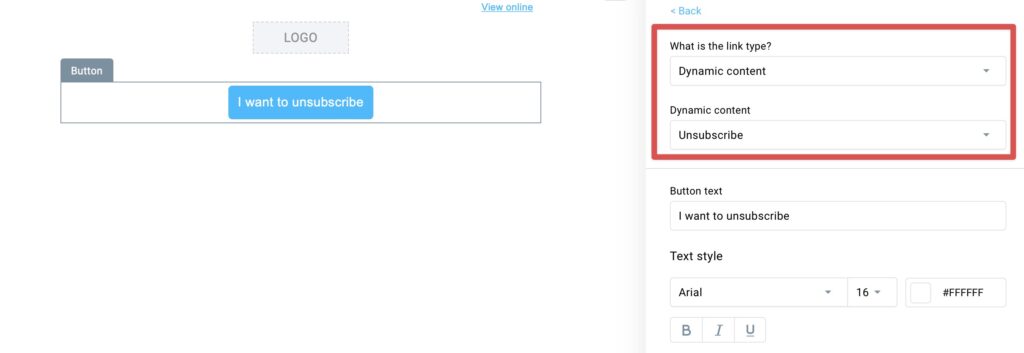
- Edit the button style to match your needs.
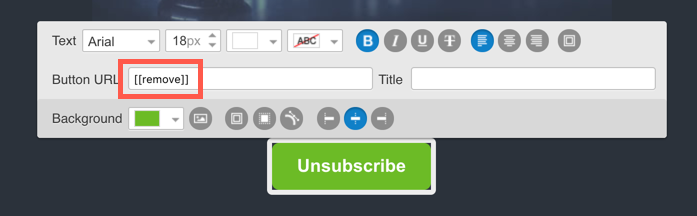
In the older version of the newsletter editor
- Add a button to the message from the Basic blocks taskbar.
- Double-click it.
- In the URL field, use the merge word [[remove]].
A button for those that want to reconfirm the subscription and remain on your mailing list
In the new newsletter editor:
- Add a button to the message from the Basic blocks taskbar.
- Click the button to open the settings window on the right.
- Select the type of link from the drop-down menu. You can select from:
- Web address – for this option paste the URL of the thank-you page you want to use,
- Landing page – for this option select the landing page you want to use from the drop-down list.
- Edit the button style to match your needs.
In the older version of the newsletter editor
- Add a button to the message from the Basic blocks taskbar.
- Double-click it.
- In the URL field, add a link to a page thanking your contacts for staying on your list. For this, you need to use either:
- your own custom thank-you page,
- or a GetResponse landing page. GetResponse offers thank-you page templates that you can use for this process. Learn how to create a landing page in GetResponse.
Make it clear to your subscribers that they should click the reconfirm button only if they want to stay on your mailing list and continue receiving messages.
How can I find the contacts who clicked the buttons?
This can be done with our Advanced search feature. Go to Contacts >> Search, click Advanced search and add your search conditions. In this case, you need the link clicked condition, so you can choose the specific link leading to your thank-you page. The contacts that show up in the search are the ones who clicked your reconfirmation link, and who can stay in your list. Learn more about how to filter contacts using advanced search.
It’s a good idea to then move this group of contacts into a brand new list (called “Reconfirmed contacts,” with a date, for example). This way it’ll be easier for you to distinguish between those who clicked and those who didn’t.
Then, you can go ahead and delete all the other contacts who didn’t show up in the search (those who click the unsubscribe link are removed automatically).
In order to make sure everyone got their chance to react to the mailing, you may want to wait for a week or so before you complete the campaign.


