What are suppression lists and when to use them?
A suppression list lets you exclude certain email addresses or domains from receiving your campaigns – even if they are still part of your main email list. You can use them to preserve your sender reputation, honor opt-outs promptly and avoid sending to invalid or risky email addresses.
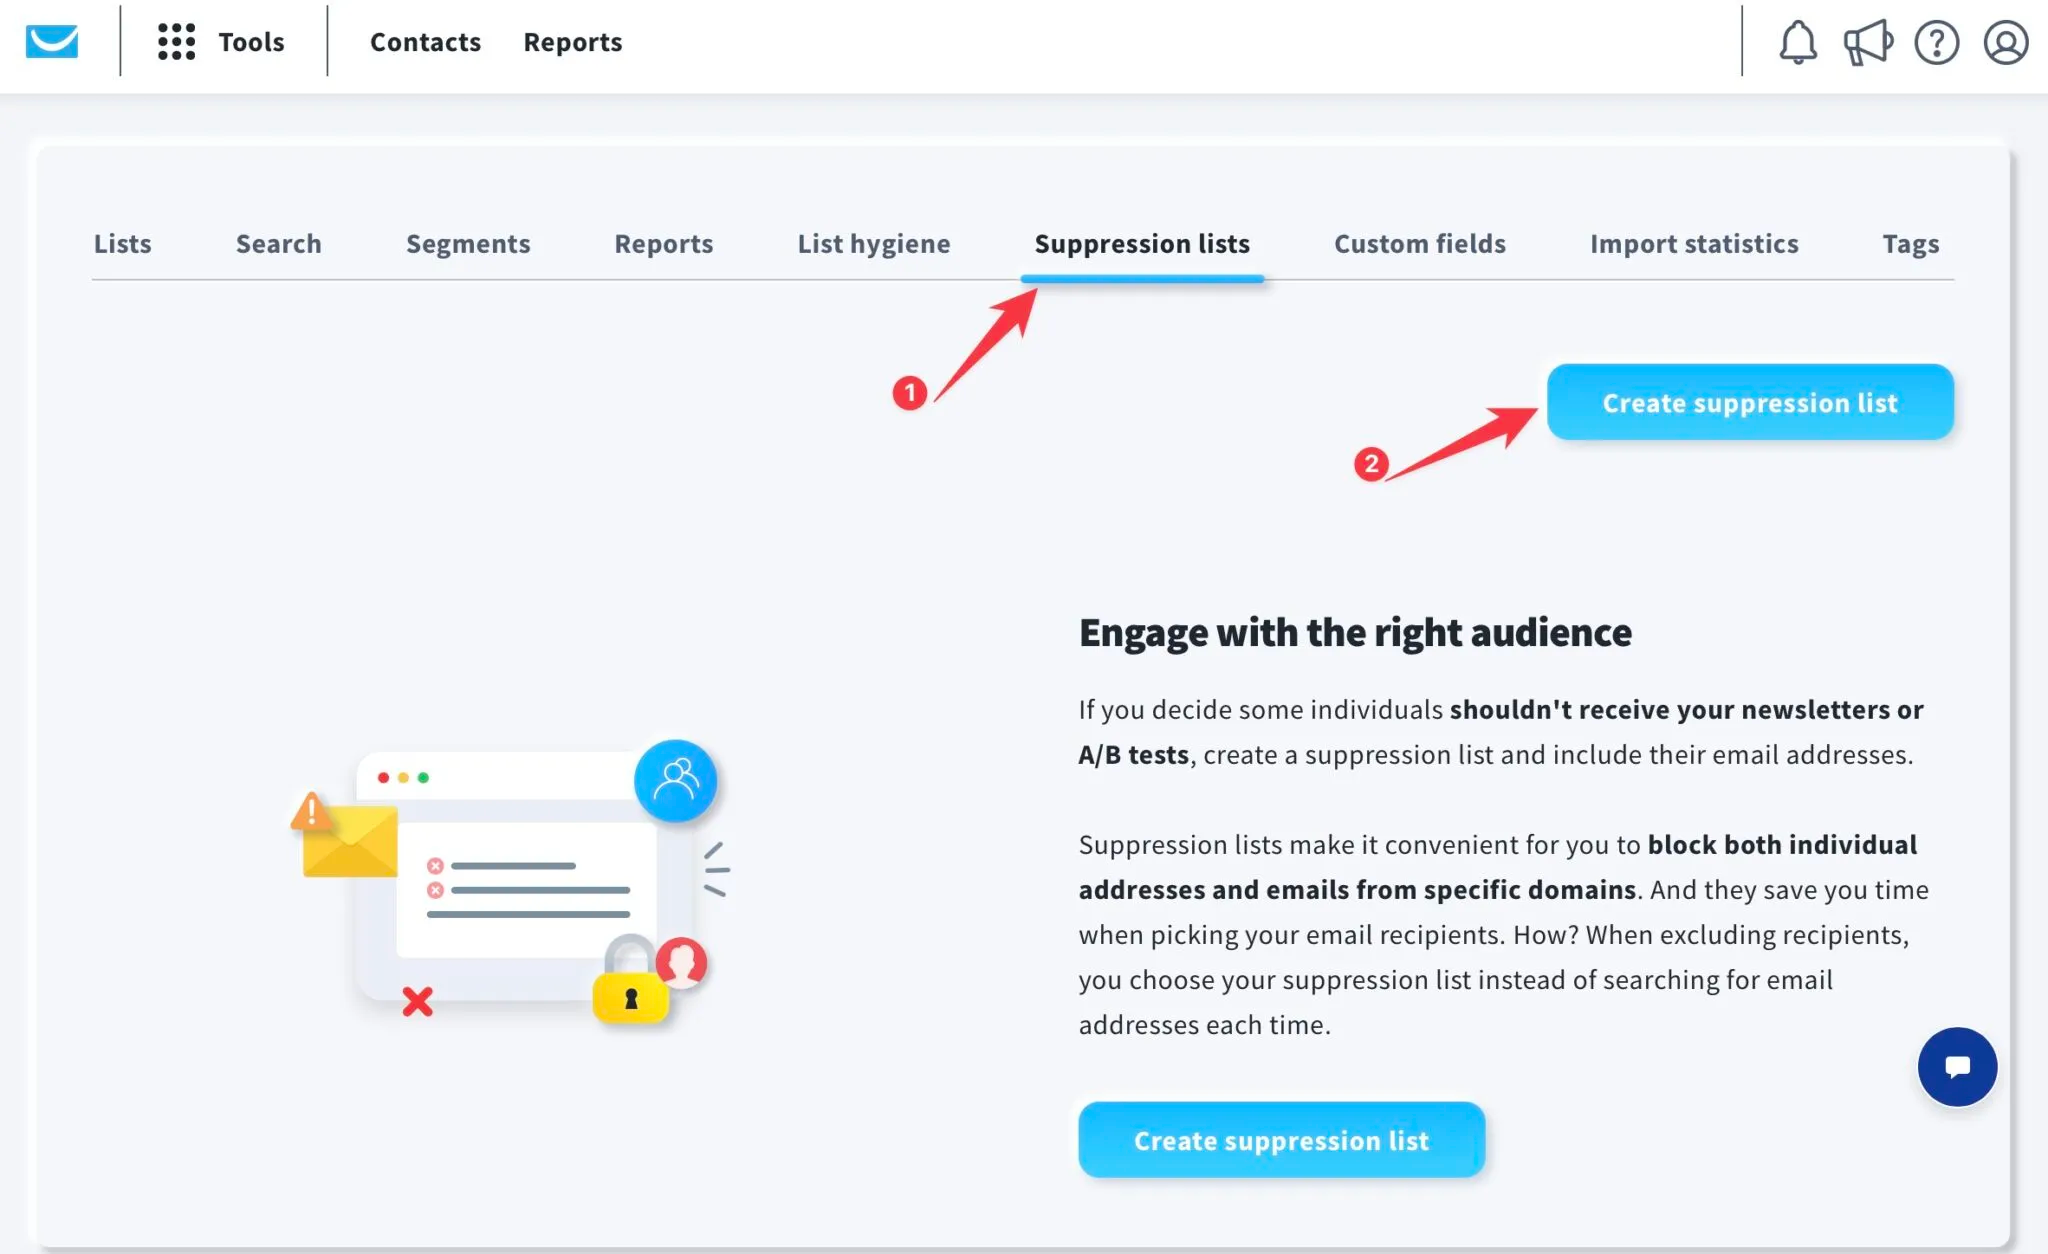
Suppression lists are a convenient way to make sure that you don’t send updates on products or services to recipients who have opted out from receiving them. Simply go to Contacts > Suppression lists and click the Create the suppression list button to set it up. Then, select it when you choose newsletter recipients in the newsletter creator.
Suppression rules can be used to exclude emails or domains. You can use the following rules:
- name@example.com – use a full email address to exclude a particular recipient.
- @example.com – use the domain name part to exclude all email addresses at that domain.
- name@ – use the local part (username – the part that comes before the domain name) to exclude such email addresses at all domains.
- #example – use # followed by ISP name to block it.
- e24xa340a8mpl68ed3d28063f17d2e27a– you can also use MD5 hashed email addresses.
You can apply a suppression list during the recipients selection step of your newsletter setup. Click here for instructions on how to exclude contacts from receiving your newsletter.
Creating a suppression list
- Go to Contacts > Suppression lists.
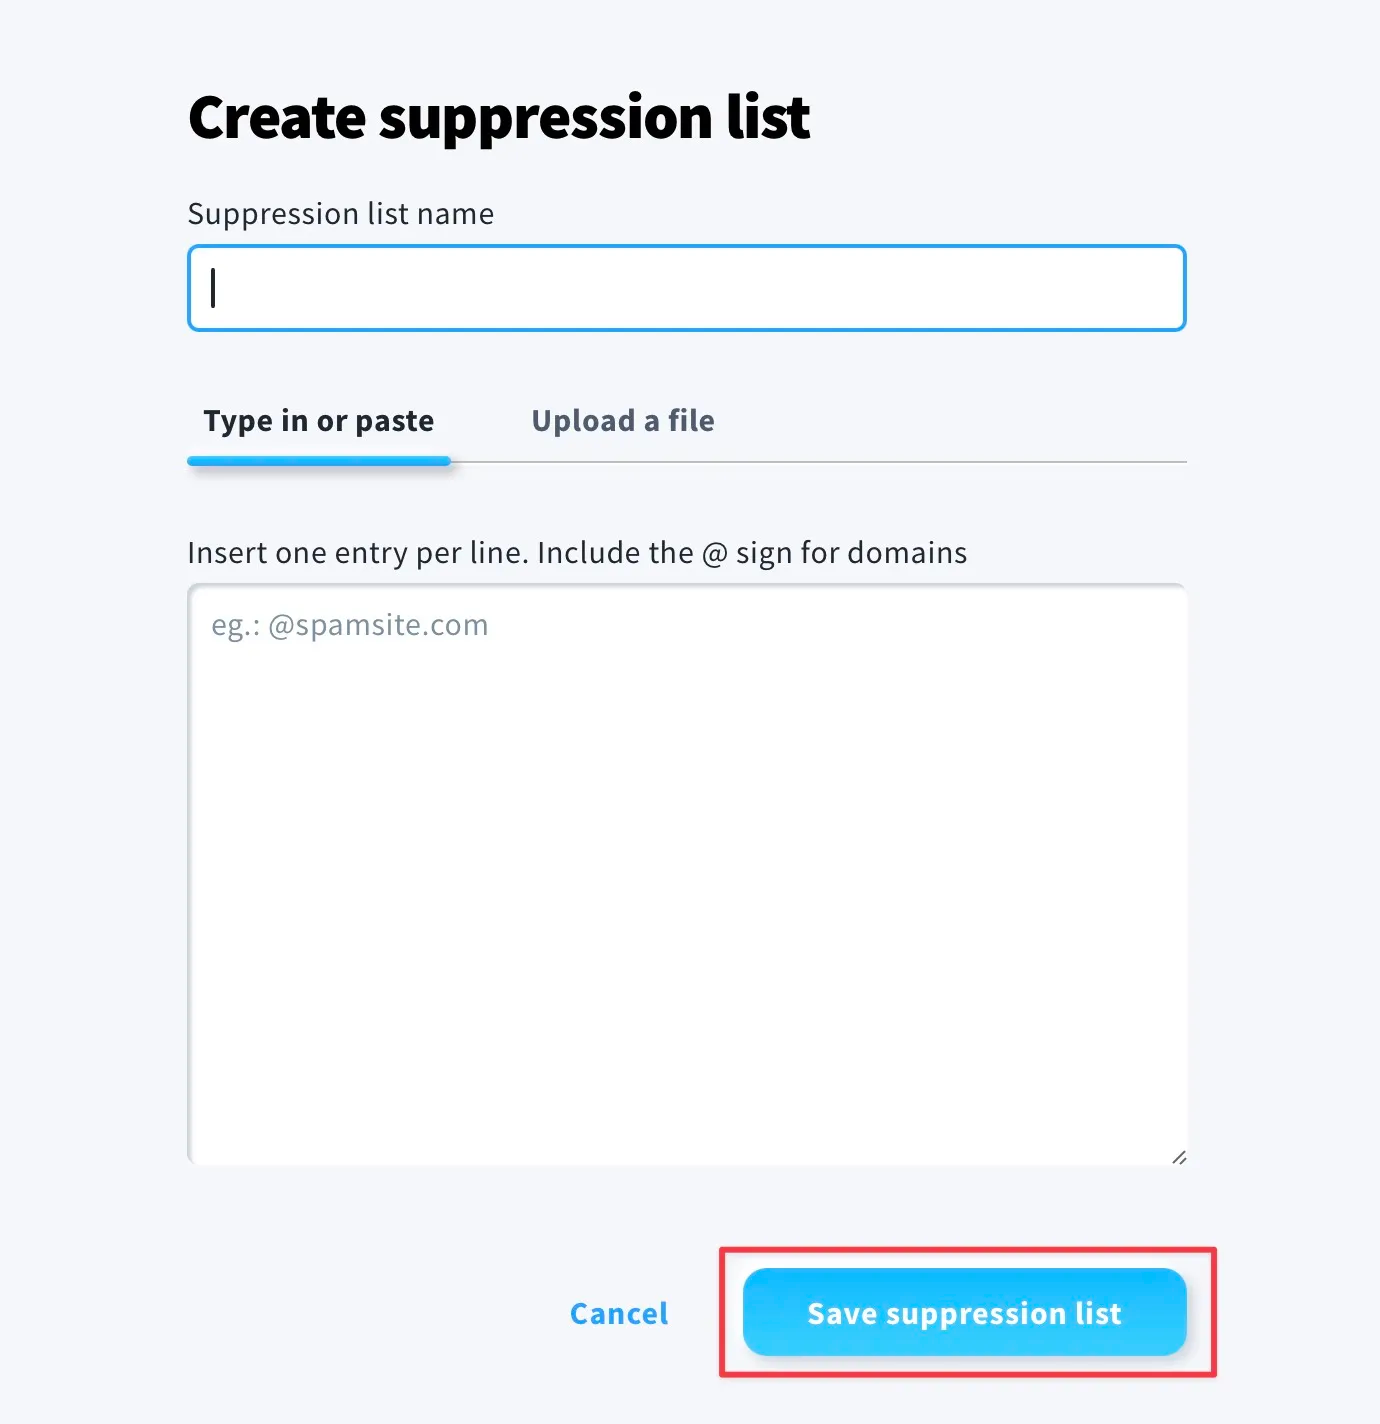
- Click on the Create suppression list button.
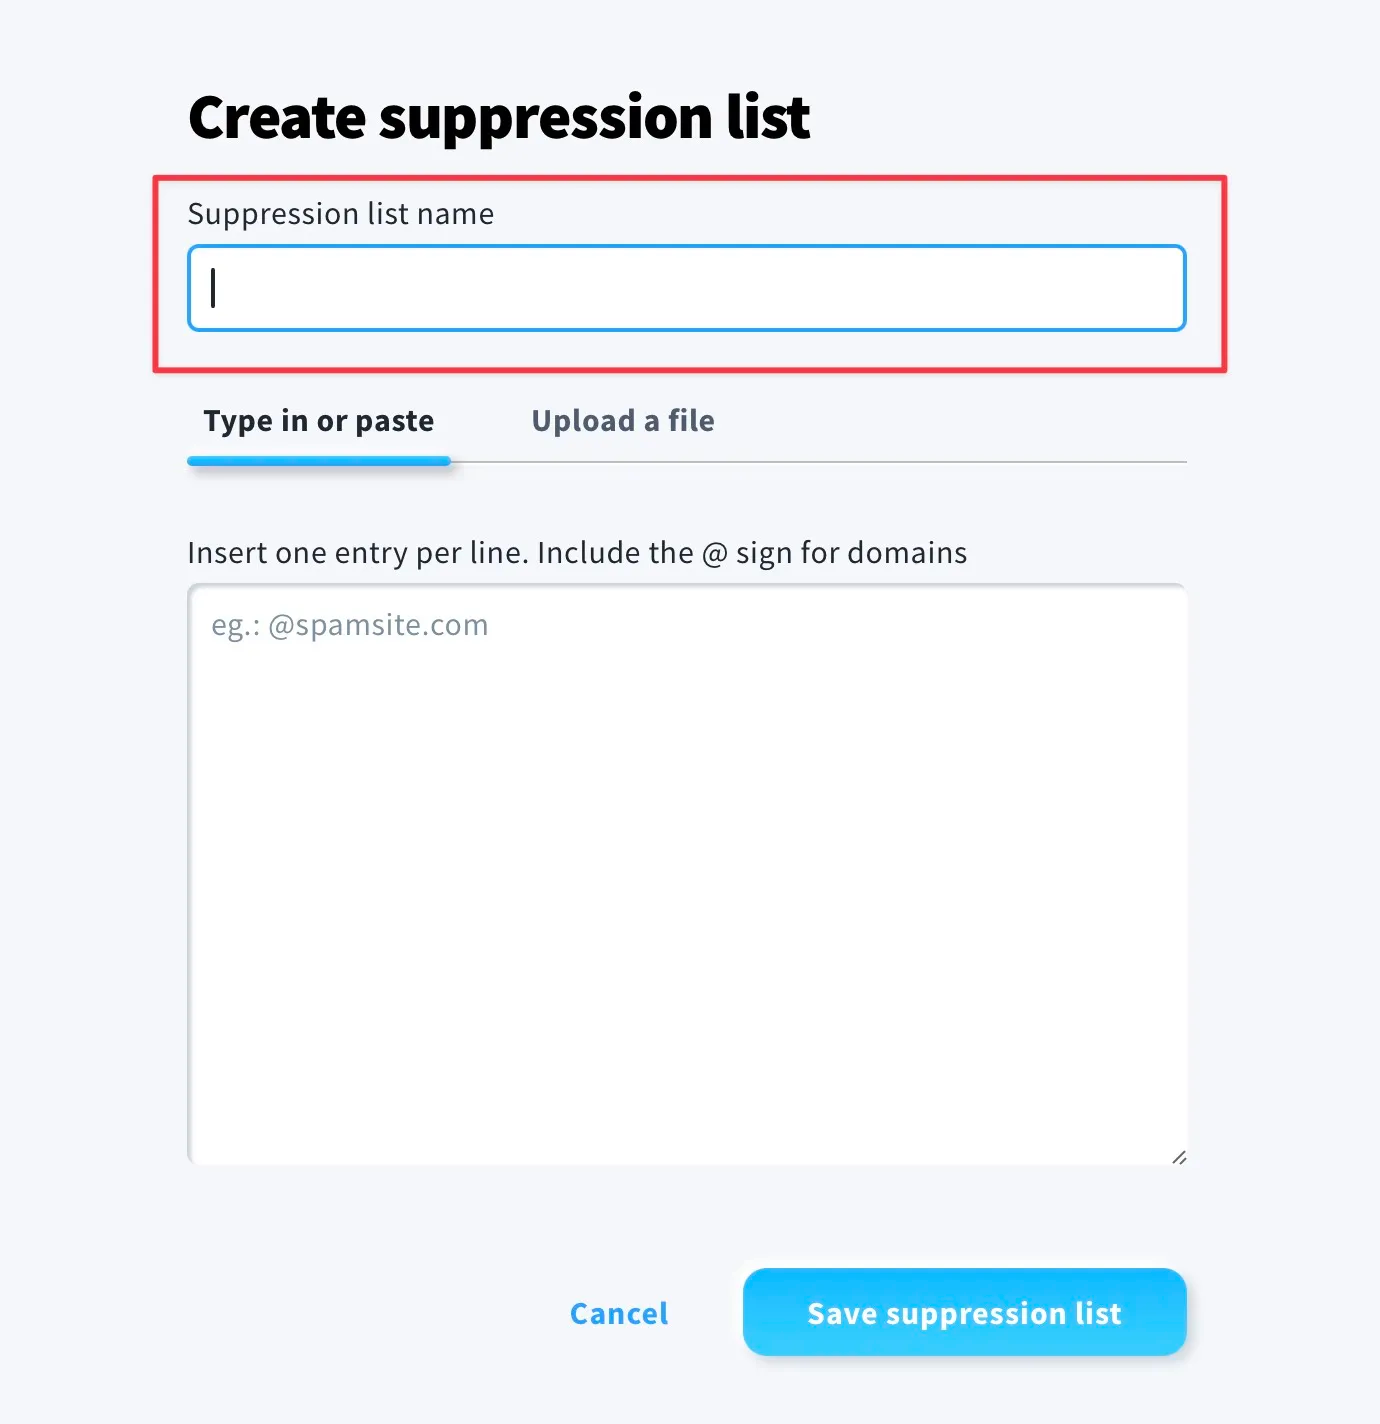
- The Create suppression list page will open. Enter your suppression list name (required). The list name can be 1-64 characters long. All characters are allowed, but your list name can’t be just a space ( ). Emojis are turned into an underscore ( _ ).
- Add suppression rules.
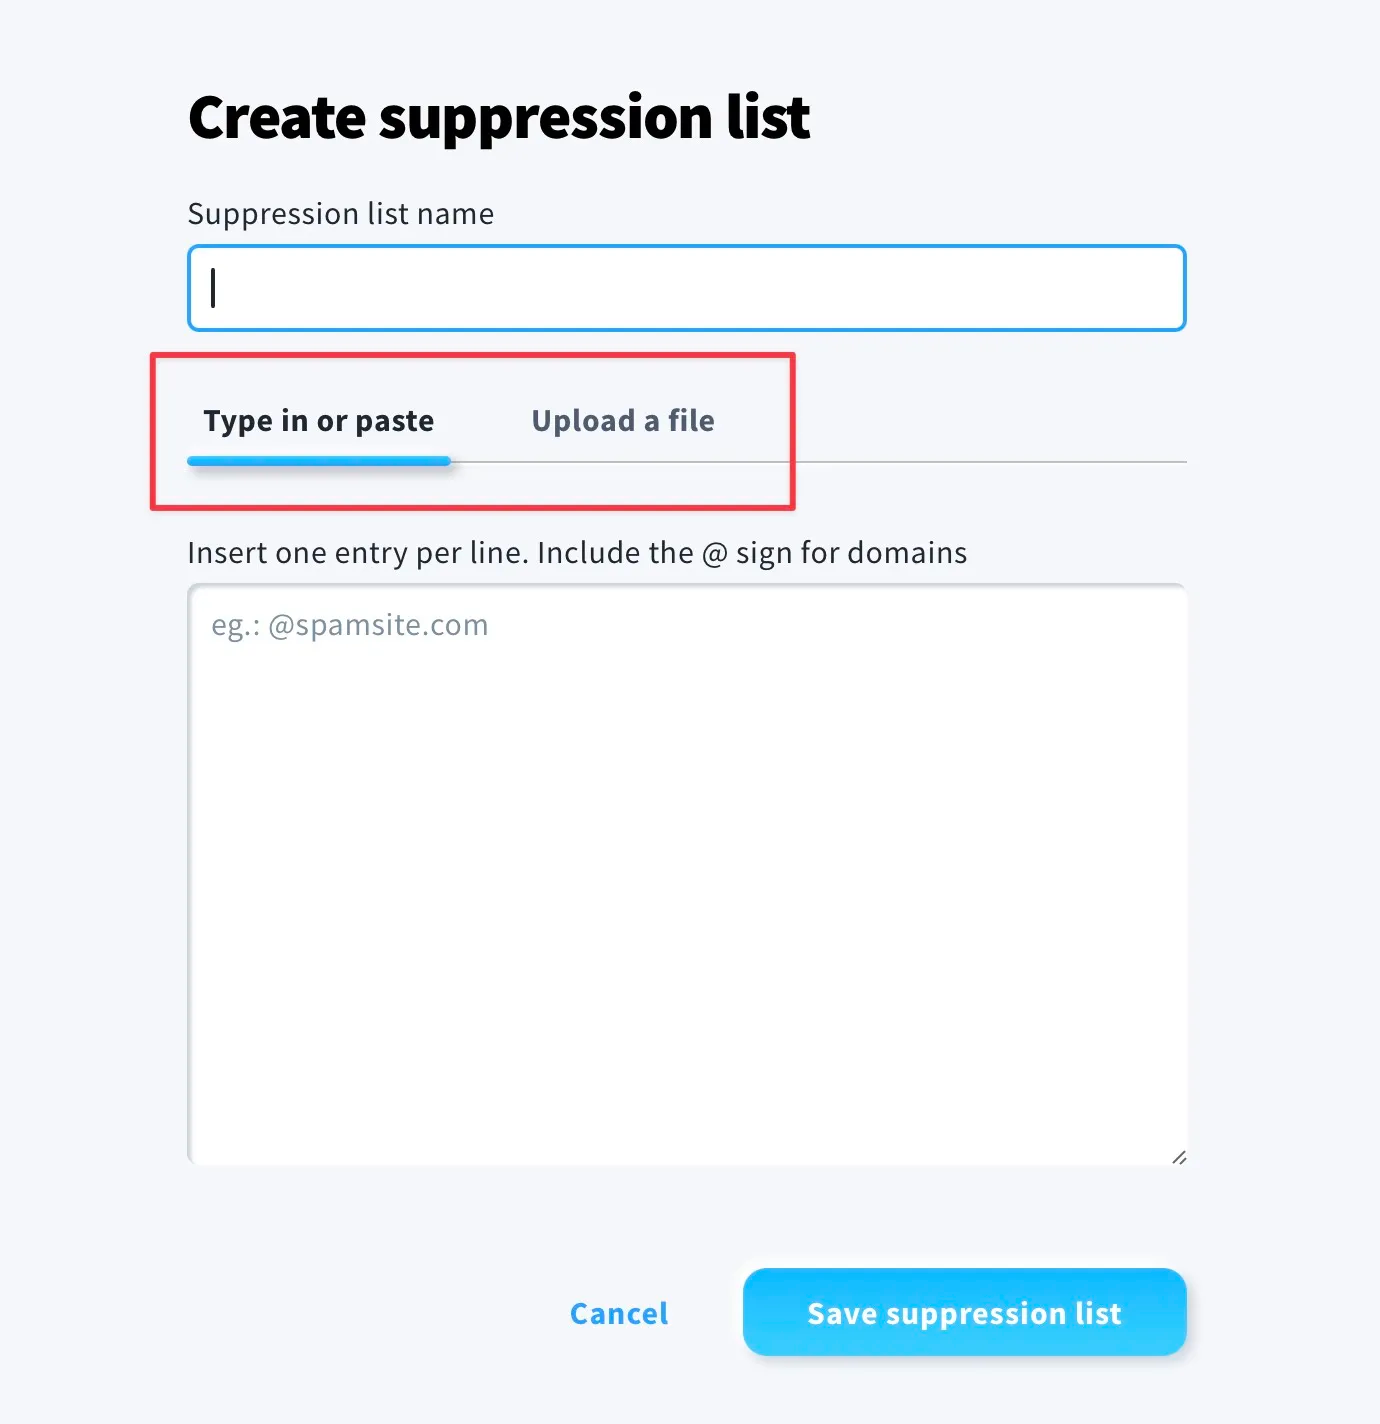
You can:
- Paste or type them in. Add one rule per line, press Enter to separate each entry.
- Upload a file. Use CSV or TXT files, no larger than 10 MB. You can either drag-and-drop it or click Choose file and select the file from your computer. When the file has been successfully added, we confirm that it’s ready for upload.
Note: The file should contain only one column. Each line should be in one of the following formats:
user@domain.com
@domain.com
user@
- Click Save suppression list.
Once you’ve successfully created a suppression list, you’ll automatically return to the Suppression lists page.
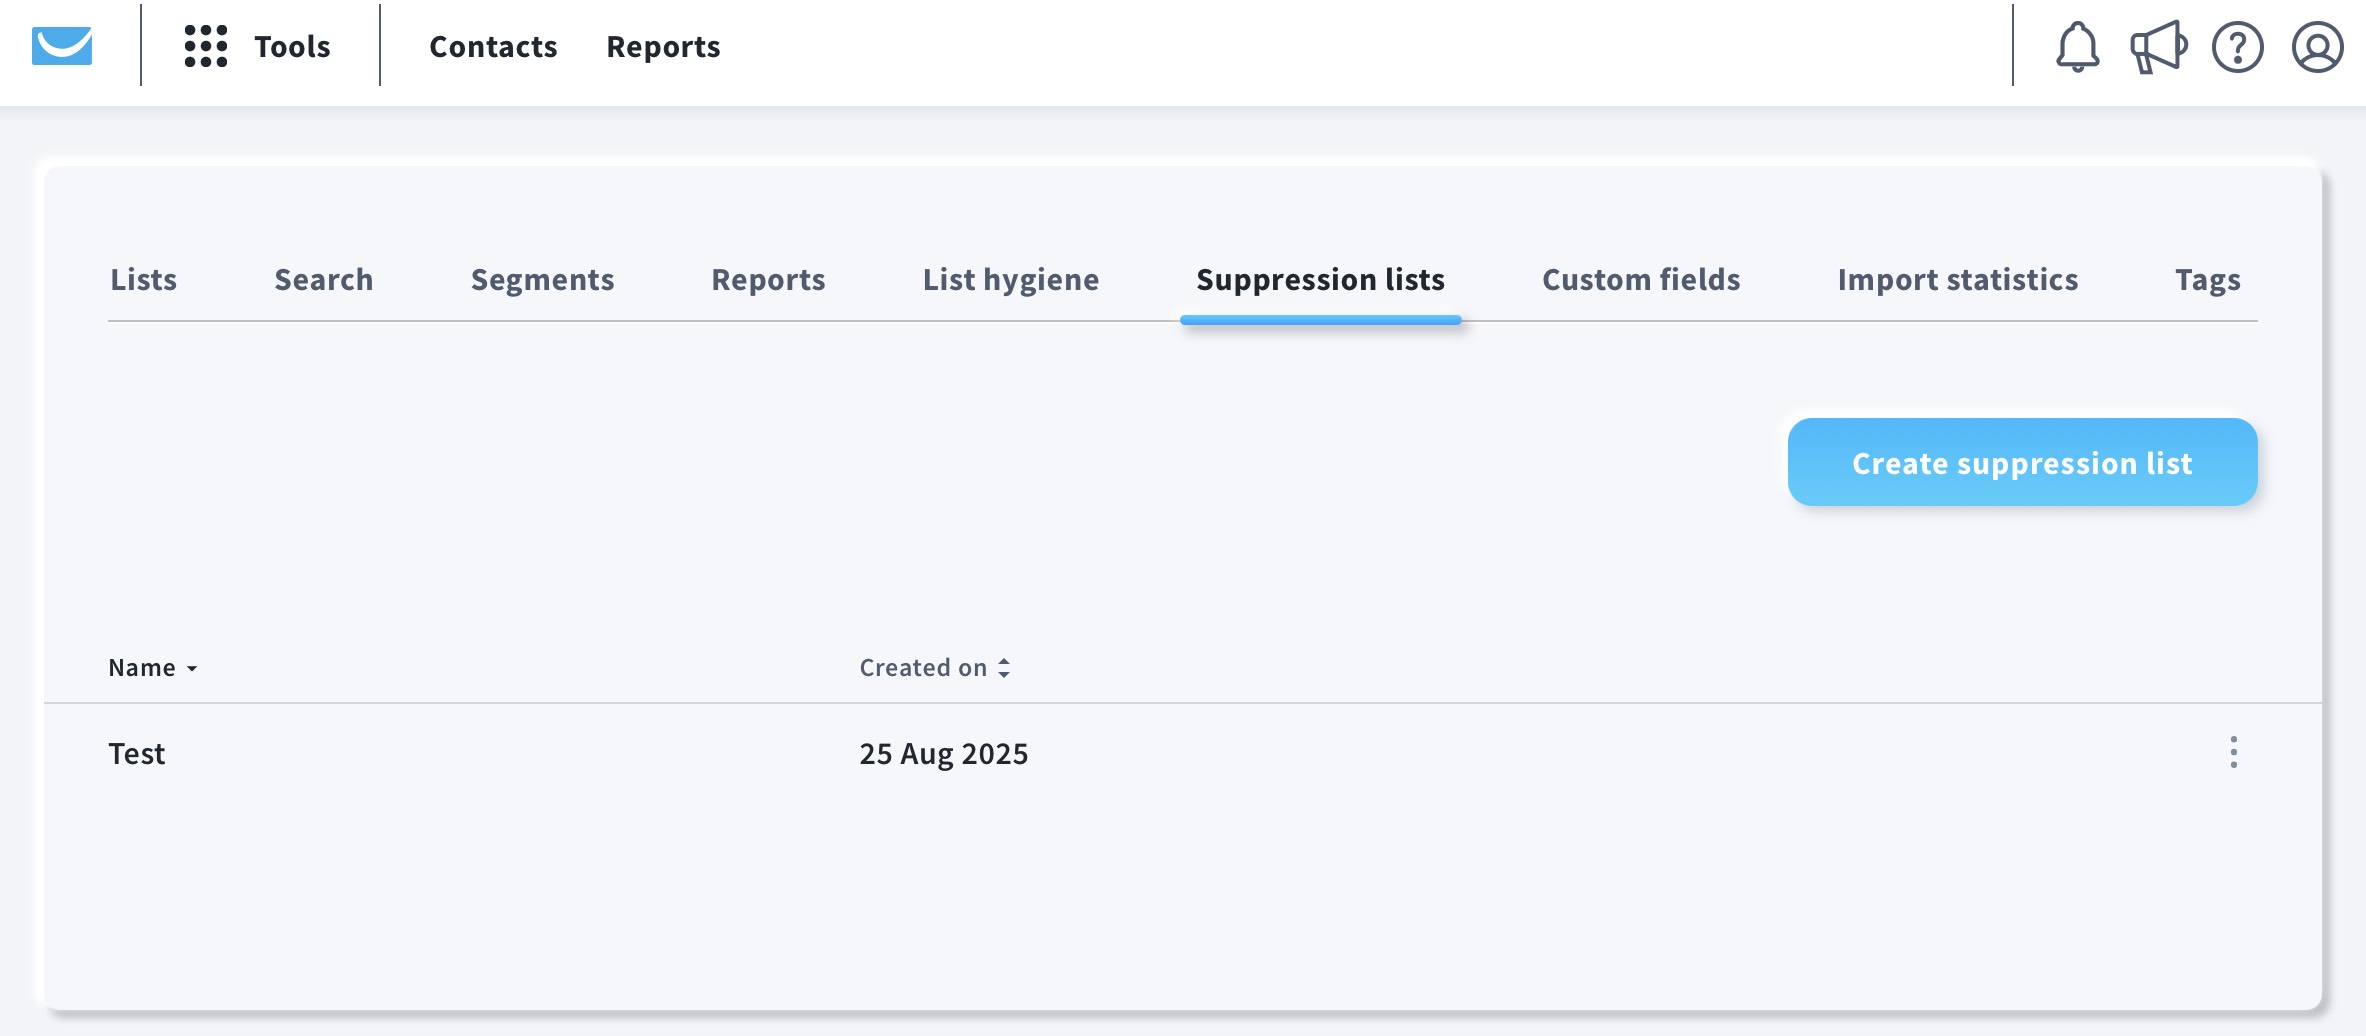
From there, you can:
- view the lists you’ve created
- edit and delete existing lists
- sort your existing lists by name or date
- create new suppression lists
Editing the suppression list
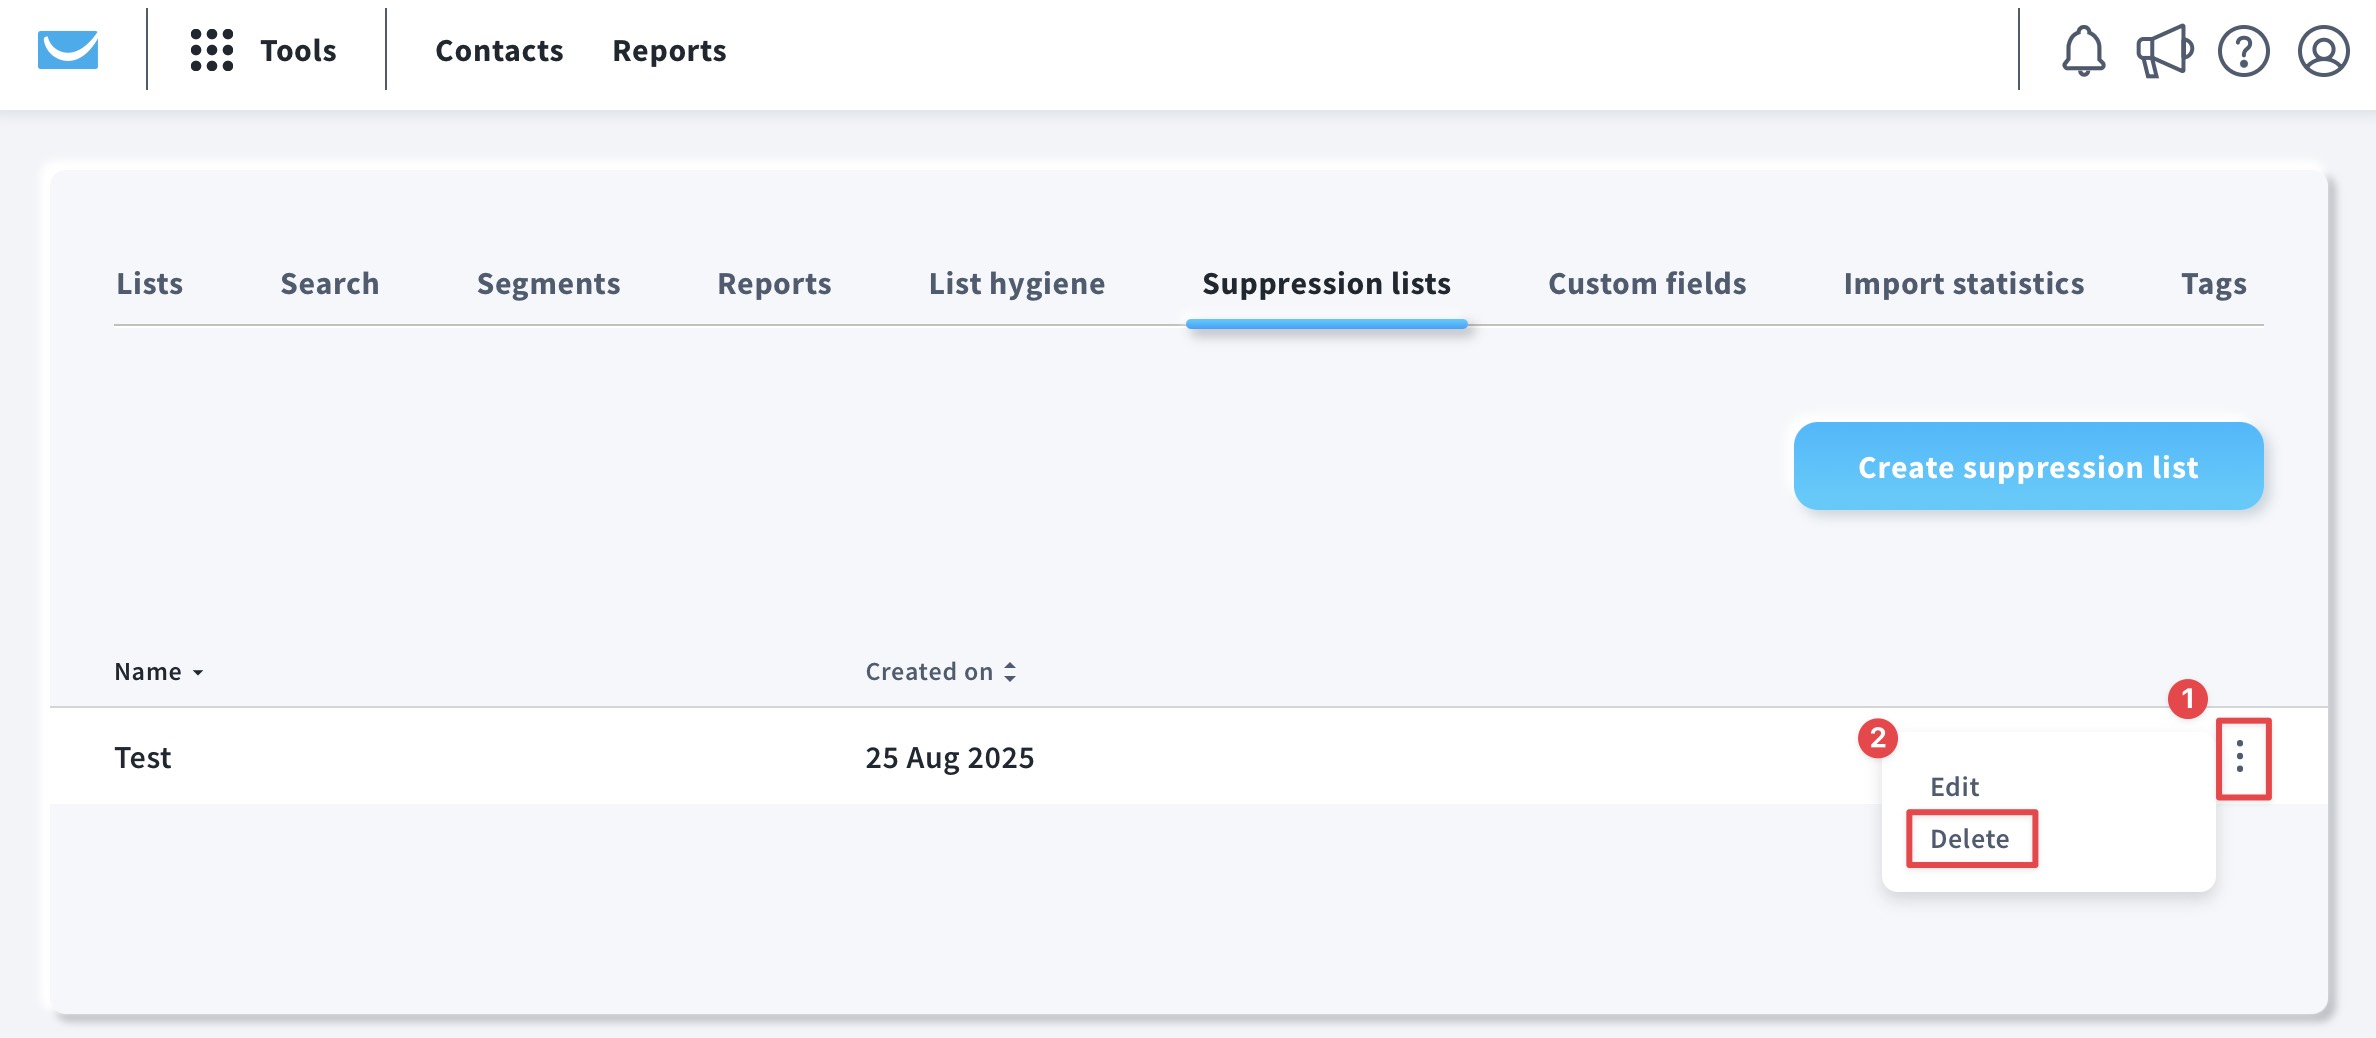
- Go to Contacts > Suppression lists.
- Hover the mouse over the action menu to open the actions list and select Edit or Delete.
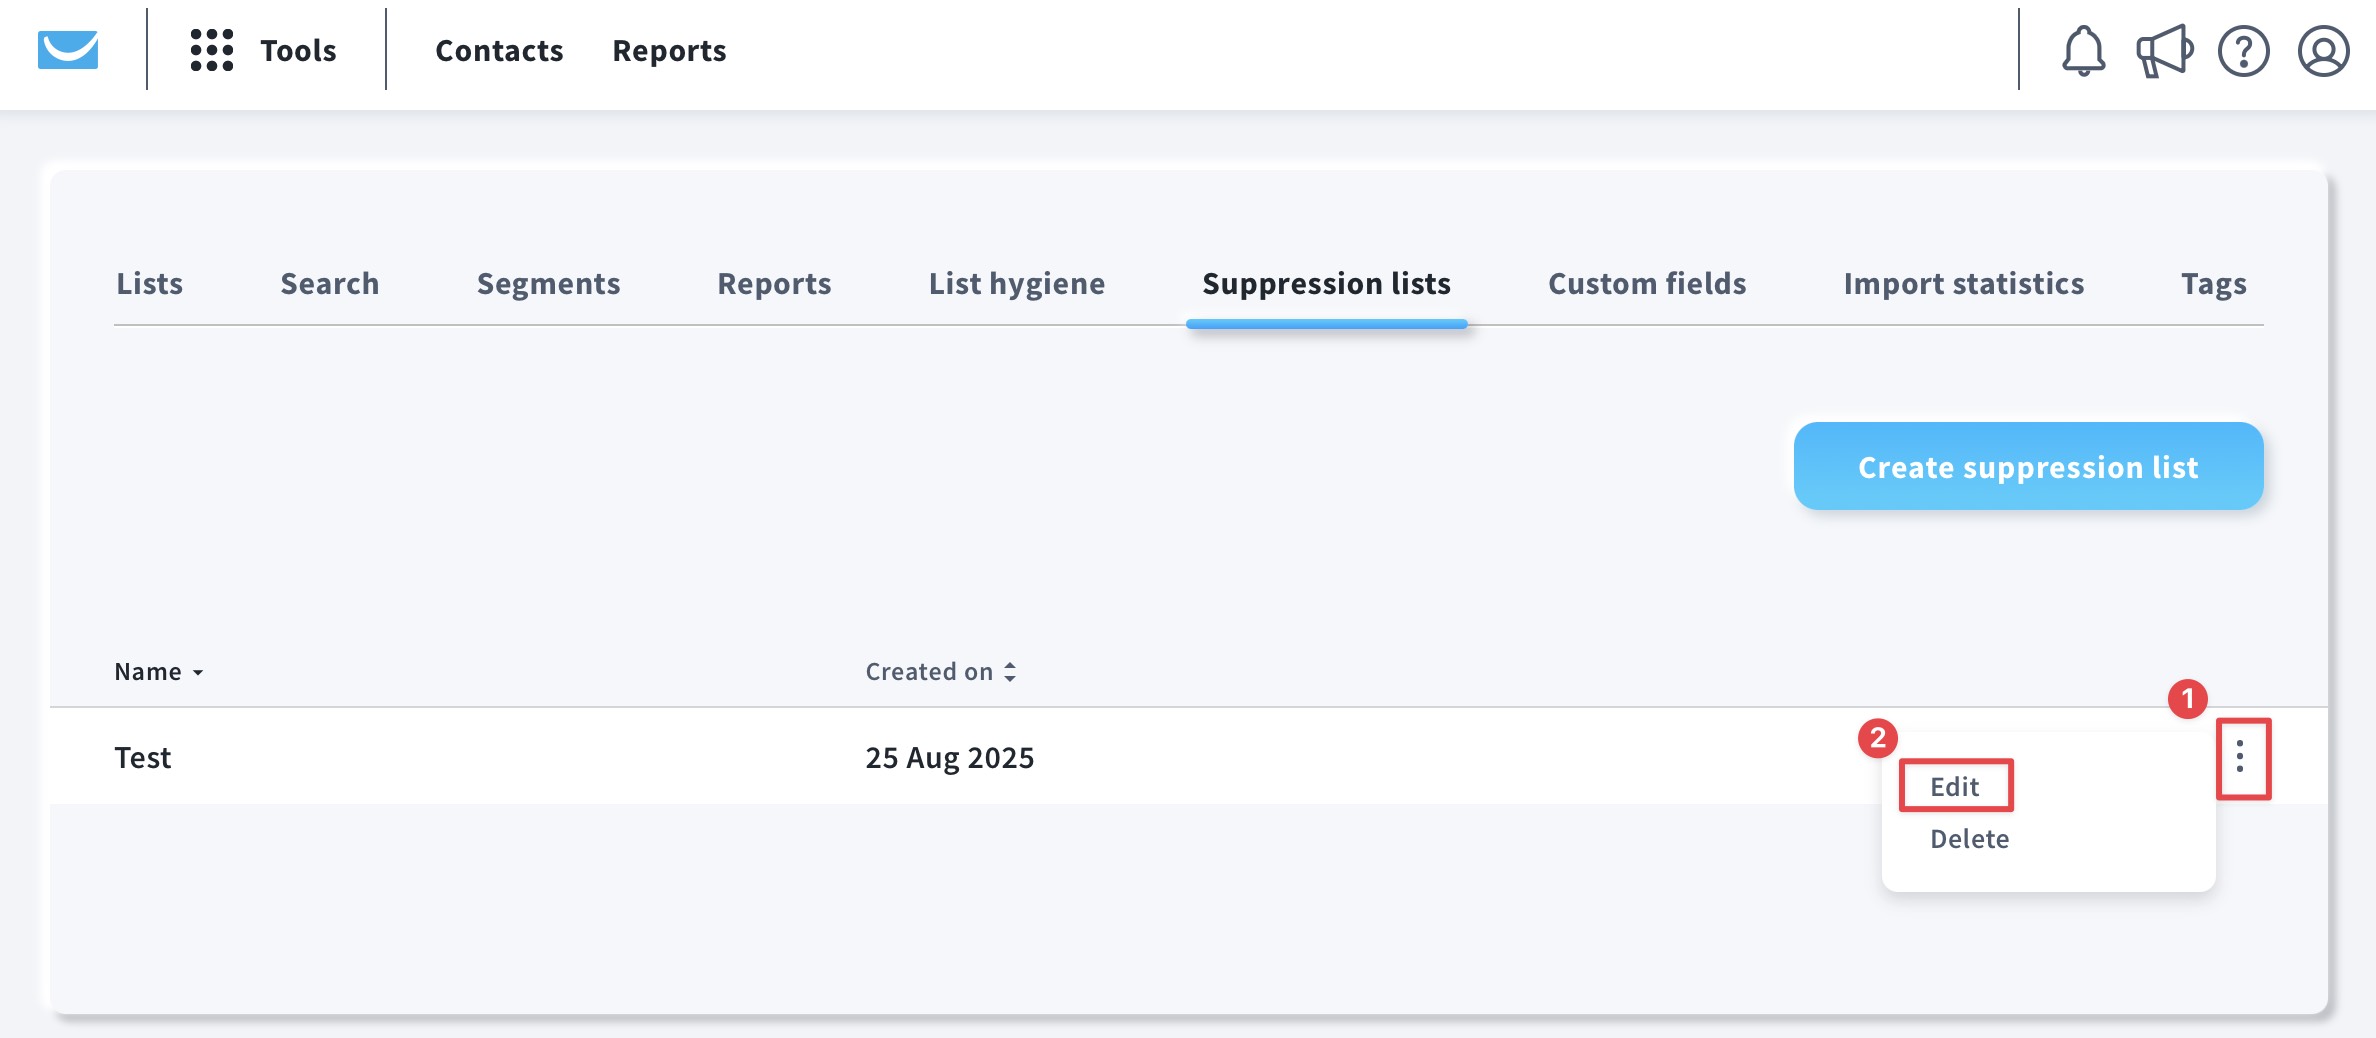
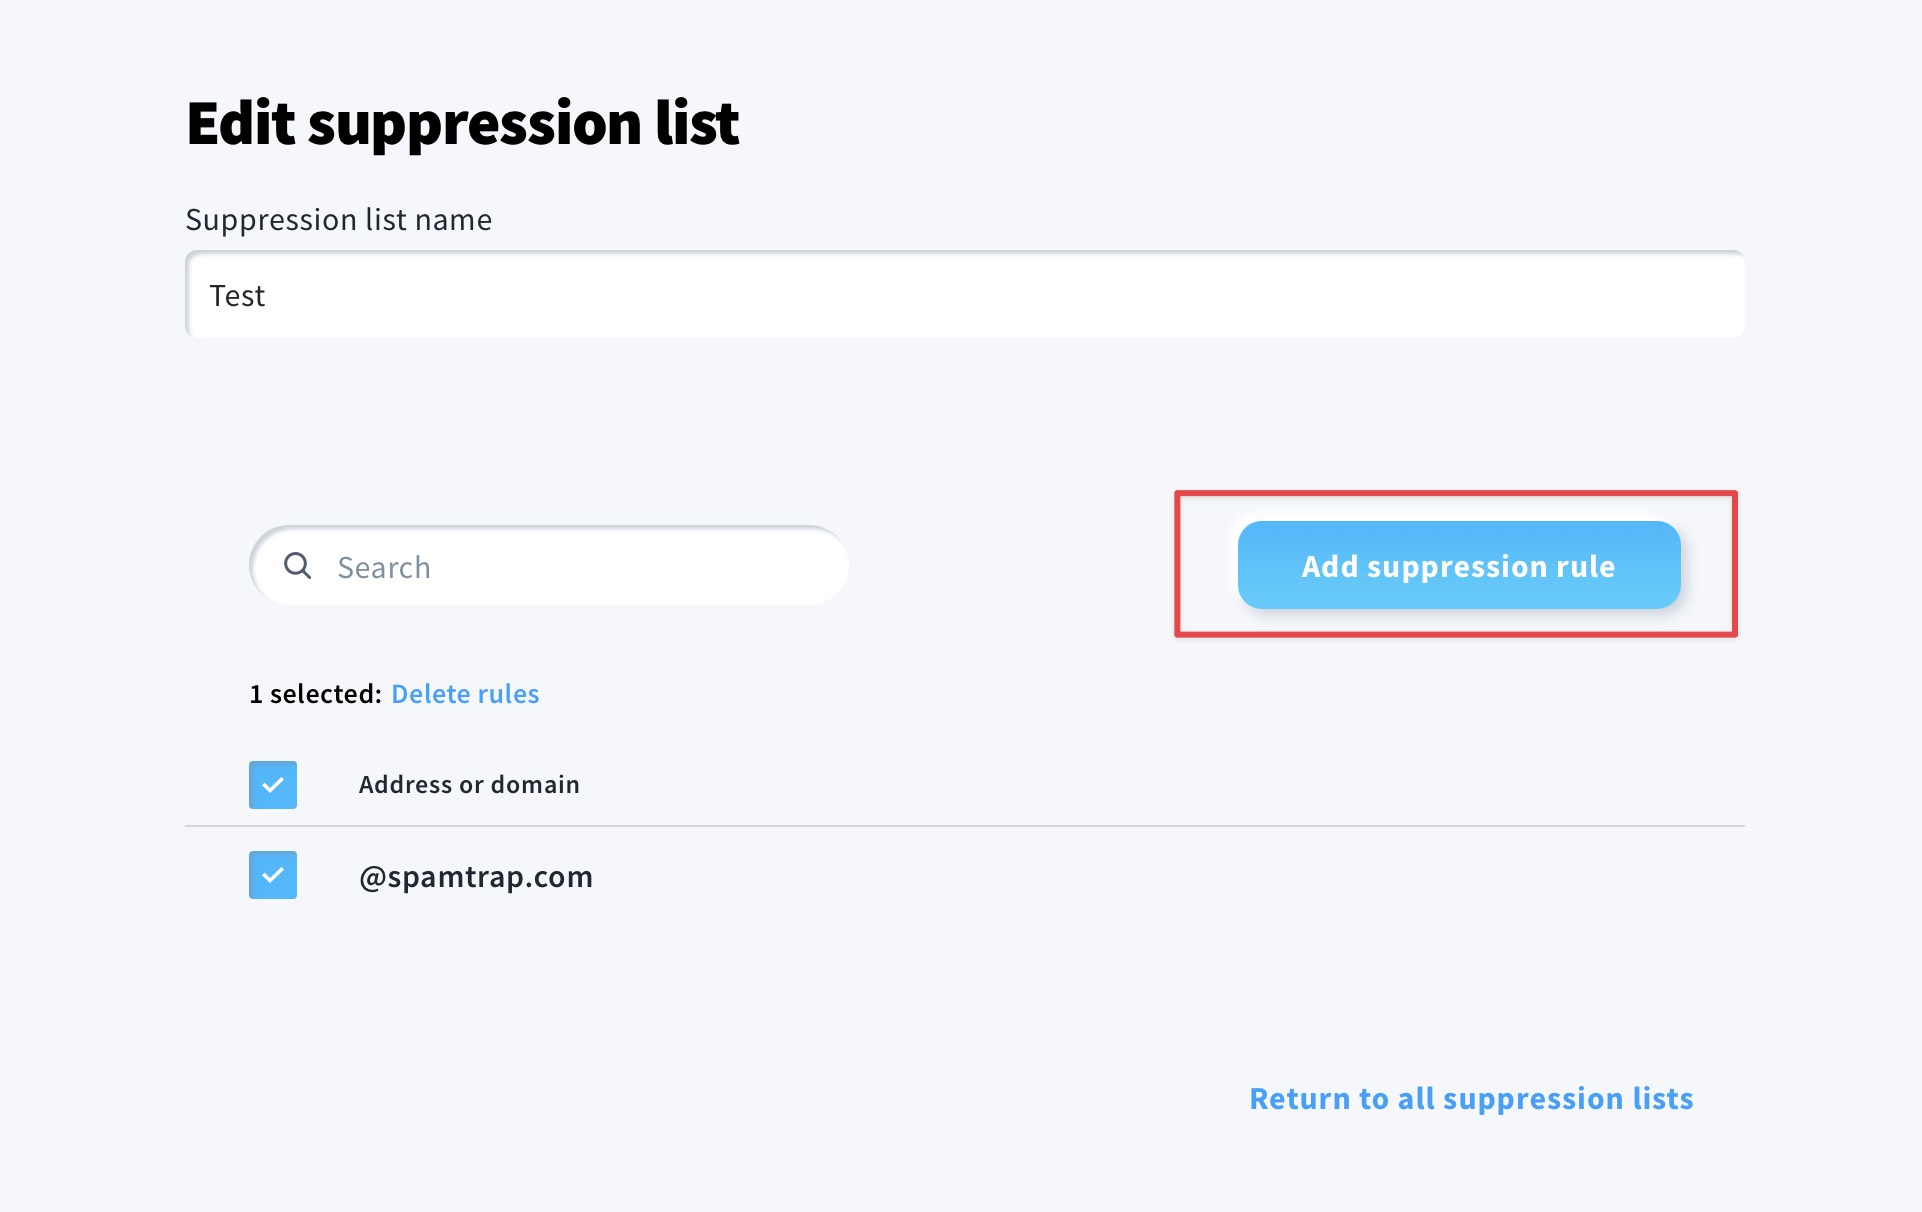
- After you’ve clicked Edit, you’ll get to the Edit suppression list page. From there you can change the suppression list name and delete or add suppression rules:
- To change the name, type in a new name in the space provided.
- To delete the rules, select one or more rules. To delete the rules in bulk, check the box above the list. Next, click Delete rules.
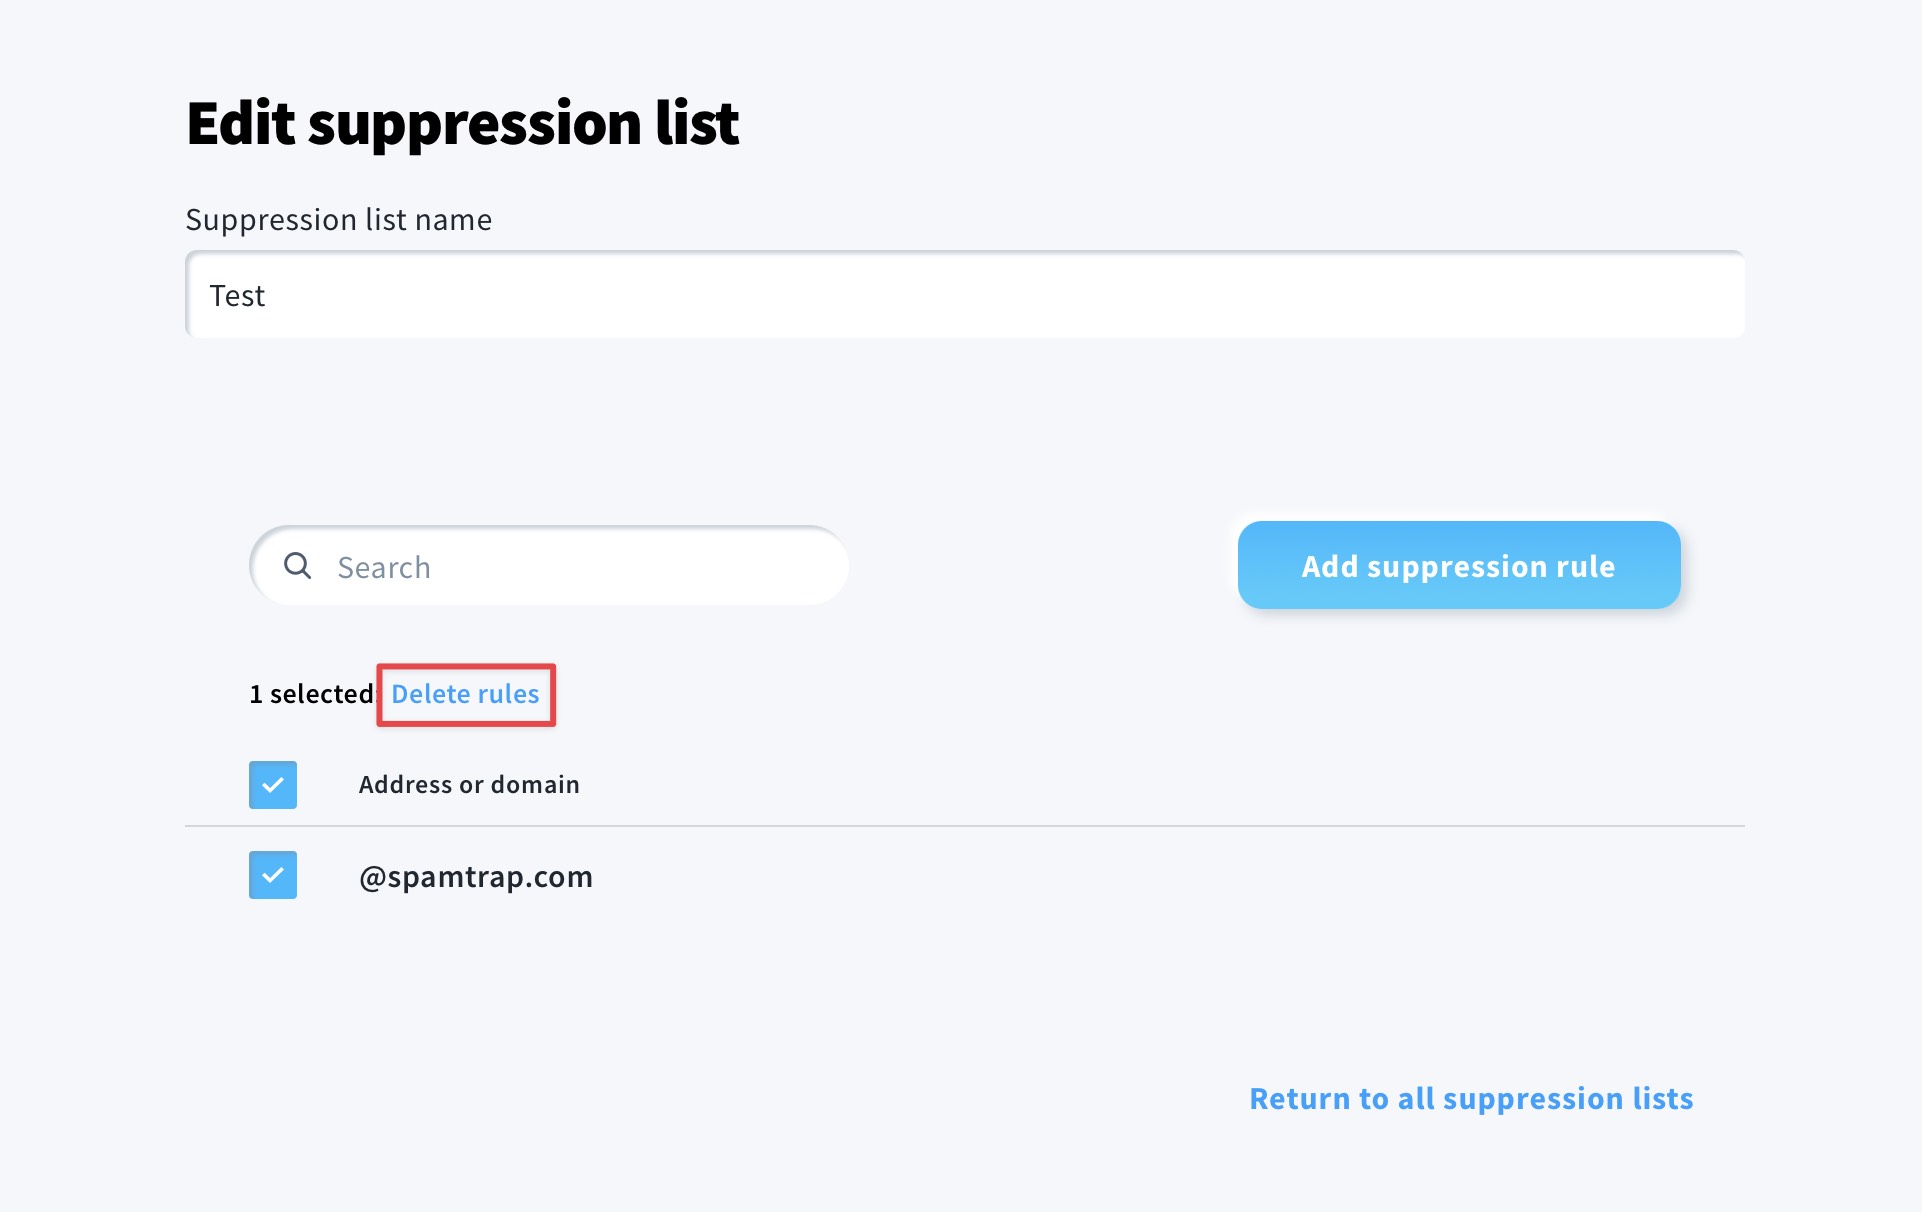
- To add new rules, select Add suppression rule. Next select Type in or paste or Upload a file. Then, follow the steps for adding suppression rules. Click Save when you are done.
Deleting the suppression list
- Go to Contacts > Suppression lists.
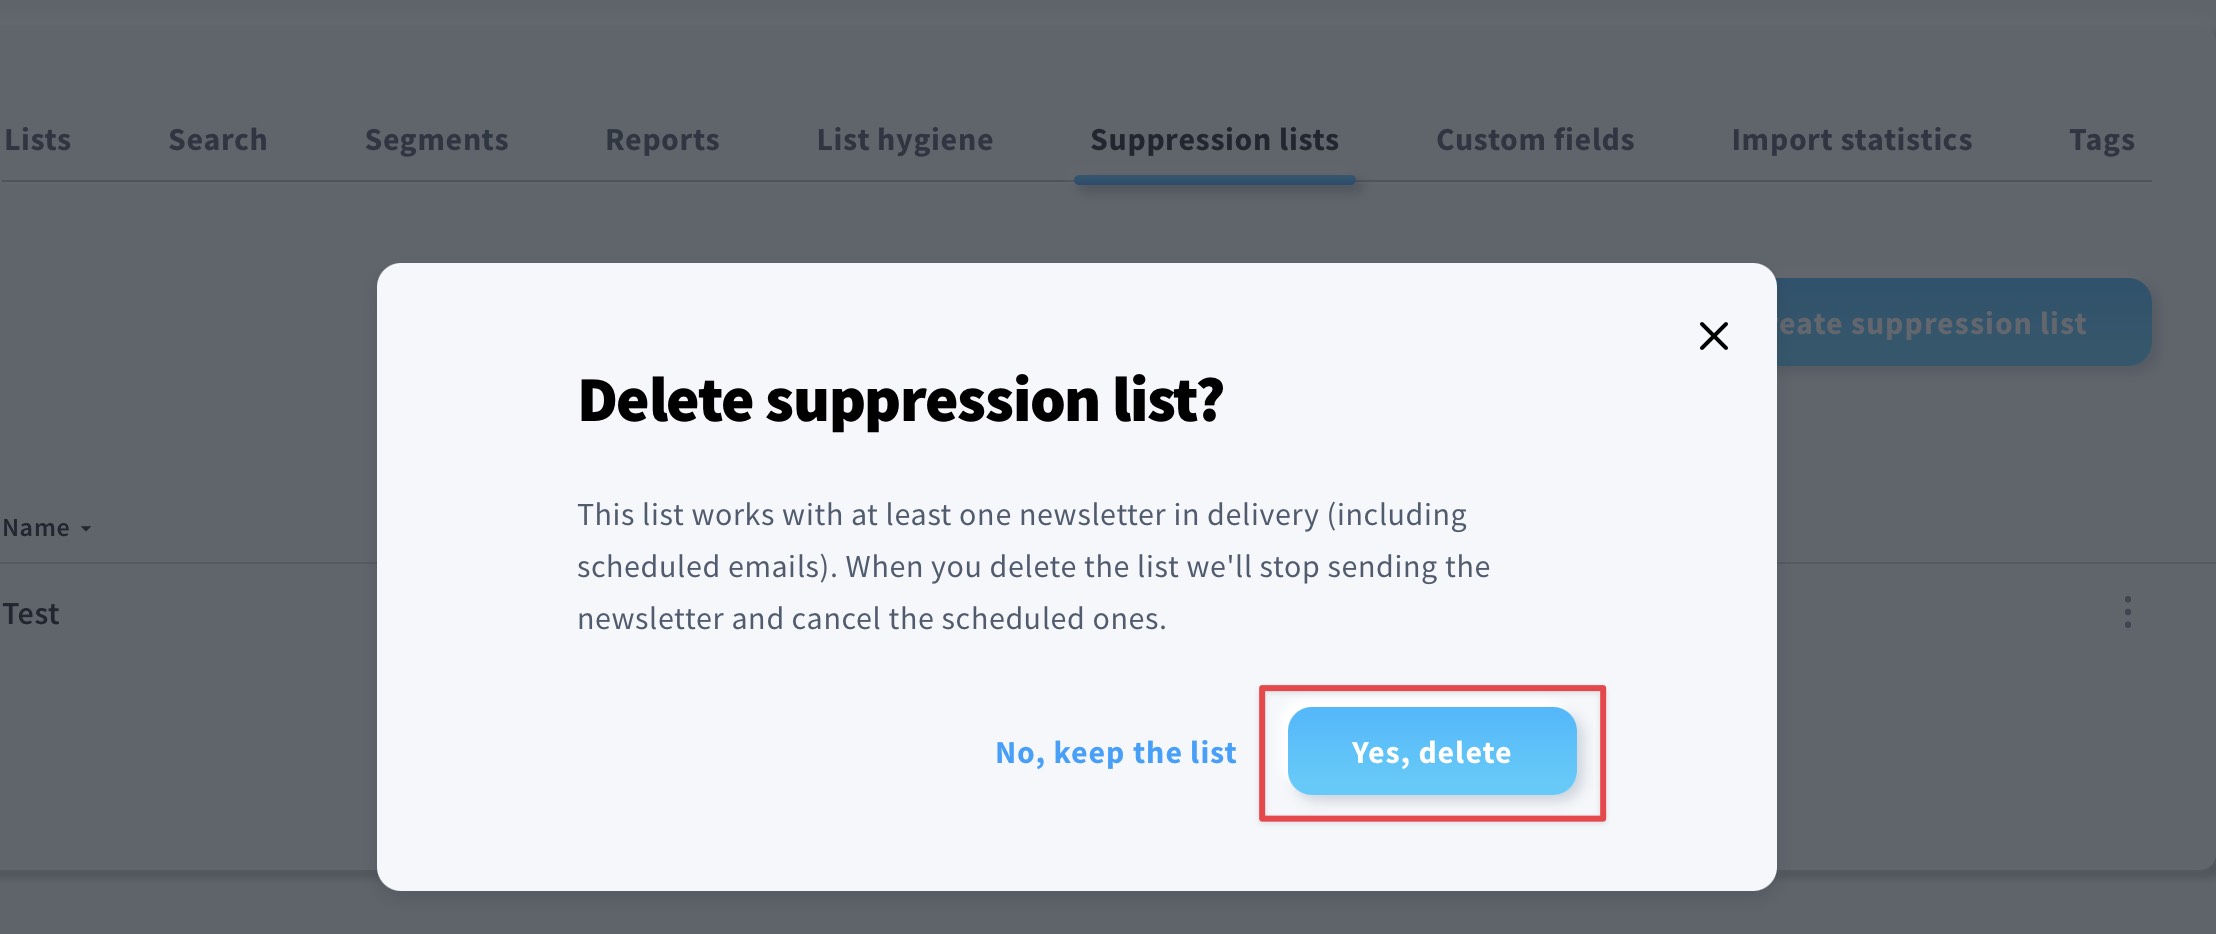
- Hover the mouse over the action menu to open the actions list and select Delete. A pop-up modal will appear.
- Click Yes, delete to confirm you’d like to remove the suppression list.