Targeted post-purchase follow-up
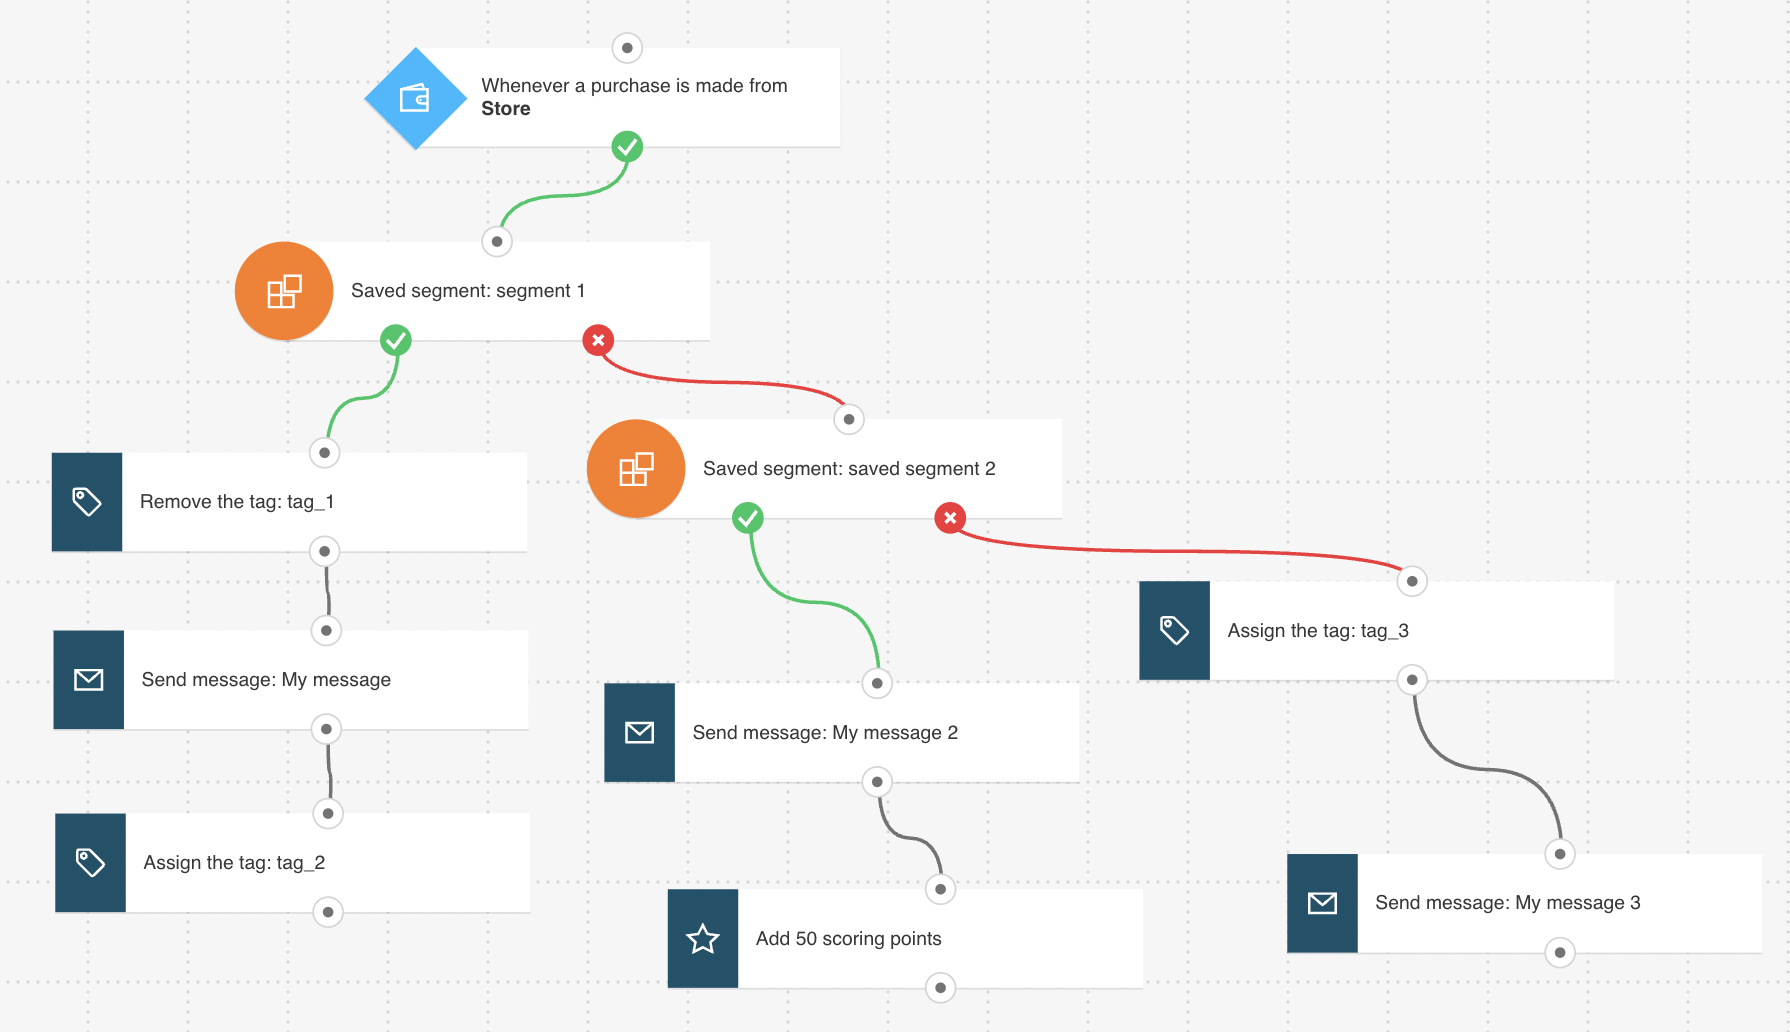
Targeted post-purchase follow-up is a multi-purpose template that helps target first-time and repeat buyers and thank them for their purchases. It enables you to automatically send tailored thank-you messages to your customers each time they make a specific purchase. This template will work both for first-time buyers who then return to your store and for existing return customers.
The template is designed to:
- assign a tag of your choice to first-time buyers to distinguish them from other customers,
- automatically remove the first-time buyer tag and then tag them as repeat customers,
- send targeted messages to buyers based on the tag they have. This means that the same customer can get different thank-you messages with different content for a more personalized shopping experience.
- continually adjust score for repeat customers each time they make a purchase. You can use this information when setting up new communication strategies for them.
Template overview
Category: Post-purchase
Elements in workflow: 10
Minimum number of elements to configure: 10
Here’s what you’ll need to configure the elements and publish the template as a workflow:
- minimum 2 automation messages or messages (or drafts) that can be used as automation messages, e.g. a thank-you message draft for first-time buyers and one for repeat buyers (in this template you can use two different messages for return customers if you want to thank customers specifically for their second purchase). You can also add product recommendations to messages used in this workflow.
- 2 tags – one for first-time buyers and one for return customers, e.g. “first_time_buyer” and “repeat_buyer”.
- 2 already created segments; one using the first-time buyer tag and the other using the return buyer tag as search conditions,
- (optional) a scoring plan.
Configuring the template
All greyed out elements need to be configured. Click an element to open its Properties tab. All the necessary elements have the option to Run multiple times enabled to work for the same customer more than once. This template uses tags and dynamic segments based on those tags. To be able to publish this workflow, be sure to set up the tags and segments used in dynamic segments in advance (see the steps explained in Before you begin.)
Starting the workflow
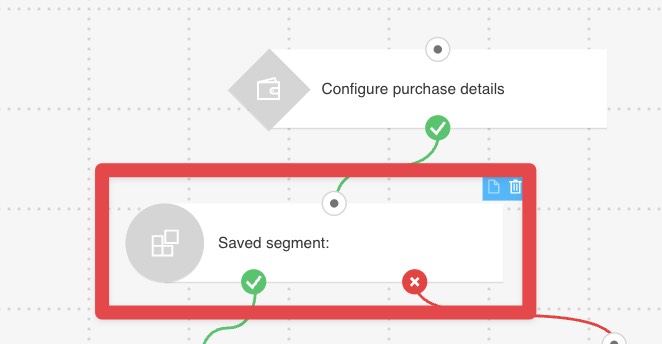
Here you’ll select the trigger (condition) for the workflow and set up the first filter that will look for customers who have already made their first purchase. Here’s how to do it,
- Configure the Purchase element to track if your contacts completed the purchase. Click the element. This will display the Get Web Connect button. The next step depends on the integration method you use:
- for JavaScript, click Get Web Connect, copy the snippet to the clipboard and after that click on ‘Back’ on the top left. (At this point it’s best to save it to a temporary document in case you copy something else to the clipboard). Under Properties, enter the URL of the post-purchase thank-you page. Note: Once you’re done configuring the template, you’ll need to copy the snippet to your website’s management system or insert it directly into the HTML source code.
For detailed instructions on installing the tracking code, please go to How do I add the tracking JavaScript code to my website?
- for API, select API as the integration method. Then, use the drop-downs to specify the purchase you want to track.
- In the Dynamic filter element, select a saved segment or create a new targeted segment based on the “first-time buyer” tag.
Targeting first-time buyers
The filter used in this part of the workflow first checks if people who enter it are returning customers. If they aren’t, these customers are given a tag that distinguishes them as first-time customers and then they’re sent a targeted message.
Here’s how to set up the elements:
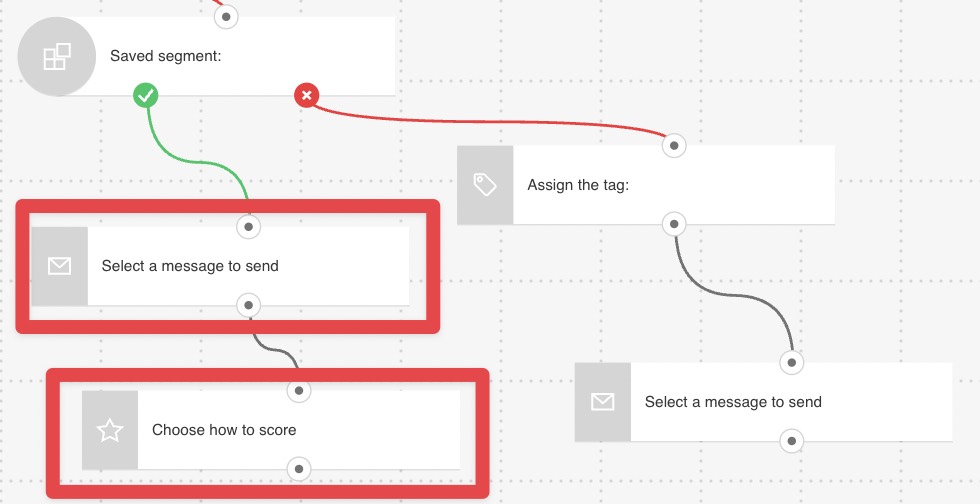
- The Dynamic segment linked to the “if no” (red) connector is preset to “Saved segment” Use the drop-down list to select the segment you saved based on the “return customer” tag. It will help you distinguish between first-time and returning customers. Everyone who’s a first-time customer will move to the next element via the “if no” (red) connector.
- The Tag action is preset to assign tags. Use the drop-down list to select which tag to assign to your customers right after they complete their purchase, e.g. “first-time buyer”.
- For the Send message element, use the drop-downs to select the message you want to use as a first-purchase thank-you message.
Targeting buyers who have purchased from you once
Here you’re going to set up the elements that remove the “fist-time buyer” tag and send them a message thanking them for returning to your store. As the last step, this group of customers is tagged as repeat buyers. This tag will be later used to continue to automatically send them post-purchase thank-you messages.
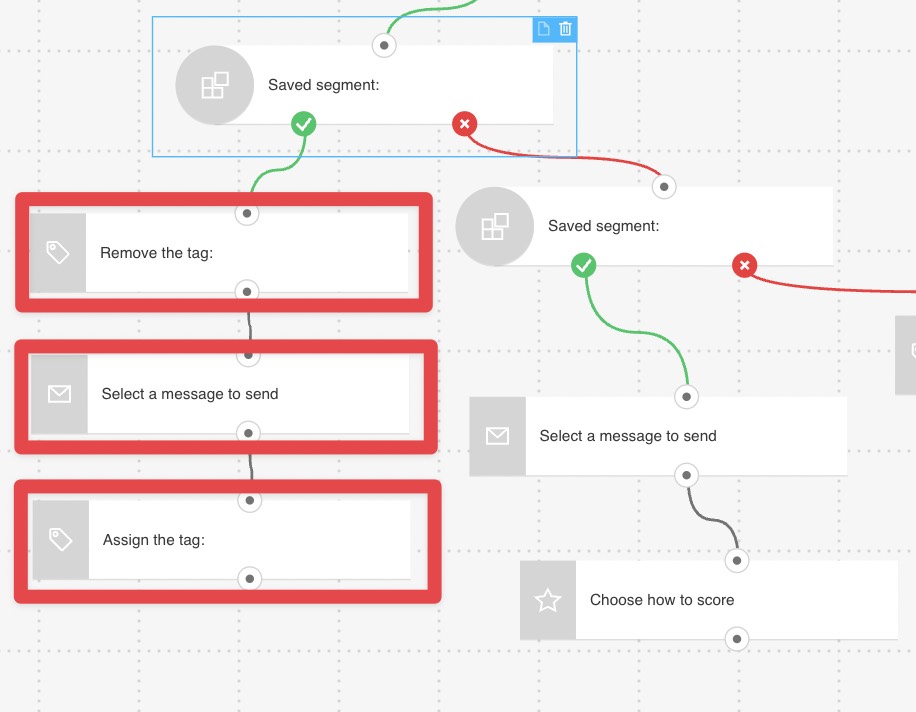
- The first Tag action in this section of the workflow is preset to remove tags. Use the drop-down list to select the tag you used to indicate first-time buyers to remove it.
- For the Send message element, use the drop-downs to select the messages you want to use to thank the customers for their second purchase.
- The second Tag action is preset to assign tags. Select which tag to assign to your customers to identify them as returning customers, e.g. “repeat_buyer”.
Targeting returning customers
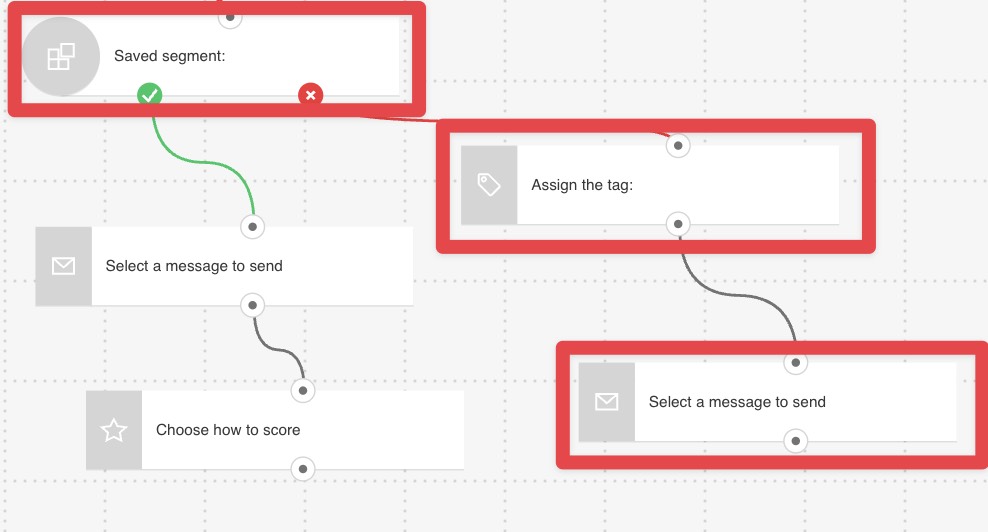
This part of the workflow uses a filter to identify everyone tagged as a returning customer and sends them an appropriate thank-you message. It will continue to do so each time they complete the purchase you selected in the trigger for this workflow.
- For the Send message element linked to the “if yes” (red) connector if the Dynamic segment filter, use the drop-downs to select the messages you want to use to thank them for their return purchases.
- In the Score action, select how many points you want to give customers for coming back, eg. 10 points every time they buy a product in the category you selected. With consistent scoring, you’ll know how many times they’ve made that purchase.
Completing setup
Click Publish when you’re done setting up the template or Save and exit if you want to finish editing the template later (it will appear as a draft on the Manage workflows page).
Going beyond
You can remove the Score element if you don’t want to track the number of return visits.
Related links
- How do I set properties for the Purchase condition?
- How can I use the Tag action in a workflow?
- How does the Dynamic segment filter work?
- How does a marketing automation message work?
- How can I use the Score action?
- Can I run specific actions and conditions multiple times?
- How do I make use of tags?
- Where can I assign tags or scores to contacts?
- What is a segment?


