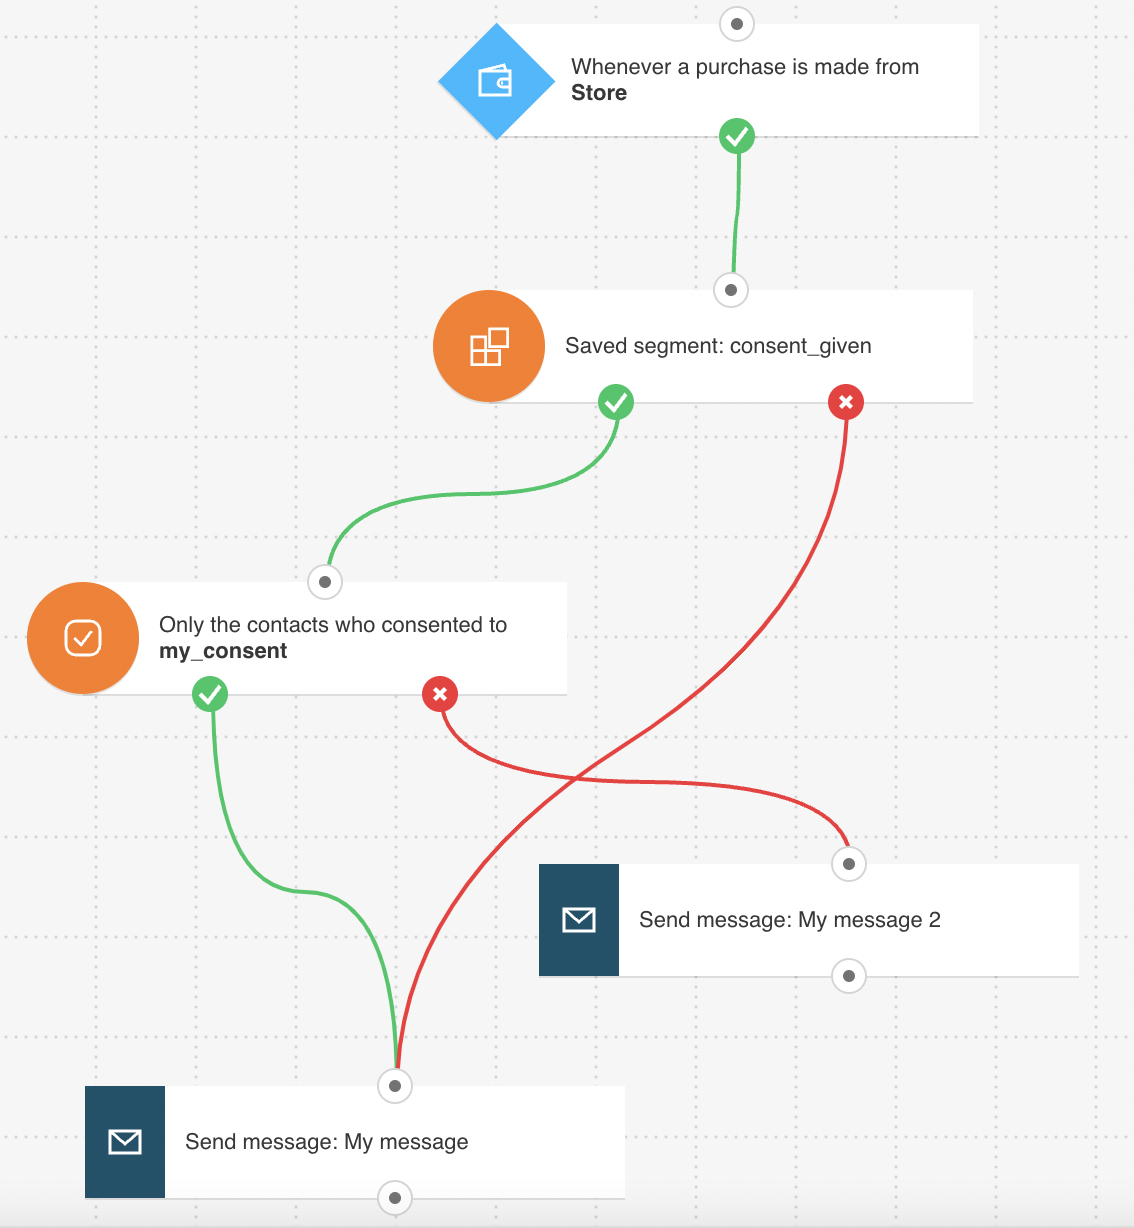
Consent-based purchase confirmation
You can send custom post-purchase messages to your customers on their consent status with the template Consent-based purchase confirmation. Use this template to create a workflow that:
- is triggered when a customer makes a purchase,
- filters customers by geolocation to identify EU-based customers,
- filters customers by their consent status to separate the customers who’ve given consent from those who haven’t.
Template overview
Category: Post-purchase
Elements in template: 5
Minimum number of elements to configure: 5
Here’s what you’ll need to configure the elements and publish the template as a workflow:
- 2 automation messages or messages that can be converted to automation messages,
- a consent field that can be used in the Consent status filter,
- optionally, you can create a segment based on geolocation to later use in the Dynamic segment filter.
Configuring the template
If an element is greyed out, it means that you need to set its properties. Clicking an element opens its Properties.
- Configure the Purchase element to track if your contacts completed the purchase. To do this, click the element. This will display the Get Web Connect button. The next step depends on the integration method you use:
- for JavaScript, click Get Web Connect, copy the snippet to the clipboard and after that click on ‘Back’ on the top left. (At this point it’s best to save it to a temporary document in case you copy something else to the clipboard). Under Properties, enter the URL of the post-purchase thank-you page. Note: Once you’re done configuring the template, you’ll need to copy the snippet to your website’s management system or insert it directly into the HTML source code.
For detailed instructions on installing the tracking code, please go to How do I add the tracking JavaScript code to my website?
- for API, select API as the integration method. Then, use the drop-downs to specify the purchase you want to track.
- To set up the Dynamic segment filter, you have to:
- use an existing segment,
- create a new targeted segment, by clicking the Create new segment button in the element Properties.

- For the Consent status filter, select a Consent field. Contacts who’ve given consent to it will go down the positive (green) part. Those who haven’t will go down the negative (red) path.
- Set up the Send message action. Expand the drop-down lists to select the messages you want to use.
- select a message to send to customers who’ve given consent required by GDPR. Customers who are not from the EU can also receive this message.
- select a message to send to customers for whom you have no proof of consent.
- Click Publish when you’re done setting up the template or Save and exit if you want to finish editing the template later (it will appear as a draft on the Manage workflows page).
Related workflows:
Check for consent after a contact subscribes.


