How to create a sales funnel? Video
Sales funnel focuses on the process of collecting leads and finalizing the sales process. It is useful if your aim is to:
- find potential buyers,
- promote and sell products online,
- increase sales results.
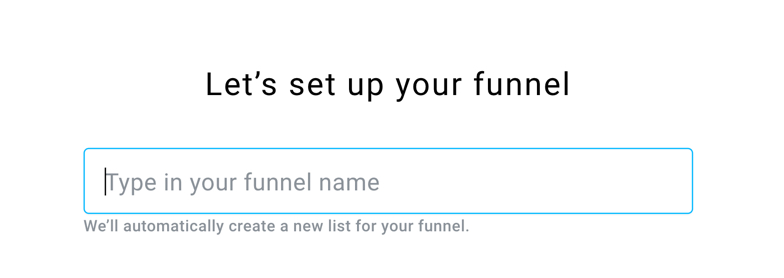
To start creating your sales funnel go to Conversion funnel > Create funnel.
Now, you can start setting your funnel up:
- Type in the name of your funnel and GetResponse will automatically create a new list for that. The name should have at least 4 characters.
- Choose Sell a product type of funnel and click on Create funnel.

- Choose either full or quick type of funnel:
- Full sales funnel: choose this option if you want to get new contacts and send them emails until they buy.
- Quick sales funnel: choose this option if you want to take people straight to your sales page.

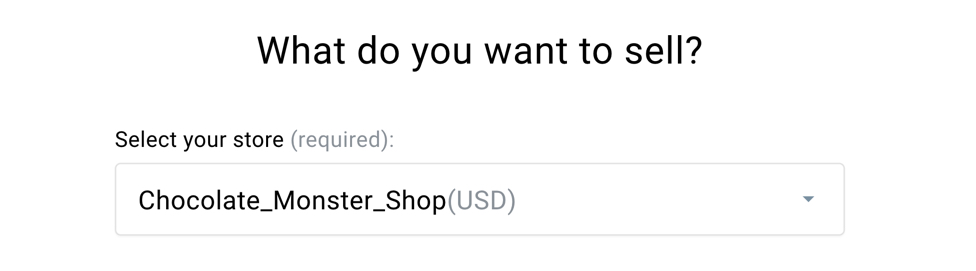
After you select the type of funnel, you will get to the funnel settings page. There you can create a store or connect to an existing one.
Connecting to a store
Existing store
You can choose an existing store (if you had one created with API or in another Conversion funnel). All existing stores will be visible on the dropdown list.
New store
If you do not have a store yet, no problem, you can create it. To do so:
- Click on Create another store and you will be able to create the store from there.
- Now click on Create a GetResponse store.

- Type the name of your store, choose the currency and click on Create.
One store can have only one currency. If you would like the store to have several currencies, create separate stores for each currency.
Connecting to a store
You can also choose to connect to an existing store.
- To do that, click on Connect an existing store

- Click on one of the platforms and you will be able to import products from there:
– XML,
– Stripe (we only import products which have a name set up. The type of products we import is “good”, products such as “services” (subscriptions and plans) are not added),
– Magento (we only import products which have a name set up. For Magento 1.9 – the status of the product has to be “enabled.” For Magento 2.0 – we don’t import “bundle” and “grouped” products),
– Shopify (we only import products which have a name set up and have the status “published”).
Note: You can always go to Ecommerce tools to see all the existing stores. Want to add new stores now? Just click on Add store.
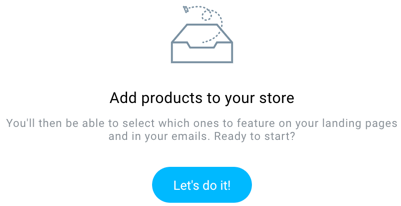
Adding and selecting products
You can add products to an already existing store or to a newly created one.
To do that, click on Let’s do it.
You can add products:
- manually,
- by importing your catalog from another service,
- by connecting to your online store via a plugin or API.
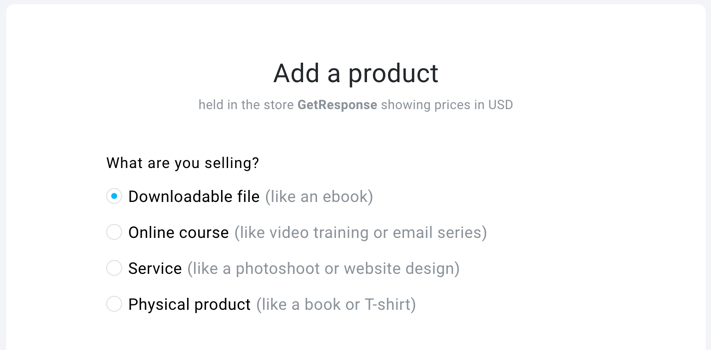
There are 4 types of products that you can add:
- Downloadable file (like an ebook)
- Online course (like video training or email series)
- Service (like a photoshoot or website design)
- Physical product (like a book or T-shirt)
If you want to add products manually, click on Add New Product. You will see several types of products to choose from.
Importing products into GetResponse store
You can also upload your complete product database to GetResponse by adding a product feed in Product feeds. Visit this section to find out how to do it.
Types of products
Downloadable file
Choose this option if you sell ebooks, or other downloadable files. Download product consists of:
– File name (required),
– Description (required),
– Price (required),
– Image (you can use: JPG, .PNG, .GIF),
– Product (max size is up to 50 MB).
Online course
Choose this option if you sell video trainings or a course that will be conducted online, e.g. via emails. Online course consists of:
– Course title (required),
– Description (required),
– Price (required),
– Image (you can use: JPG, .PNG, .GIF),
– Delivery option: 1) I’ll copy them to a list that has my course 2) I’ll redirect them to a site that hosts my course.
Service
Choose this option if you sell a service, e.g. photoshoot or web design. Service consists of:
– Service name (required),
– Description (required),
– Price (required),
– Image (you can use: JPG, .PNG, .GIF),
– Service delivery: inform your customers how the service is going to be delivered to them. This information will show up on the confirmation page and confirmation email.
Physical
Choose this option if you sell physical goods, e.g. a book or a T-shirt. Physical consists of:
– Product name (required),
– Description (required),
– Price (required),
– Image (you can use: JPG, .PNG, .GIF),
– Explanation of how you will ship the order to the customer.
If you completed all the steps, selected the store, added the products, click Save. You should now see all the added products.
Note: You can always go to Ecommerce tools, click on the name of the store and you will be able to add products from there. To do so, click on Add a product.
Choosing the payment processor
Now it’s to time to decide on how you will be collecting payments. We currently offer 4 options:
PayPal
1. To connect with PayPal, click on PayPal logo and then Connect with PayPal. You will see a PayPal window open up.
2. Log in by typing in your email address and click on Next.
3. Type your PayPal password and click Log in.
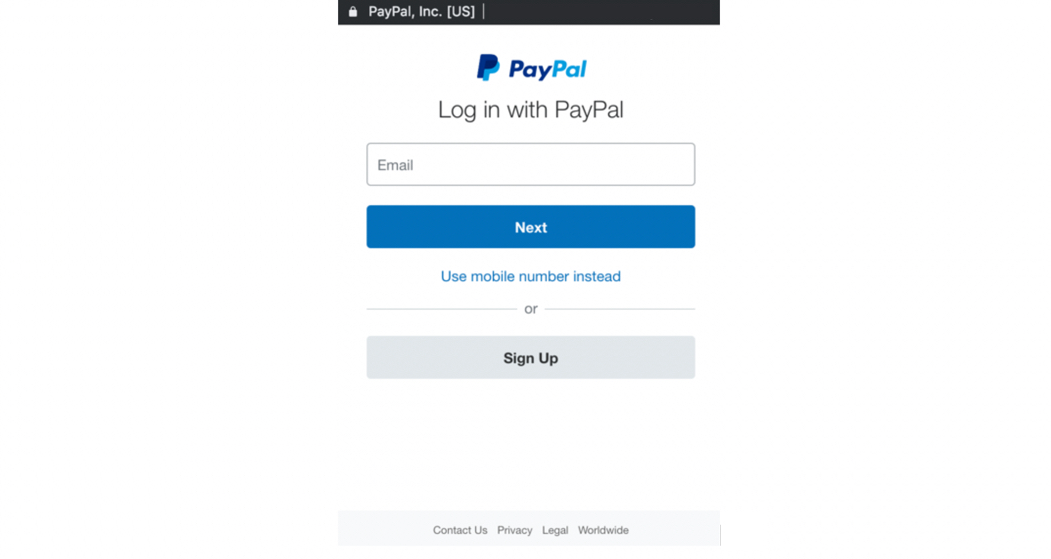
If you do not have PayPal account, create one. Note that this has to be a Business account.
Stripe
1. To connect with Stripe, click on Stripe logo and then click on Connect with Stripe.
2. Choose Sign in with Stripe to connect.
3. Type your Stripe email address and password and click Sign in to your account.

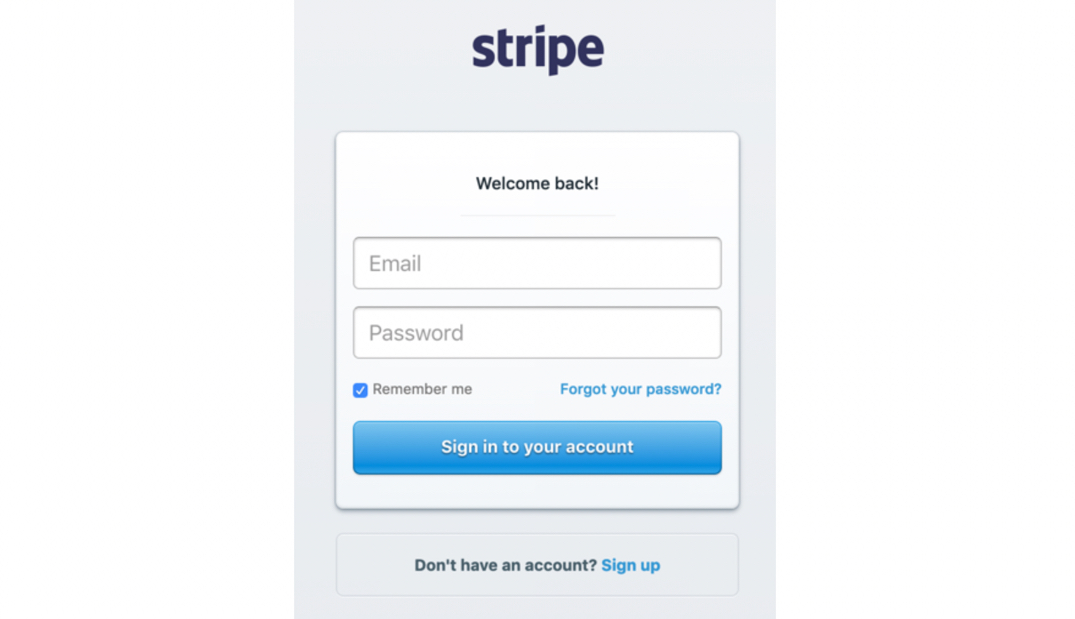
If you do not have a Stripe account, create one.
PayU
1. To connect with PayU, click on PayU logo.
2. Type the POS ID (pos_id), OAuth protocol (client_secret) and Second key (MD5). (The MD5 is in your PayU account. To get there, log into PayU and go to My Shops > Shop details > Point of sales and generate the configuration keys).
3. Click Connect
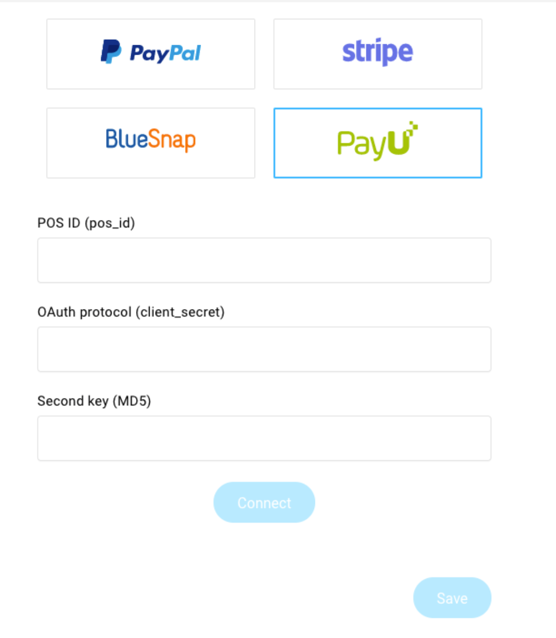
If you do not have a PayU account, create one.
Square
1. To connect with Square, click on the Square logo and then Connect with Square. You will be redirected to the Square login page.
2. Log in by typing in your email address and password and clicking on Sign In.
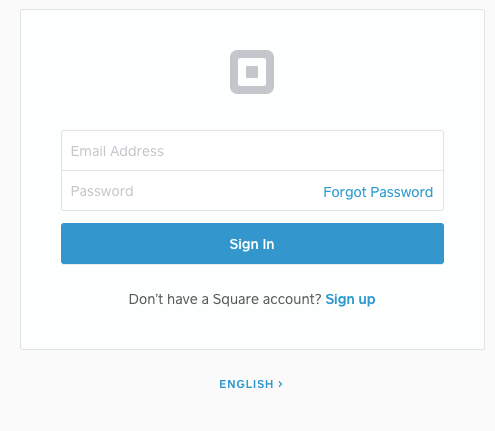
If you do not have a Square account, create one.
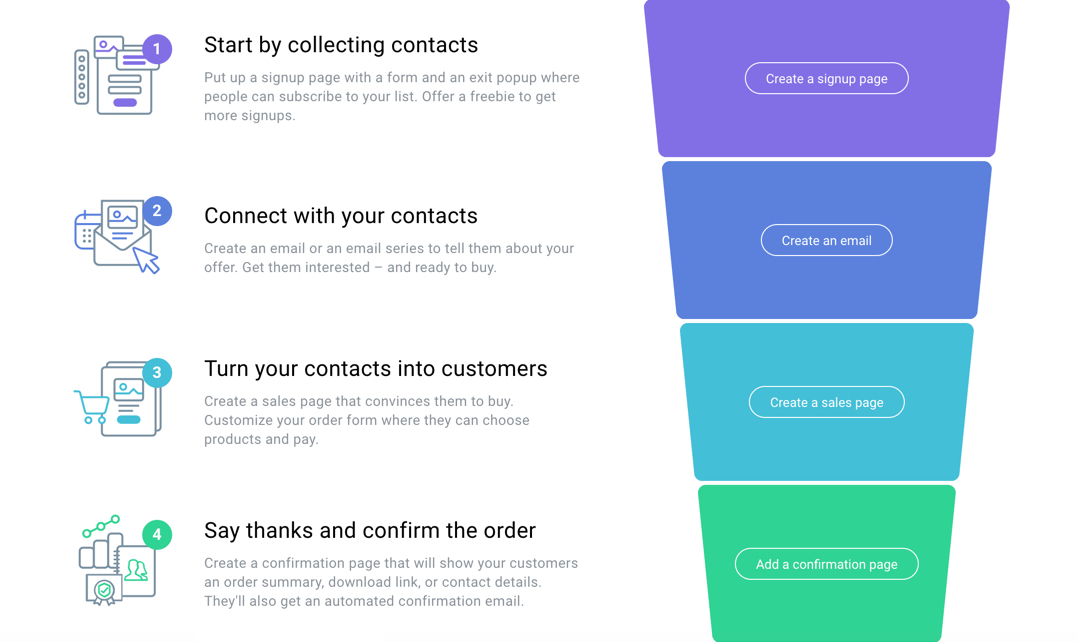
Once you configure the payment method, click Save. You will now see your funnel, consisting of 4 stages (in the case of full sales funnel):
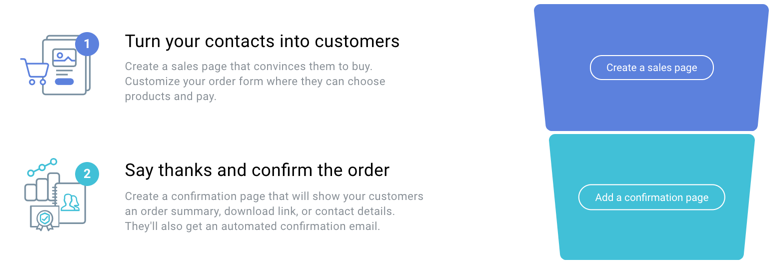
or 2 stages (in the case of quick sales funnel):
To continue setting up your funnel, visit this section.
Setting up a Facebook ad
After setting up your first funnel page, you can create a Facebook ad for it.
To do that, click on “Create an ad”. You will be redirected to the ad editor.

All linked ads will appear on the top of the funnel. If ads are active, we will show overall clicks and reach.
Note: The ad will be linked to the first page of the funnel and cannot be changed. The ad can only be created for the first page of the funnel.
For more information on Facebook ads, please visit this page.


