How to create Facebook Ads in GetResponse?

Facebook Ads integration allows you to extend your marketing actions by reaching out to people on social media directly from your GetResponse account. You can create ads for Facebook Pages and Instagram accounts connected to them. Facebook ads can be created for a variety of audiences making sure that it reaches the people you want.
Before you begin:
- You need to have admin user permissions on at least one Facebook Page to run an ad.
- You need to connect your Facebook Ads account with GetResponse.
- You need to add a credit card to the Facebook Ads account.
- Make sure that the content of the ad you want to run is in line with Facebook ads requirements.
- Disable adblockers to make sure the Facebook Ads creator works properly.
Initial creation
- Go to Paid Ads and click Create Ad.
- Select Engage audience.

- Engage audience helps to get more visits to your website. For Facebook Ads you need to select List or segment targeting.
You can also choose Search ad for Google ads without a subscription form.
- Enter a name for your ad.
Ad placement
Click on Select placement in Ad placement section to select a Facebook Page and/or Instagram profile you want to link with your Facebook Ads account. If you have an Instagram profile connected to Facebook Page, you will see it next to your Facebook Page name. If your ad account is not connected yet, you can also go to the integration page from here to connect it.
Where do you want to run your ad?
Tick the box if you want to place the ad on the feed of the selected page and if you want to place the ad on the Audience Network. If you have an Instagram profile, you may place the ad in the Instagram feed and Instagram Stories.
Click here to learn how to connect an Instagram Account to a Facebook Page.
What devices to display your ad on?
Select the devices you want to display your ad on.
Content
Catch your audience’s attention with the content of your ad. It’s what they see when the ad is displayed and should clearly state what you’re promoting and encourage them to click it.
- Click Create content.
- Add an image, or multiple images to create a carousel or a video to advertise your content.
 Note: You can use: JPG, PNG, JPEG up to 10MB for an image, or .mp4, .mov up to 50MB for a video. Facebook recommends that the video should be 15 seconds or shorter.
 - Add a Message introducing your ad to your post for your viewers (optional).
- Select a Page you want to promote with your ad. It can be a GetResponse landing page your ad will direct to or you can select a Custom URL for an external web address.
- Add a Headline to draw in your audience.
- Select a Button type that will show next to your ad.
- Add your product Description (optional).
- Click Save to see your ad preview. You can check how your ad will look like on mobile or desktop devices.
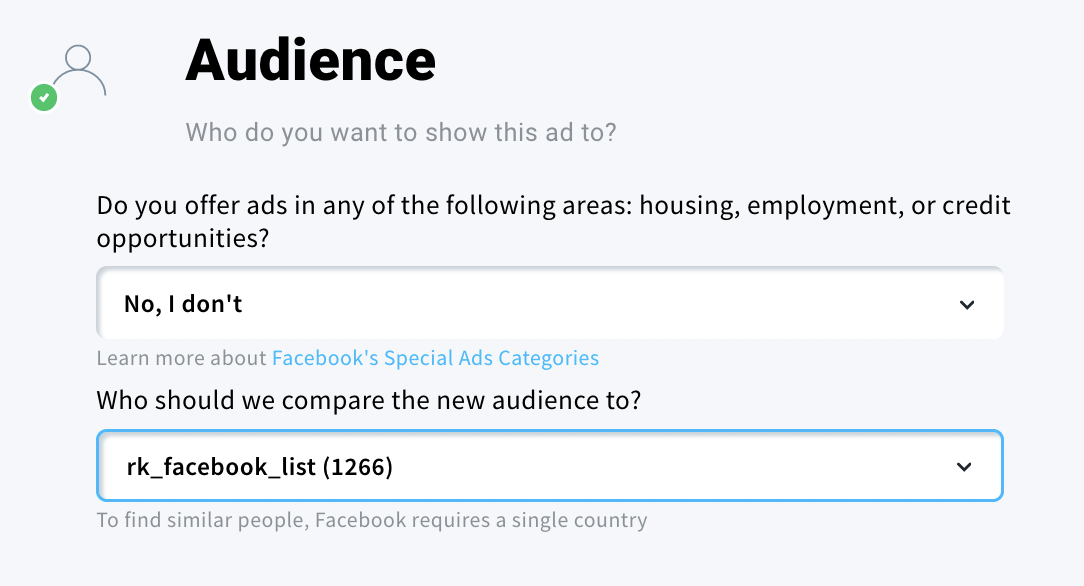
Audience
Selecting a specific audience can help your ad to reach the right people. You have two options for that.
- Click Select audience to start setting up your audience.
- Choose if you are creating a Special Ad category or not.
Click here to learn more about Facebook Special Ads rules. - Select the list or segment you want to compare the new audience to. It needs to have at least 100 contacts.
- Click Save to save this step.
Runtime and budget
Set up the runtime of your ad and its budget.
Start with the ad runtime. You can control how long your ad should run. You can set it to start today or schedule it for later to sync it with your promotions and special offers.
- Select the start date.
- Keep I want to run this ad indefinitely box checked if you don’t want your ad to expire. If you prefer, you can uncheck it and set up an end date.
As the last step, set up the budget for your ad by deciding how much you want to spend daily using a slider.
The monthly calculation will be shown below.
You can edit your budget later to help your ad earn more clicks.
Click Save once you’re done.
The last step is to click Publish Ad to set your ad as active.


