Black Friday Flash Sale
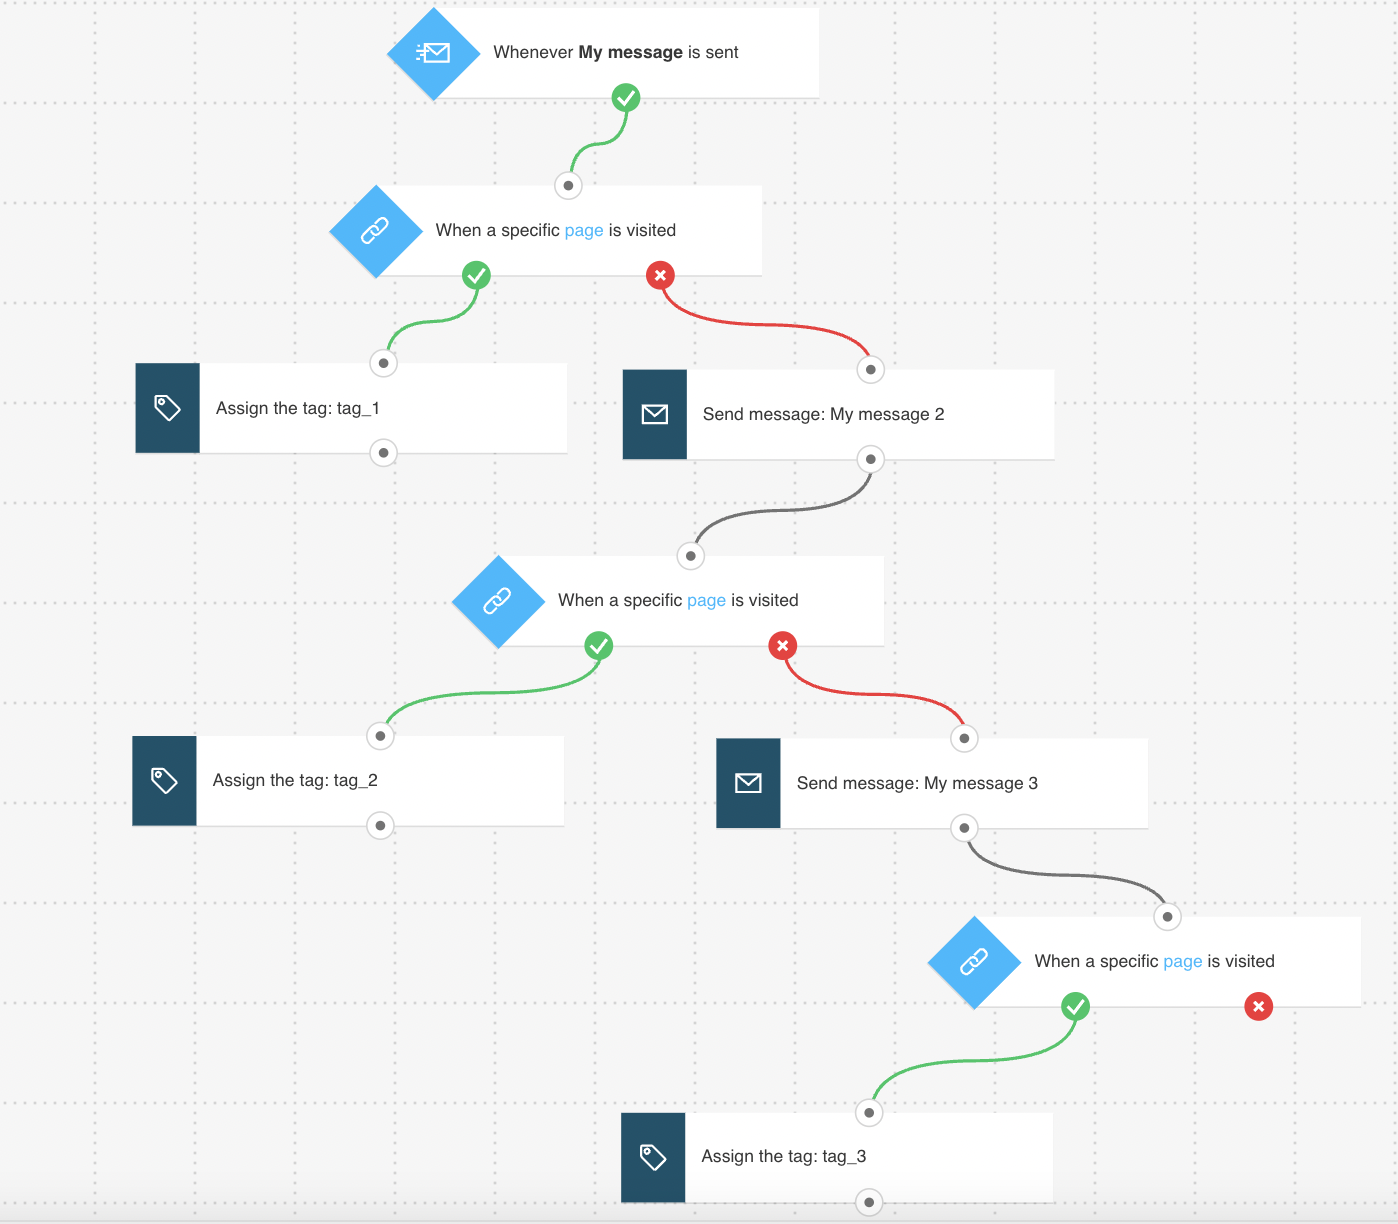
The Black Friday Flash Sale template lets you send a sequence of emails featuring different products. It also lets you remind your customers about the time left until the end of the sale. It checks whether your contacts have bought your product to avoid sending them more emails. This way you can focus on the contacts who are yet to convert. Finally, it assigns them new tags to help you keep track which of the offers made them click.
Template Overview
Category: Sales promotions templates
Elements in the template: 9
Minimum number of elements to configure: 9
Here’s what you’ll need to configure the elements and publish the template as a workflow:
- 2 automation messages or messages (or drafts) that can be used as one.
- Tags (optional). They will help you identify your customers if you want to target them specifically or add them to another workflow. You can create tags as you’re building the workflow, but it’s best to have a basic tagging plan set.
Starting the workflow
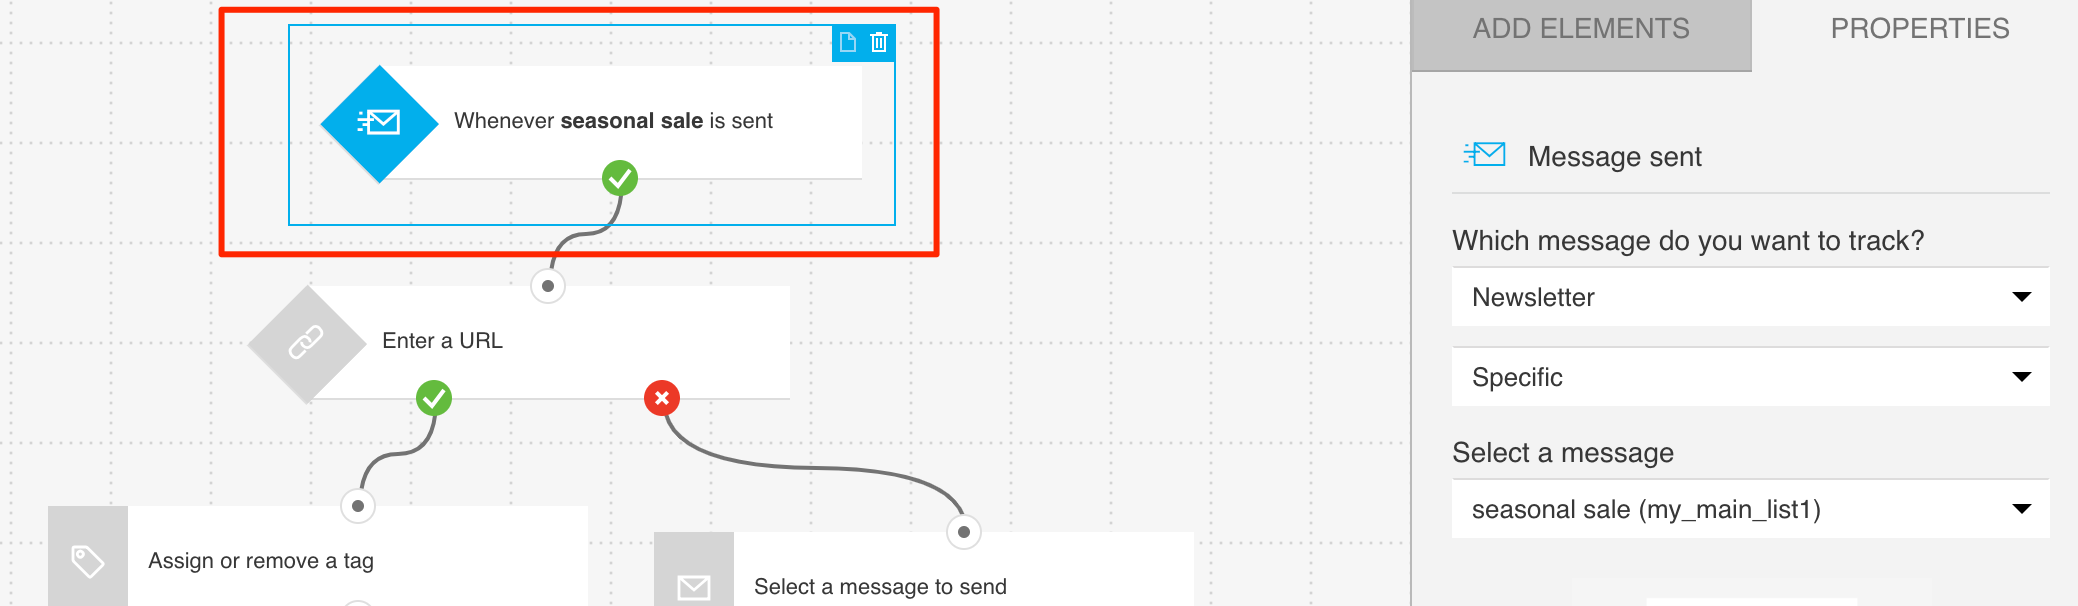
1. For the Message sent condition is preset to any message. Click the element to open the Properties tab and select the sale announcement email you’ll be sending out. Be sure to schedule the message before you start configuring this element.
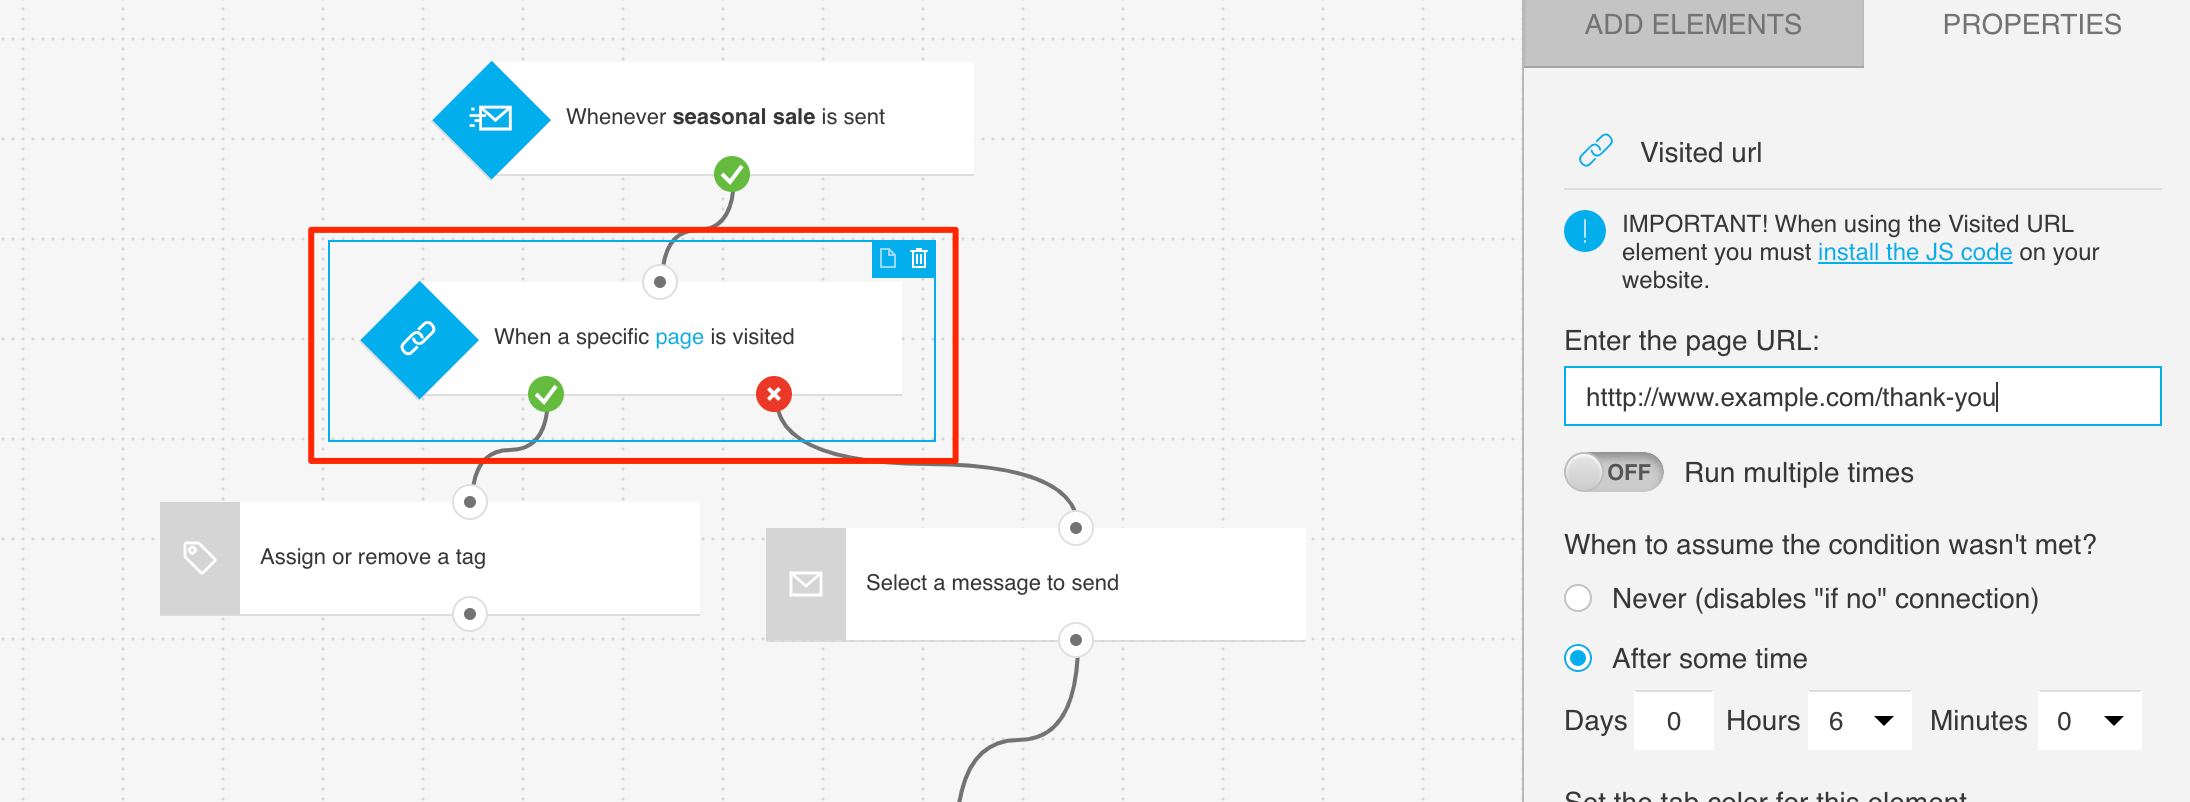
2. Configure the URL visited elements to track if your contacts reached the post-purchase thank-you page:
a. Click the element. This will open the Get Web Connect button.
b. Click the Get Web Connect button, copy the snippet to the clipboard and after that click on ‘Back’ on the top left. (At this point it’s best to save it to a temporary document in case you copy something else to the clipboard).
c. Under Properties, enter the URL of the product site you want to track. Use a wildcard if you want to track visits anywhere on your site. To learn more about configuring the element and using wildcards, go to How do I set properties for the URL visited condition
Note: Once you’re done configuring the template, you’ll need to copy the snippet to your website’s management system or insert it directly into the HTML source code. For detailed instructions on installing the tracking code, please go to How do I add the tracking JavaScript code to my website?
The wait time for the condition should be set to 6 hours. After this time, customers who don’t complete their purchase will go down the negative path and receive a reminder email.
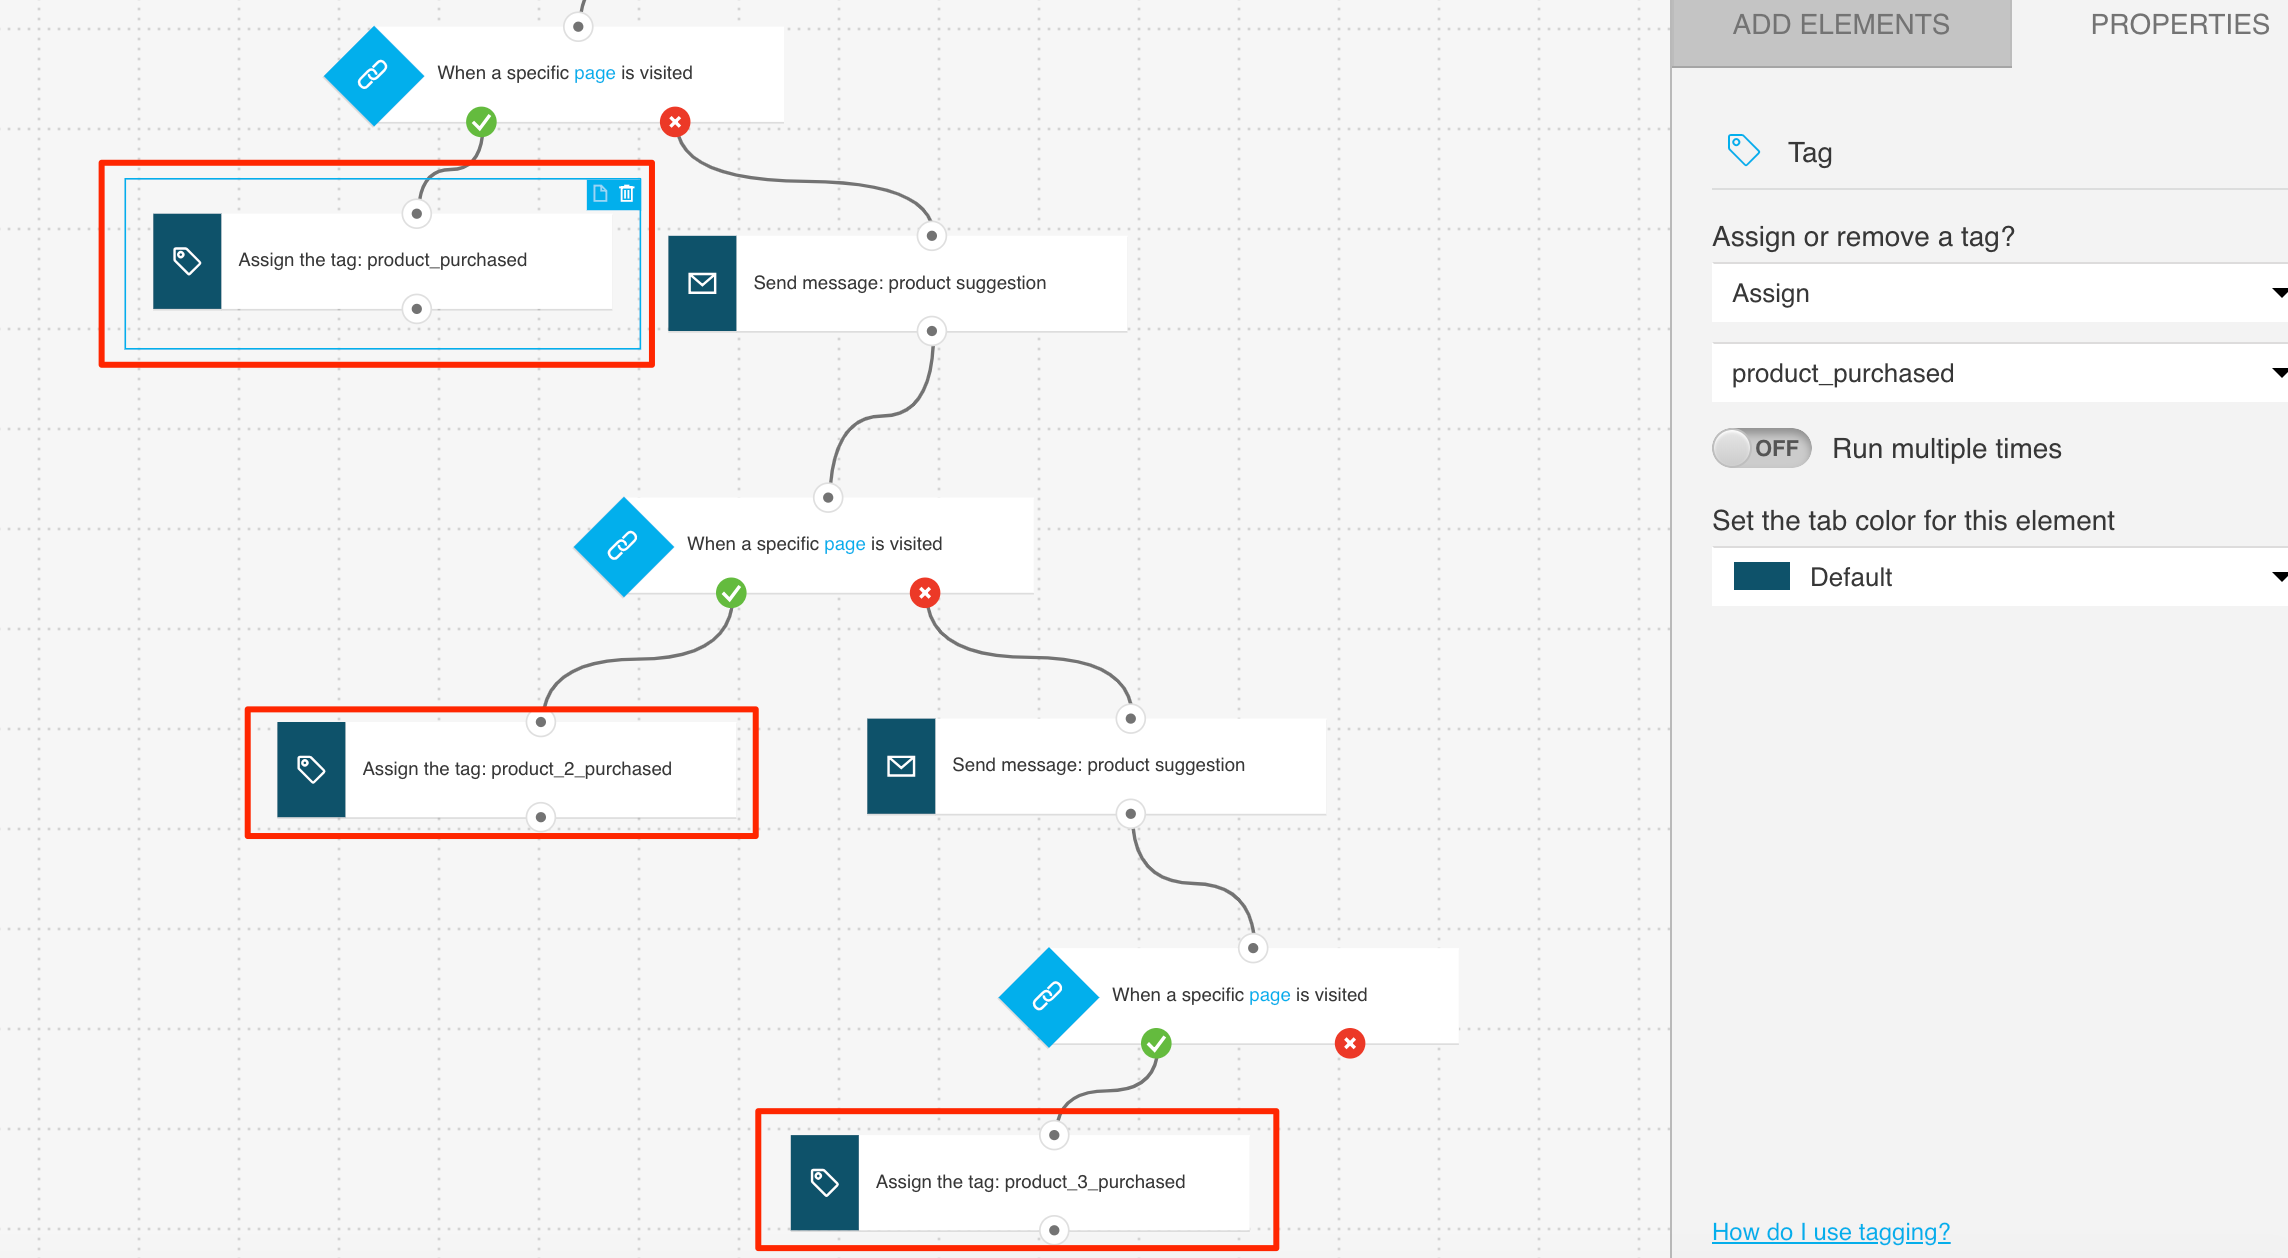
Targeting customers who’ve purchased from you
For each of the Tag actions attached to the “if yes” (green) connector of the URL visited conditions, select the tag to assign to contacts who returned to your site and completed their purchase. You can use different tags for each of the products they’ve purchased.
Retargeting contacts to increase sales
1. For each of the Send message actions linked to the negative (red) connector of the URL visited conditions, select the message with the follow-up offer.
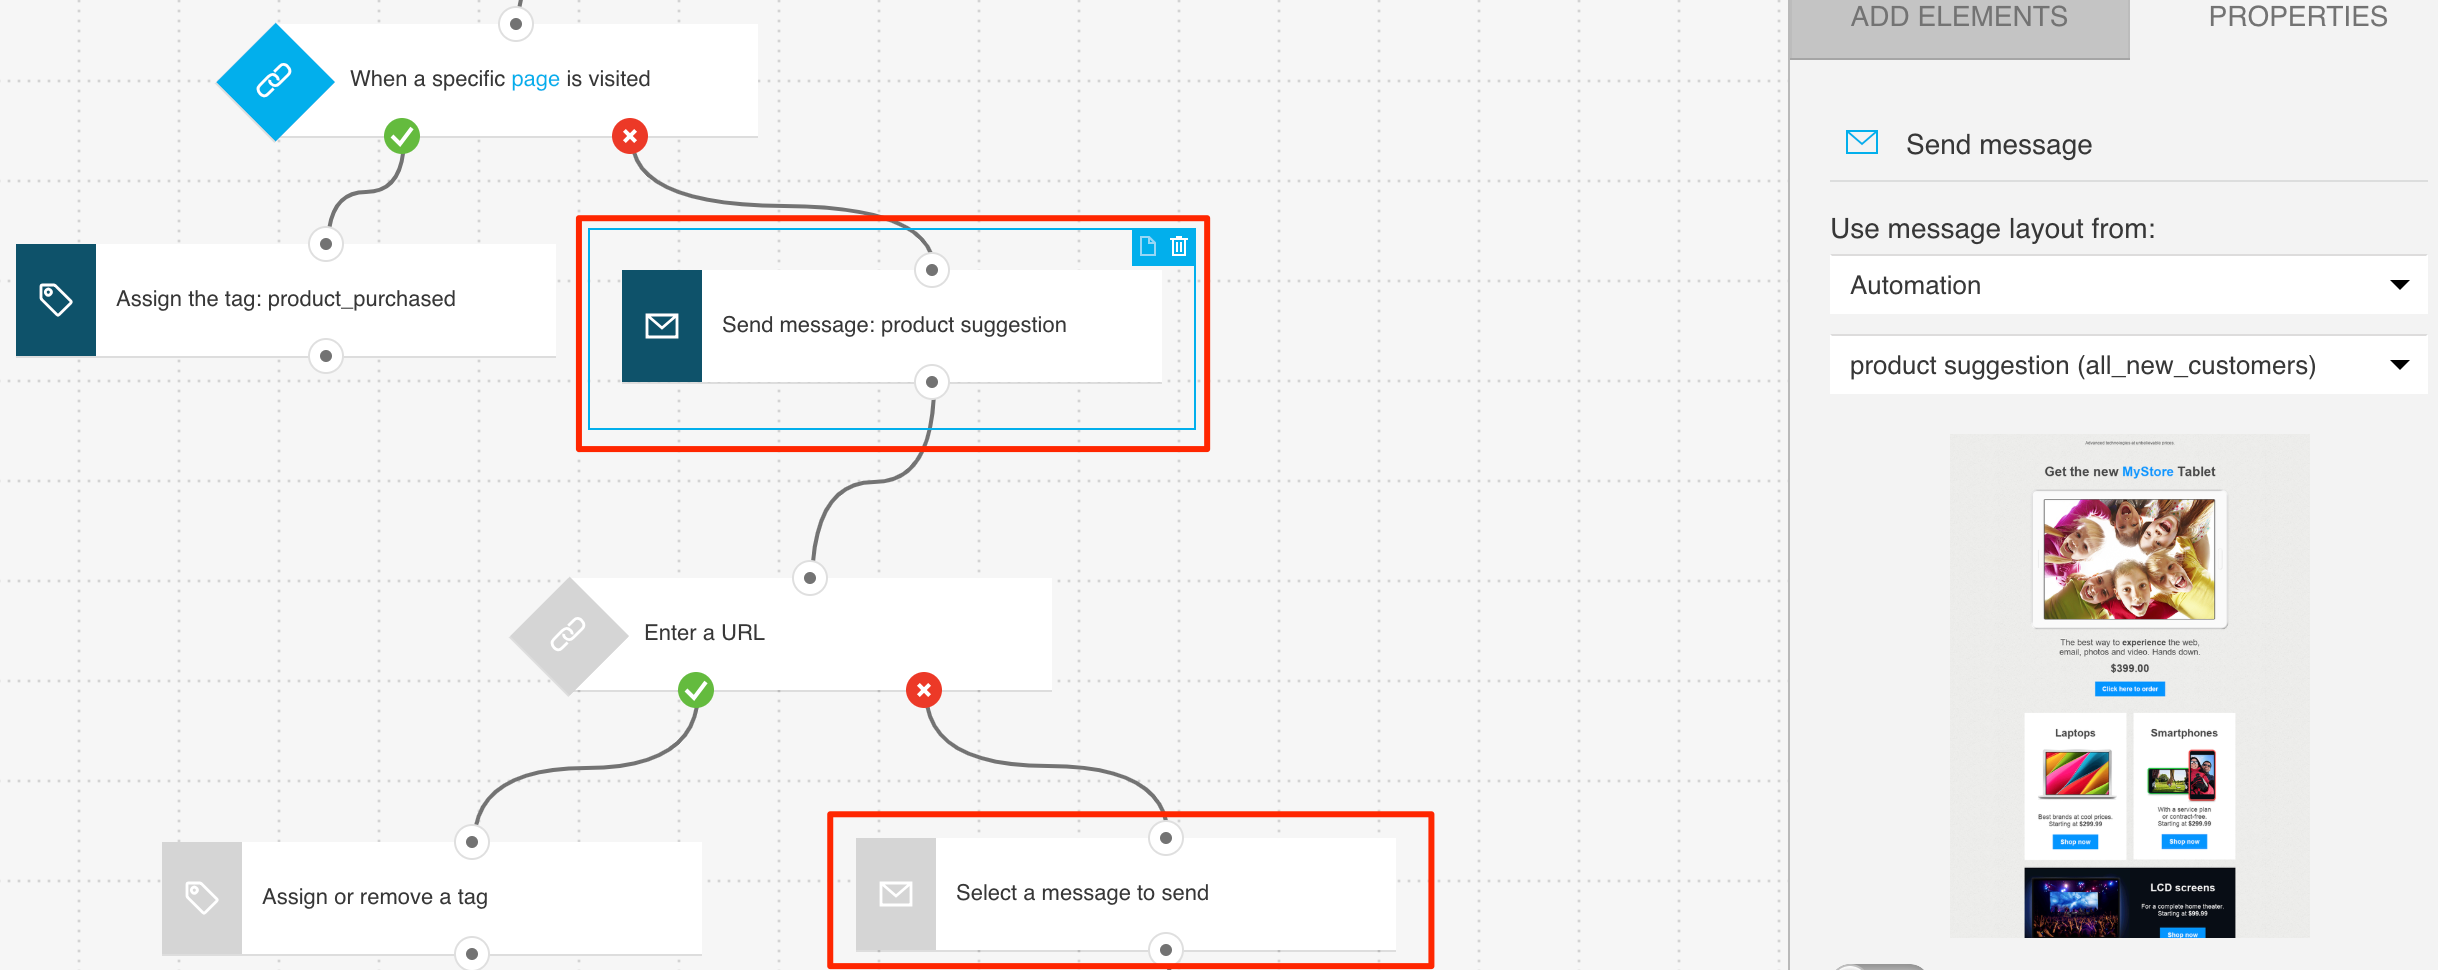
2. In the remaining URL visited conditions, enter the URL post-purchase thank-you page for a given product. The wait time for the condition should be set to 6 hours. After this time, customers who don’t complete their purchase will go down the negative path and receive a reminder email.

Finishing setup
Click Publish when you’re done setting up the template or Save and exit if you want to finish editing the template later (it will appear as a draft on the Manage workflows page).


