Black Friday Early Bird Sale
Use Black Friday Early Bird Sale to engage your customers by turning your campaign into a game. To do this, you’re going to use filters, personalized emails, and different discount codes.
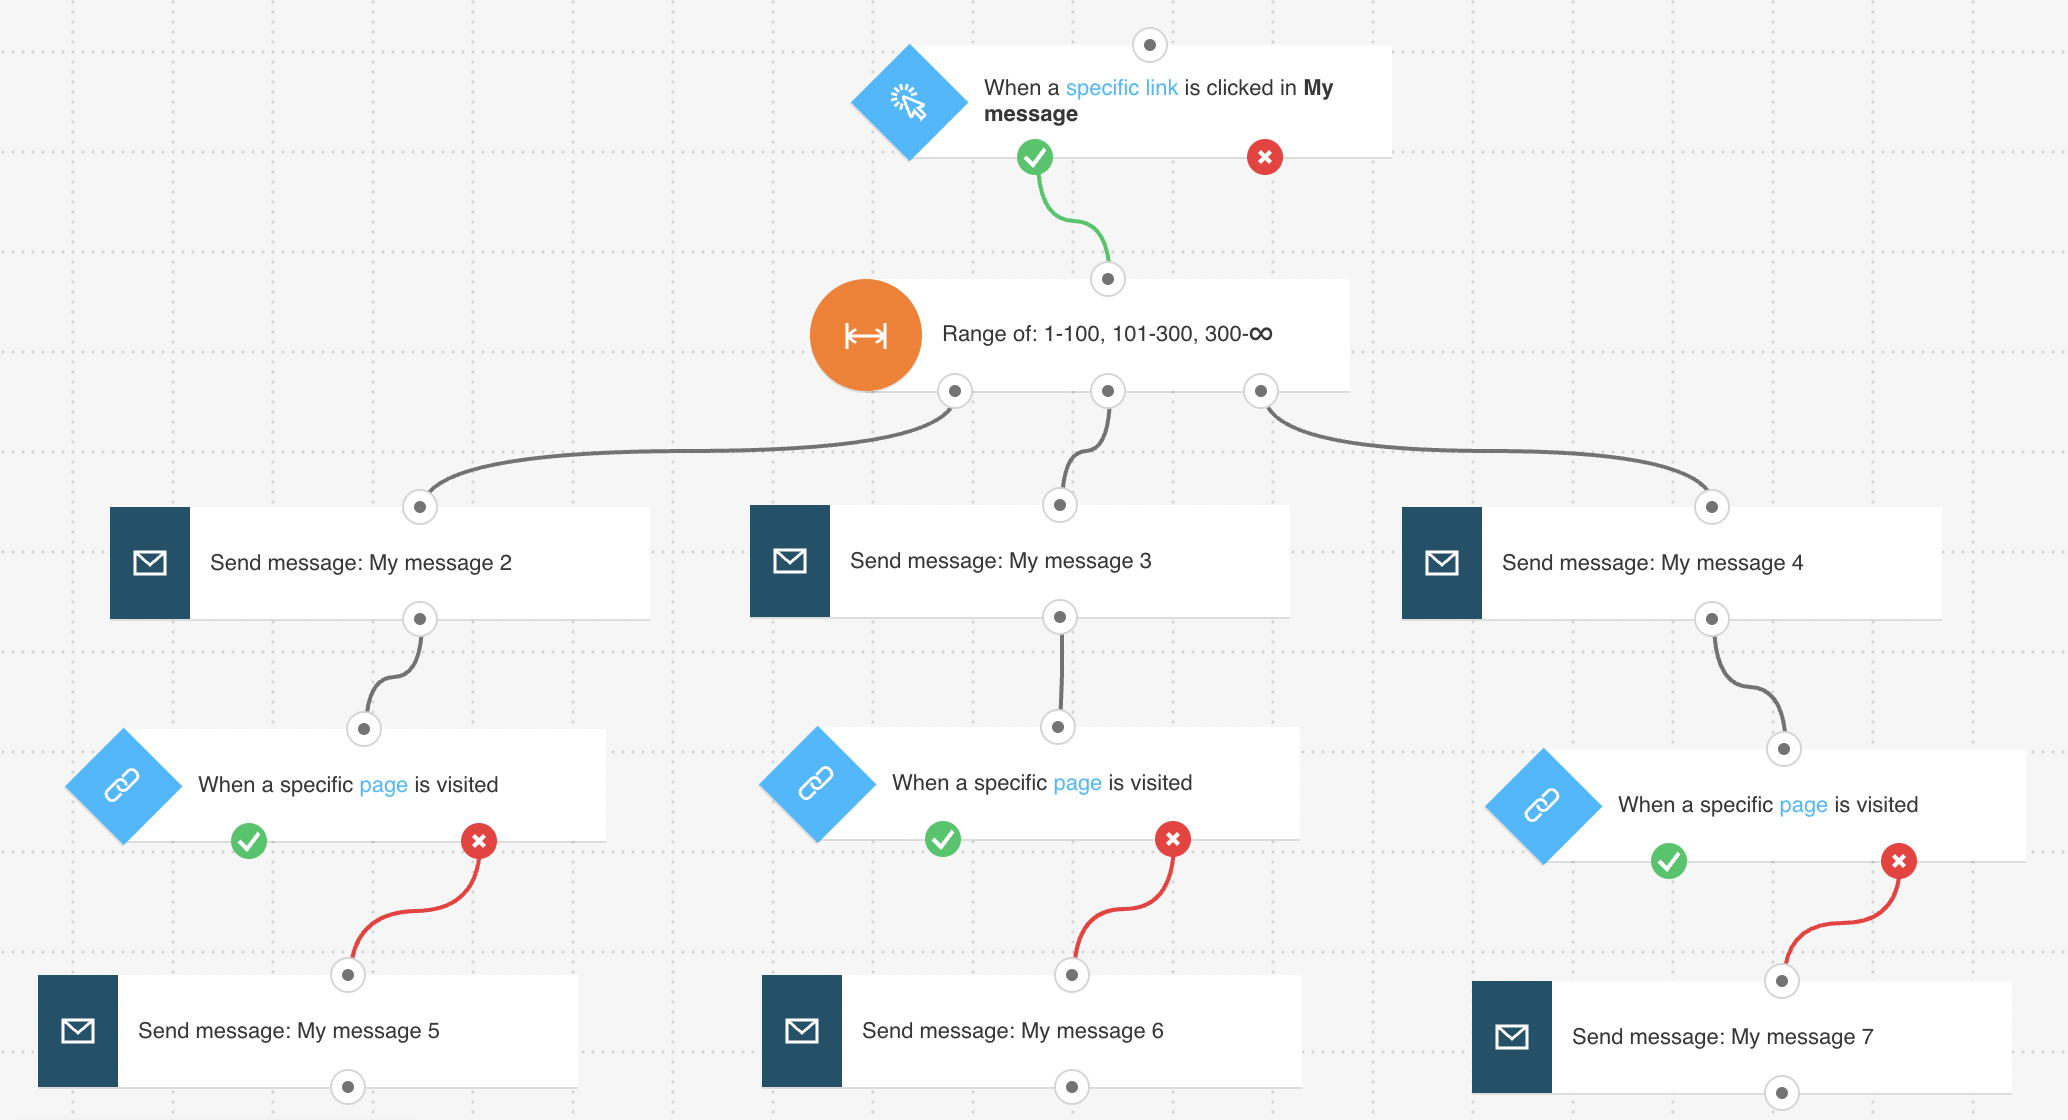
The workflow is triggered when your contacts click on a link in the message explaining the rules of the early bird sale game. Then, contacts go through a filter dividing them into three groups, based on how quickly they took action. Immediately after, contacts in each group get an email with a discount code. After 12 hours, the system checks if anyone converts. If they don’t, each group gets an additional retargeting email to remind them of the offer they’re about to miss out on.
Template overview
Category: Holiday templates
Elements in template: 11
Minimum number of elements to configure: 11
You’ll need automation messages or messages (or drafts) that can be used as one to publish this workflow.
Configuring the template
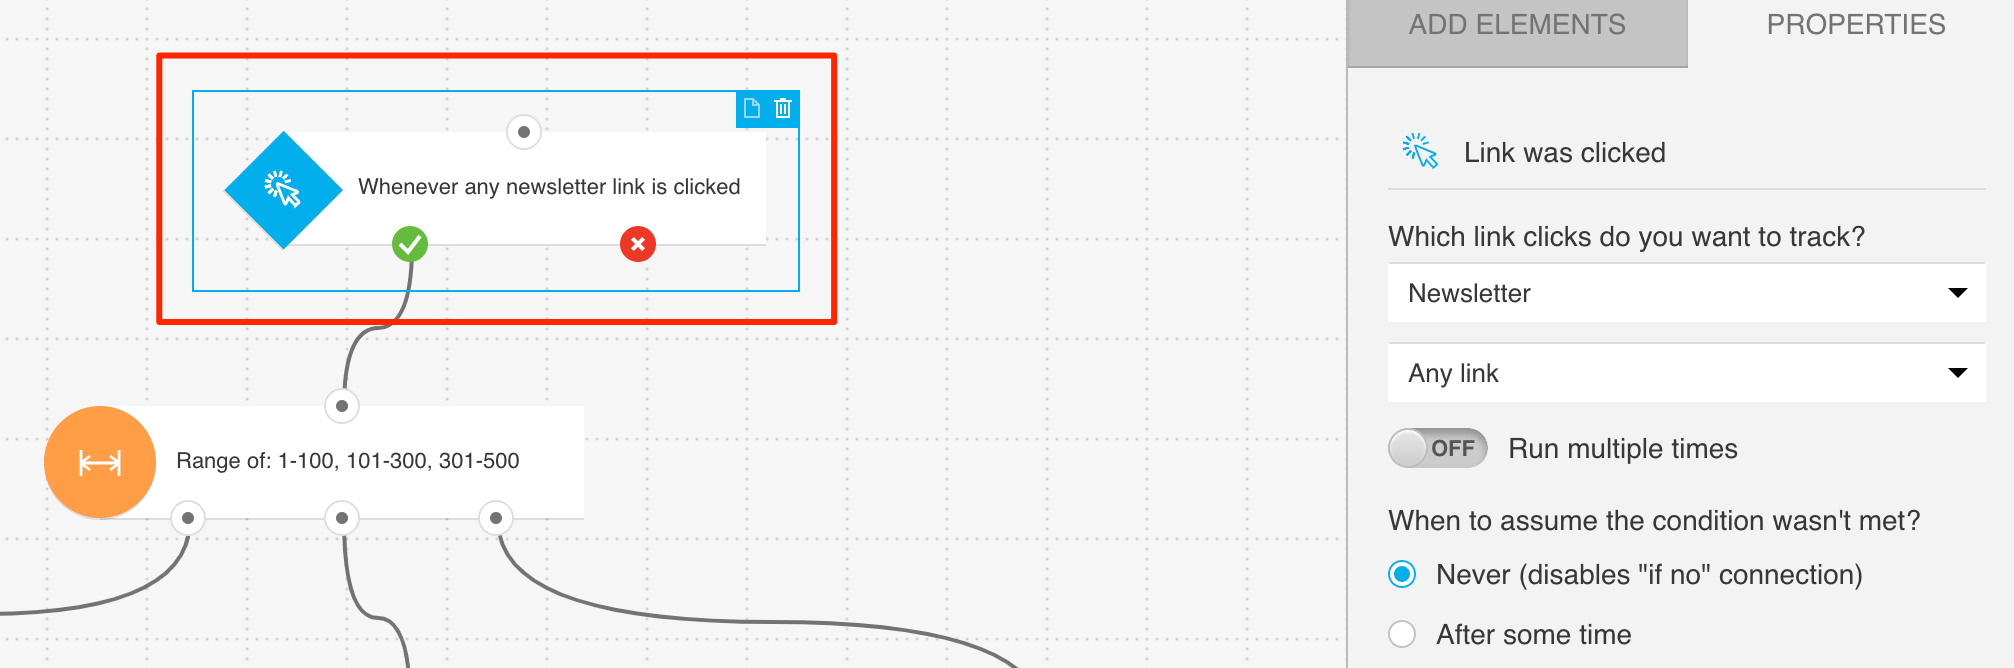
All greyed out elements need to be configured. The Link clicked? condition is preset to any newsletter/any link. You can modify the settings to better suit your needs. Click an element to open its Properties tab.
1. For the Link clicked condition, decide if you want to keep the default general settings or use the drop-downs to narrow down the condition to a specific message and link.
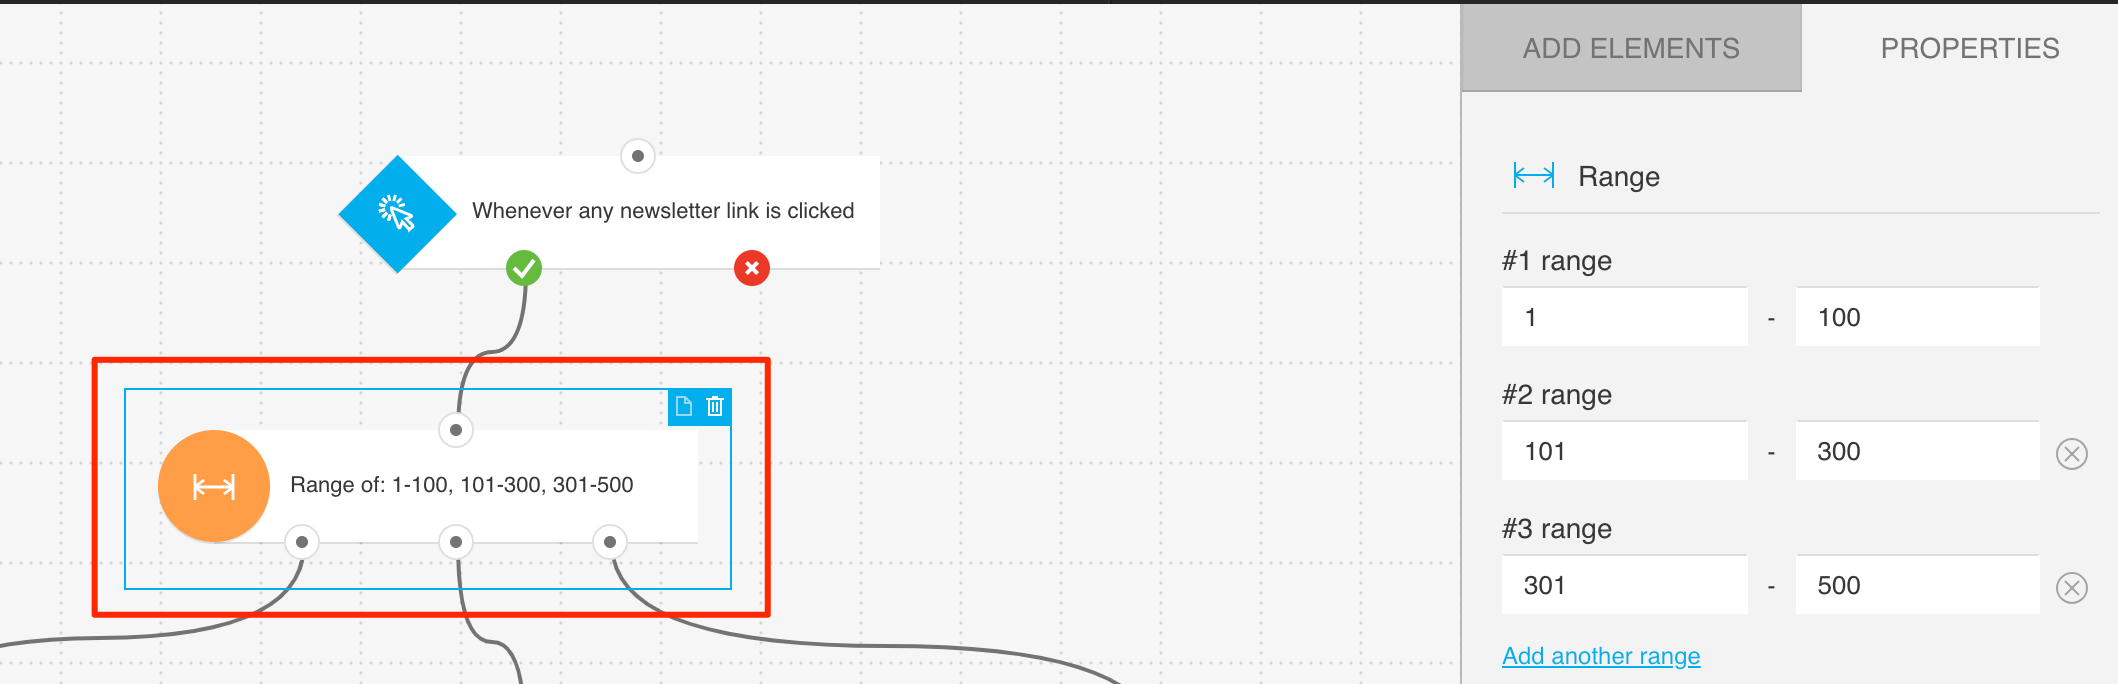
2. For the Range filter, enter the ranges based on how large you want to keep the groups. Your ranges might look like this: 1-100, 101-300, 301- 500.
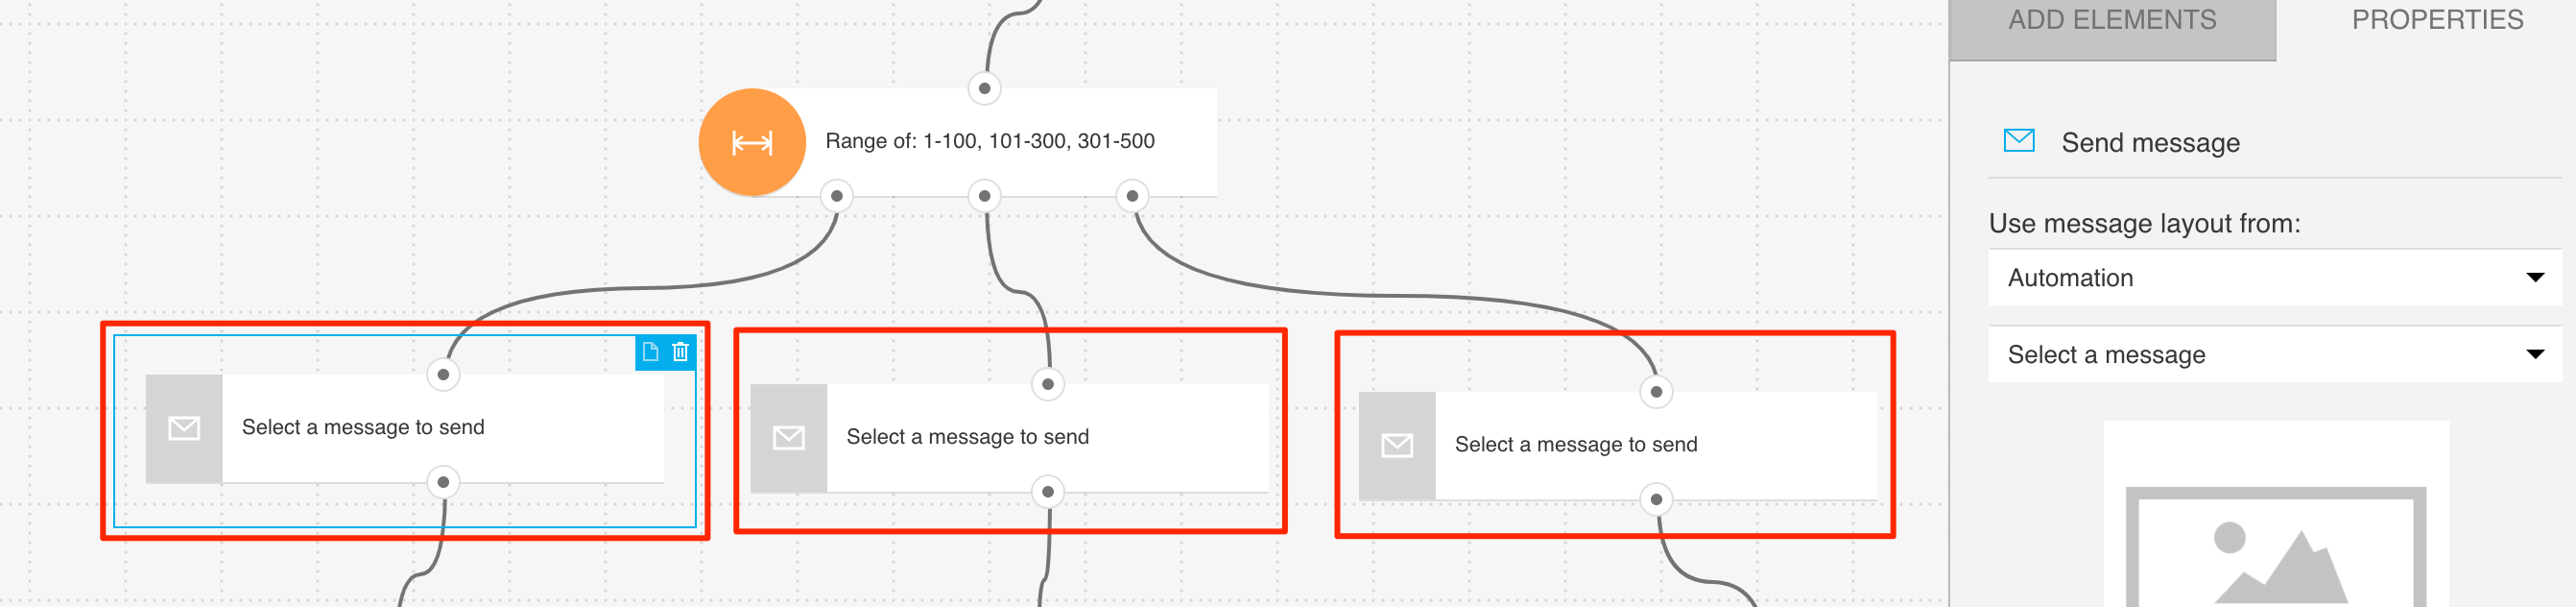
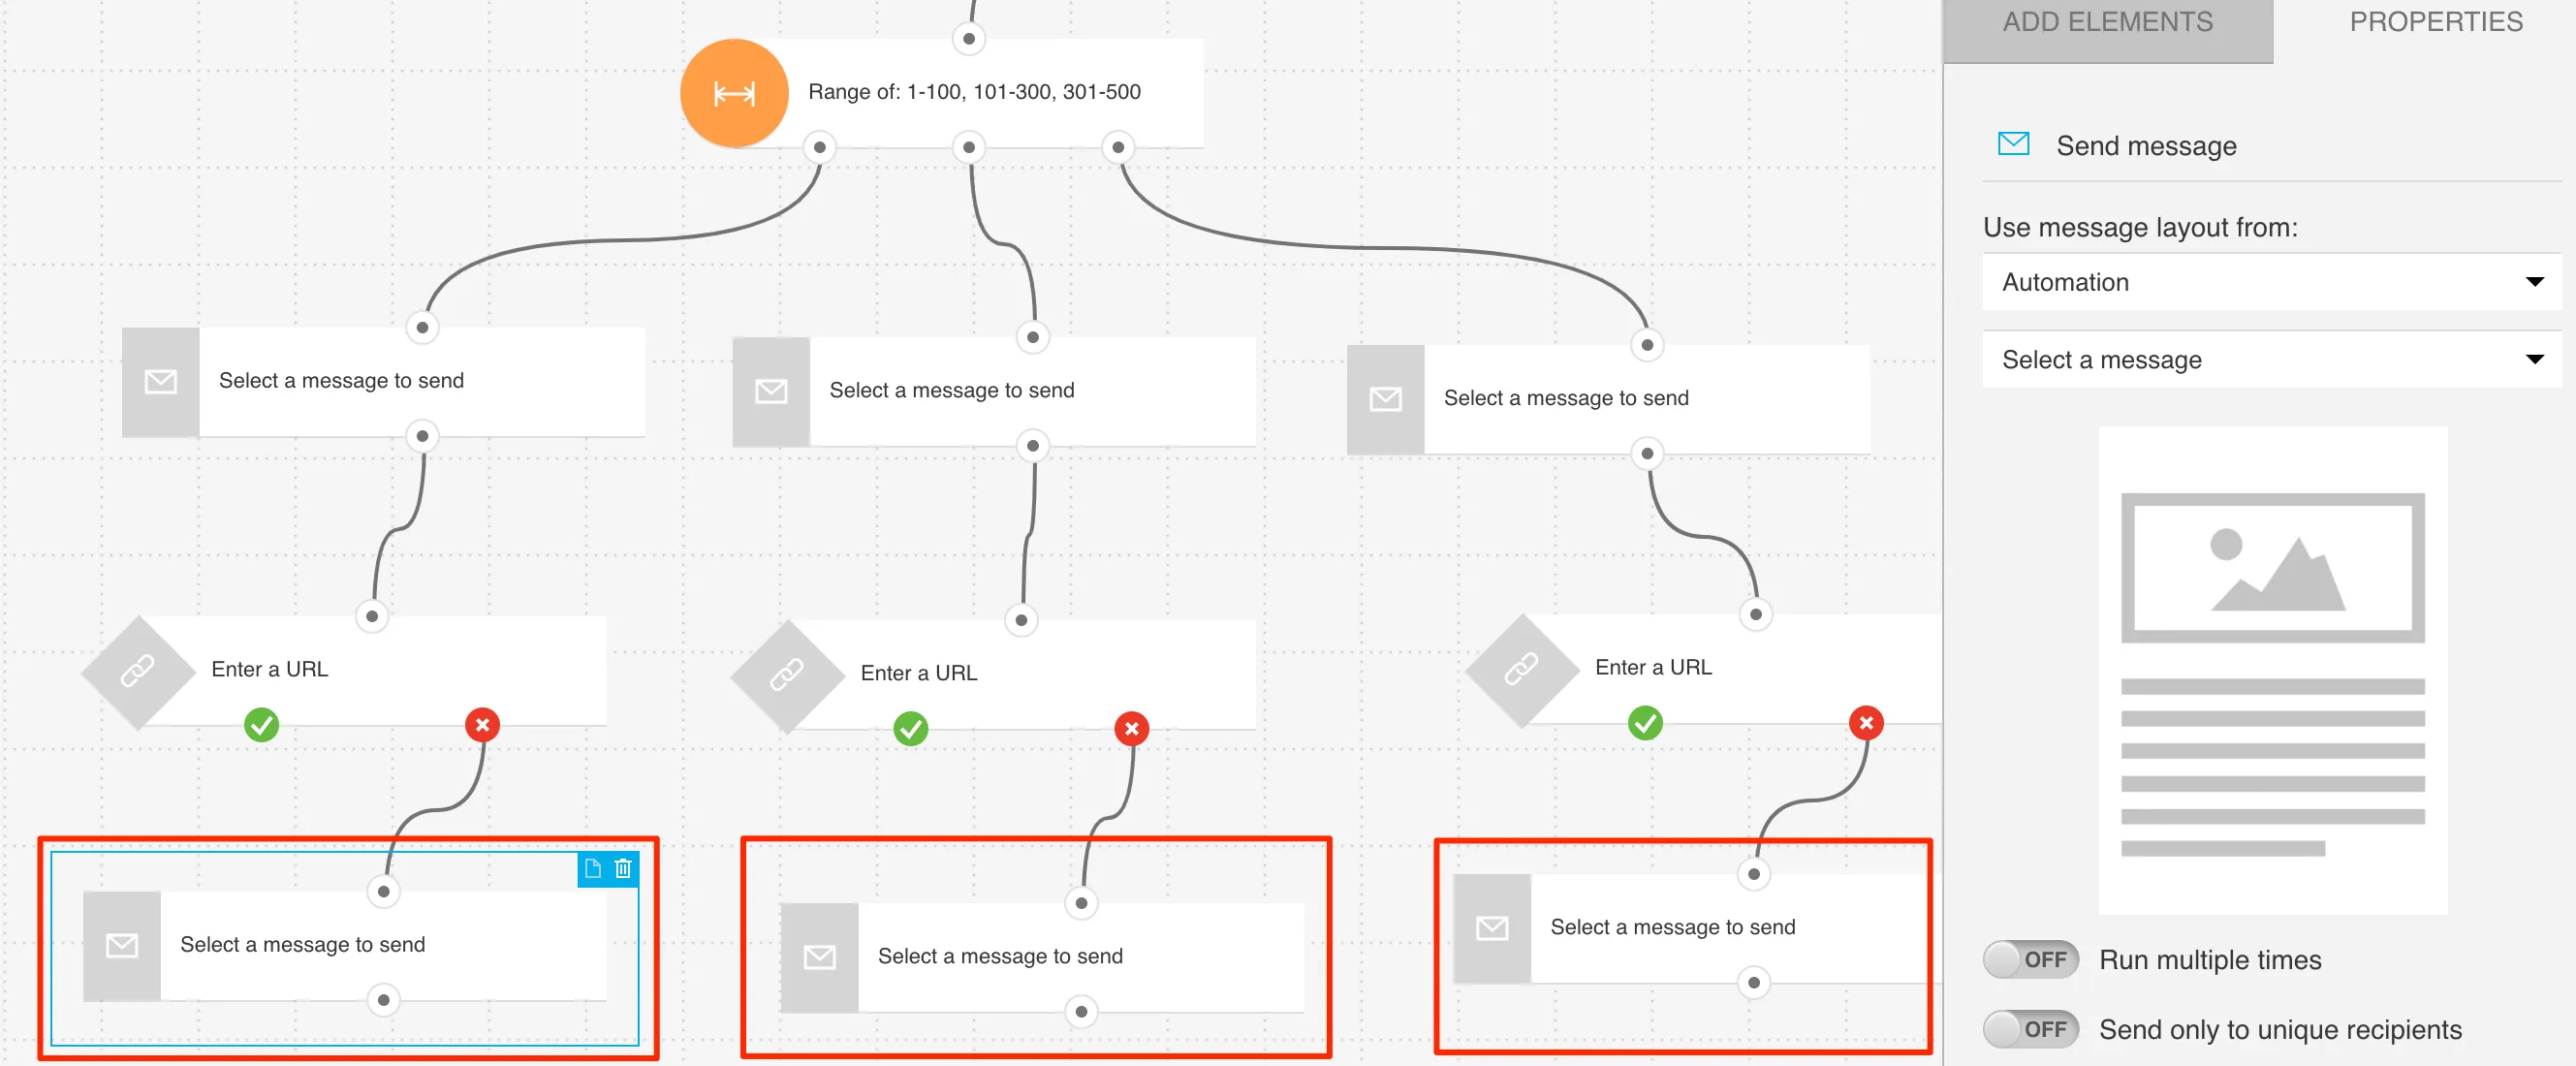
3. For each of the Send message actions, select the message you want each of the groups to receive.
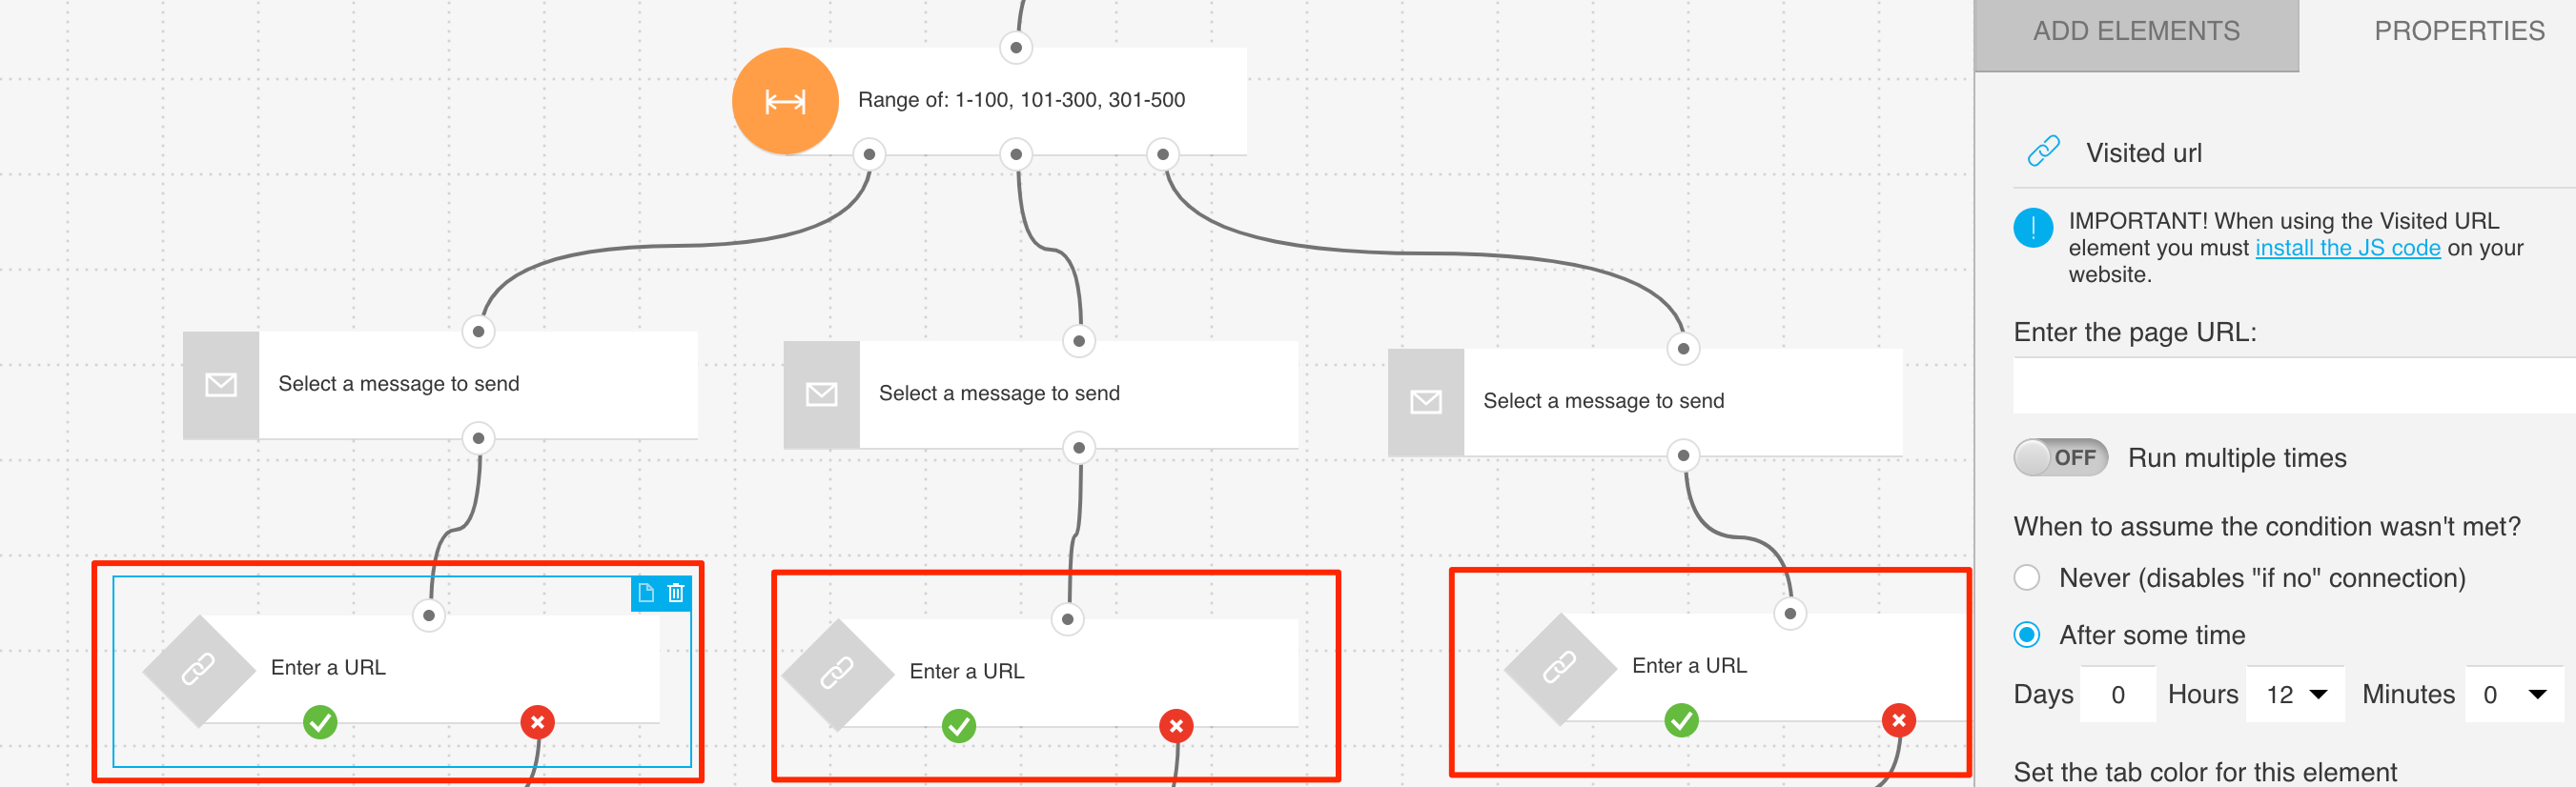
4. Configure the URL visited elements to track if your contacts reached the post-purchase thank-you page:
a. Click the element. This will open the the details from where you can click on Get Web Connect.
b. Click the Get Web Connect button, copy the snippet to the clipboard and after that click on ‘Back’ on the top left. (At this point it’s best to save it to a temporary document in case you copy something else to the clipboard).
c. Under Properties, enter the URL of the product site you want to track. Use a wildcard if you want to track visits anywhere on your site. To learn more about configuring the element and using wildcards, go to How do I set properties for the URL visited condition?
Note: Once you’re done configuring the template, you’ll need to copy the snippet to your website’s management system or insert it directly into the HTML source code. For detailed instructions on installing the Web Connect code snippet, please go to How do I add the tracking JavaScript code to my website?
The wait time for the condition should be set to 12 hours. After this time, customers who don’t complete their purchase will go down the negative path and receive a retargeting email.
5. For each of the Send message elements, select the retargeting message to send.
6. Click Publish when you’re done setting up the template or Save and exit if you want to finish editing the template later (it will appear as a draft on the Manage workflows page).


