How does a marketing automation message work?
A marketing automation message is a special type of a message used only as an action in marketing automation workflows. The main difference to other messages you can use in GetResponse is that you don’t set the sending properties. The message gets sent as a result of all conditions and filtering that you set up in the workflow.
The marketing automation message is created in Automation >> Automation messages. It can also be a copy of a layout of an existing message (newsletter, autoresponder, A/B test message, or draft). It’s created automatically the minute you choose your source message type to be sent as an action in your marketing automation workflow.
All original images, text, and hyperlinks are being carried over. However, the original settings regarding the sending of the source message no longer apply to the automation message. For example, if you choose an autoresponder, only its content is copied. To send the automation message, we use the settings of the workflow where you use it.
Converting any message type into an automation message doesn’t affect the source message in any way. It continues to be sent according to your settings.
When you choose an A/B test type of message, the marketing automation workflow doesn’t continue running the tests. It simply uses the template that you’ve chosen. For the time being, if you want to do multivariate testing, you need to use the standard procedure.
How do I create an automation message draft?
If you want to create an automation message, start by creating a draft. If you want to convert an existing newsletter, A/B test, autoresponder, or draft, go straight to the section Converting a draft or another message type.
Creating an automation message draft
- Go to Automation from the dashboard.
- In the Automation feature space, click Automation messages.
- Click the Create automation message button.

- Configure the automation message settings:
- type in a message name. Only you can see it. It will help you to find the message on the Automation messages page.
- select a linked list. The message draft will be saved to the list you select. The footer will display in the language chosen for this list.
- select a “from” field. You can pick a different reply-to address if necessary.
- add a subject line.
- (optional) Turn on click tracking with Google Analytics.
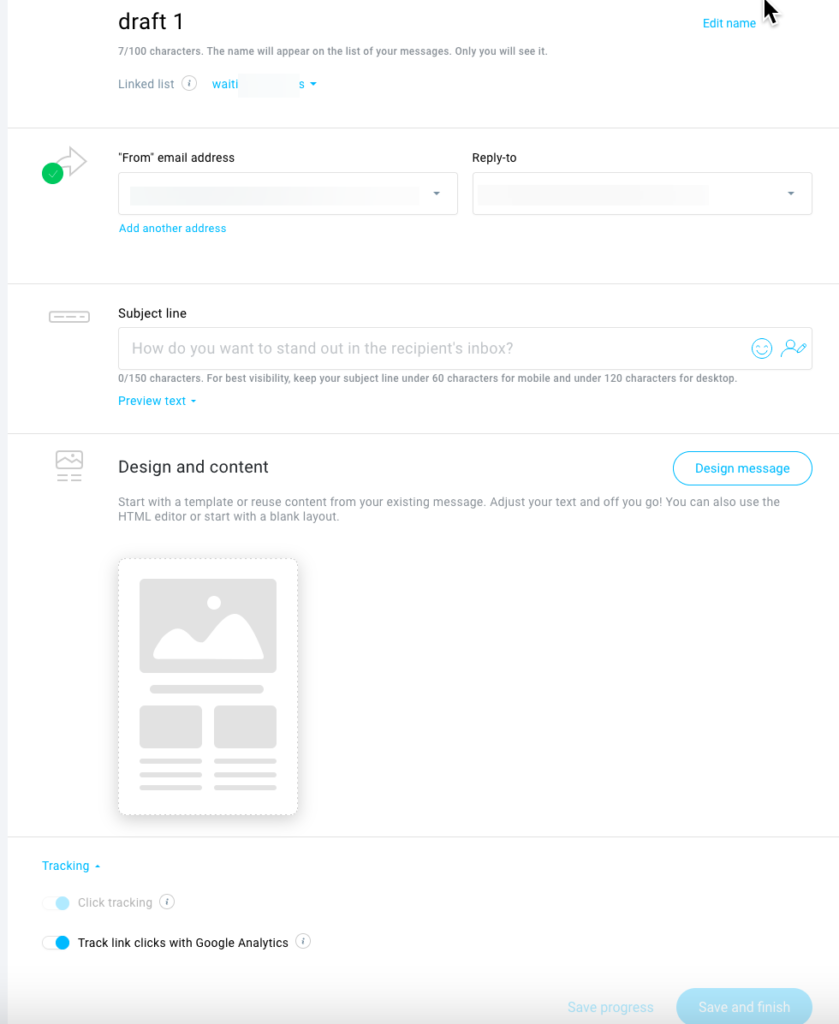
- Click the Design message button when you’re done to proceed to the template gallery.
- Select a template. Use the side menu to browse by category. Then, click to choose and proceed to the message editor.
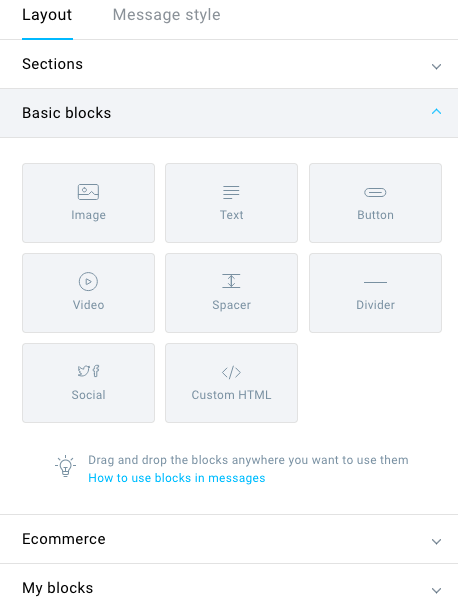
- Edit the template. You can add, rearrange, and edit text and images. Click the tabs in the side toolbar to view more editing options: Sections, Basic blocks, Ecommerce (includes Recommendations, Abandoned cart, and Product box), and My blocks.
- Click Next to go back to your message settings. There, you can click Save progress to save your current progress and stay in your message settings page, or Save and finish to save your message and go back to Automation messages.
Now that you’ve created an automation message, it’s time to use it in a workflow. You’ll be able to reuse this message in other workflows.
Selecting your automation message
- Go to Automation and start creating a workflow. You can use a template or build it from scratch.
- When configuring a Send message action, click Automation and pick a message of your choice.
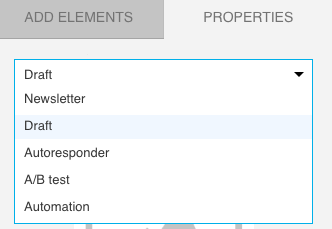
Converting a draft or another message type to an automation message
- Go to Automation and start creating a workflow. You can use a template or build it from scratch
- When configuring a Send message action, you can use a message draft or any message you’ve previously created.
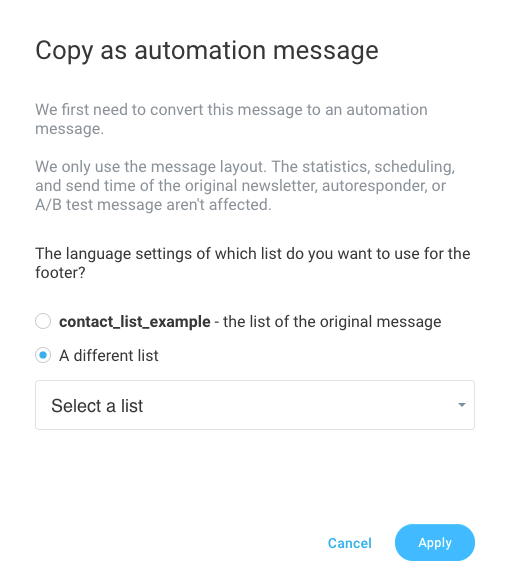
- In a popup modal, confirm that you want to copy the message as an automation message and set the language of the footer. You can:
- use the footer of the original message, i.e. the language of the list when the original message was created
- change the language of the footer in your automation message. To do it, select the list you want to link the message to. The footer will display in the language specified for that list in List settings.
You’re done. You can now continue editing your workflow and save and publish it when you’re done.
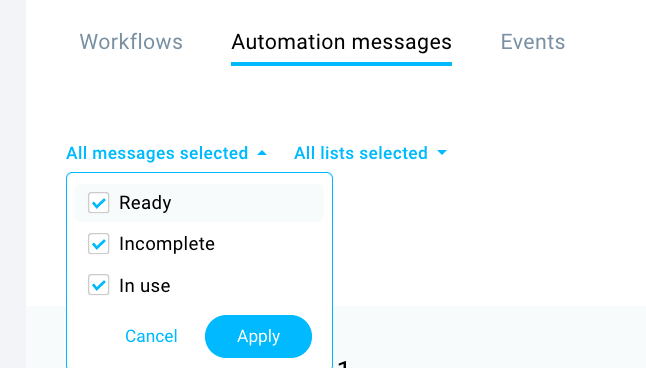
To view your existing automation messages or drafts, go to Automation>>Automation messages. Use the drop-down menu to view just ready, incomplete, in use, or all of them.
How do I edit or reuse my automation messages?
You can edit automation messages under Automation messages in Automation. You can:
- edit your automation message settings (change the message name, change and personalize the subject, and edit the “from” and reply-to email address);
- edit the message template.
To edit automation messages:
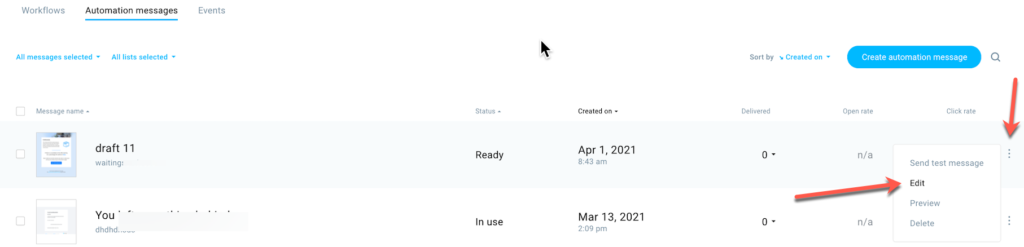
- Go to Automation>>Automation messages and find the message you’d like to edit.
- Expand the Actions menu next to the message and select Edit to open the editor.
- Edit your message settings and the From field. When you’re done, click Next step.
- Edit your message just like you edit a newsletter template. When you’re done, click Next step. This saves your changes and takes you back to Automation messages.
To reuse the automation message you’ve just created, select Automation for message type and select the message.
Where do I find statistics for my automation messages?
Messages sent as a part of your marketing automation workflow have their own statistics that can be found on Manage automation messages page. You can access this page by selecting Manage messages from the main Automation menu. The statistics for the messages that you used as an automation message template stay intact.
How can I stop contacts from receiving duplicate messages in a workflow?
The Send message action can be set to send a message to unique recipients only. This option is helpful when the same person is in multiple contact lists.
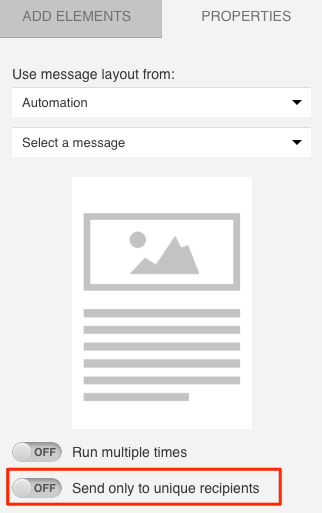
By default, marketing automation treats the same person in different lists as individual contacts. So, the same person can “enter” the same workflow multiple times if they are in different lists and receive the multiples of the same message.
To avoid sending the same message to duplicated contacts, enable Send only to unique recipients. When the contact enters the element the first time, they’ll get the message. After that, every time they get to this element, they will pass through it but won’t be sent the message.
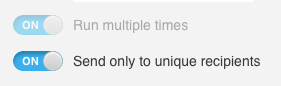
When you move the switch to ON, Run multiple times turns on automatically and is disabled in the ON position. This ensures that duplicated contacts can go through the Send message action to the next element.
Can I choose when people get automation messages?
You can decide when to start and stop sending automation messages. By default, Send message sends an email as soon as your contacts reach this element in a workflow.
To pick specific start and end times,
- Add the Send message element to the workspace.
- In the Properties tab, enable Send only during specific hours.
- Click the drop-down menus and select the times.
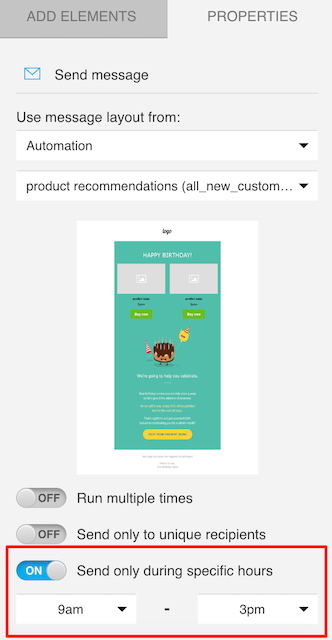
Note: It’s not possible to schedule sends that start before 12 am and end the next day. They can be scheduled in the 24-hr period starting at 12 am only.
That’s it. The message will be sent during the times you’ve selected (according to your account time zone settings). To finish configuring the element, select the message you want to send.


