How to use the Product viewed condition (web channel)?
With the Product viewed condition, you can automatically follow up with site visitors who’ve shown interest in one or more of your products. Whether they’re email subscribers or non-subscribed visitors with a tracking cookie, the Product viewed condition helps you take personalized, timely actions that can boost engagement and conversions.
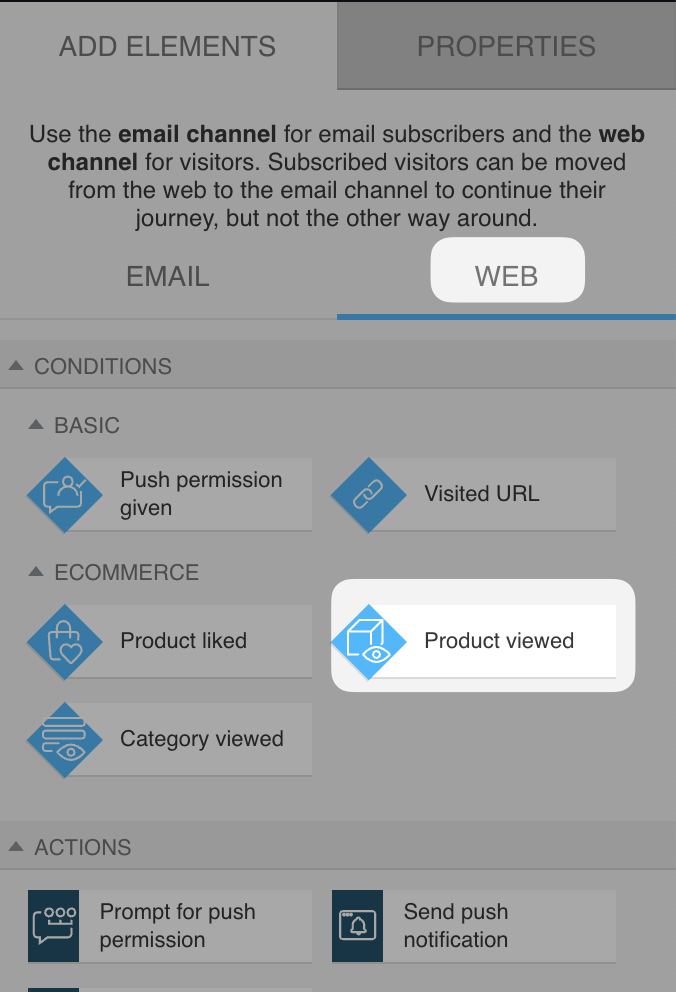
Automation now has two channels: Email and Web. The Email channel is used to reach your email subscribers, while the Web channel allows you to engage both email subscribers and non-subscribed website visitors. Subscribed users can move from the Web to the Email channel to continue their journey, but not the other way around.
This article covers an element from the Web channel.
The condition is triggered when a visitor views a product page on a selected domain where WebConnect is active. It works with:
- Our native e-commerce integrations that automatically send “product viewed” events via WebConnect (e.g., Shopify, WooCommerce).
- Custom integrations that manually send this event through WebConnect.
To use this condition, you must have Web Connect properly installed on your website. This script is essential for integrating various GetResponse services and enables the transmission of event data via Web Connect, whether through our plugins or your custom implementations.
Configuration
- Drag Product viewed element from the Conditions section in WEB channel in the automation workflow editor.
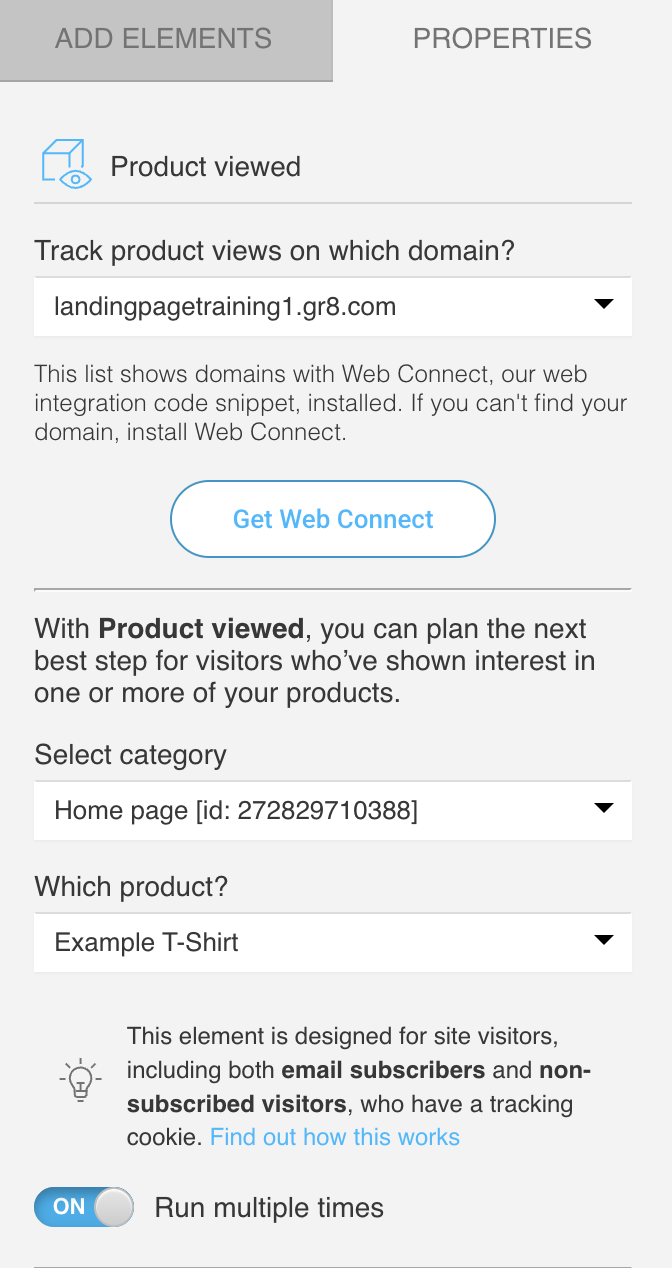
- From the dropdown menu, select a domain. If your domain is not visible there, make sure the Web Connect is properly installed on the site linked with it.
- Select a category and product. You can track specific products or all products from a category.
- Decide whether and how long you’d like the condition to wait (this applies only to the negative – red – path). There are two options you can choose between: Never and After some timeor on exit, and they both define when the system should treat the condition as not met.
- Never – Disables the negative path entirely. If the condition isn’t met within 30 days, the visitor is automatically removed from the workflow.
- After some time – Use this option if you want to set a deadline for meeting the condition. You can configure how long the workflow should wait before assuming the condition wasn’t met (for example, after 20 seconds or a specific number of minutes/hours/days).
- User tries to exit the page – The negative path is triggered when the system detects that the site visitor tries to exit the page defined in the condition details.
- You can enable Run multiple times for this condition, so it will trigger every time the defined criteria are met.
- You can also enable Frequency triggers by turning on the slider next to Use past activity rules.
This feature has let you define additional conditions related to how many times a visitor has viewed a product and/or how long those views have lasted.
Based on these conditions, the visitor can proceed to the next element once the defined criteria are met.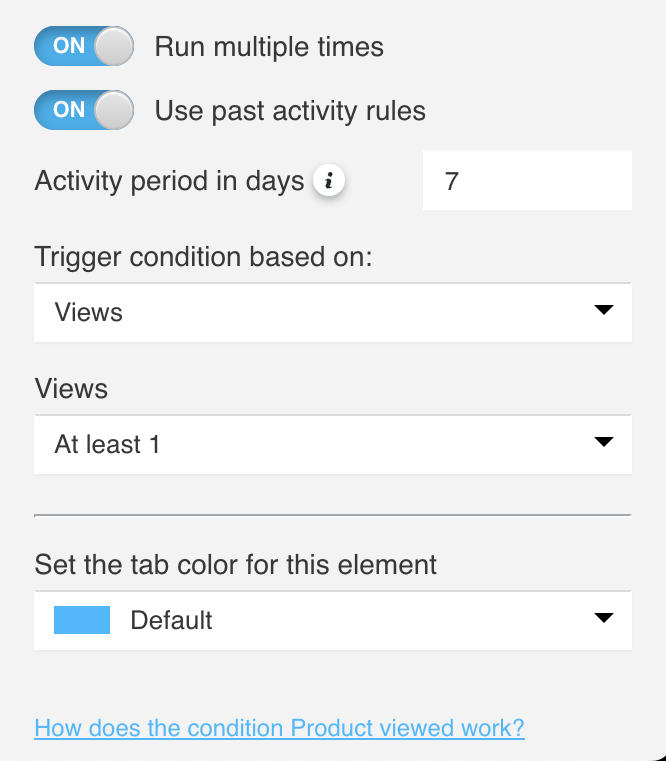
When you enable Use past activity rules, you’ll see several options to configure:- Activity period in days
Enter the number of days (1-30) during which the contact’s activity should be taken into account. The activity period defines how many full days back are analyzed.
A “full day” means a 24-hour period counted from midnight.
For example, if you set the activity period to 7 days and a visitor views a product on September 27 at 2:00 PM, the system will consider product views that happened since September 20, 00:00.
Views older than that won’t be included. - Trigger condition based on
Choose how the workflow should evaluate the visitor’s activity:- Views – the visitor must view the selected product at least 1, 2, 3, 4, 5, or 10 times within the defined activity period to proceed to the next element.
- Viewing time – the visitor must spend at least 1, 3, 5, 10, 20, or 30 minutes viewing the selected product to proceed to the next element.
The viewing time refers to the total accumulated time a visitor spends viewing the product. The activity period defines which views are included in the calculation. - Views and viewing time – both conditions must be met for the vistor to move to the next element.
- Views or viewing time – meeting just one of the two conditions allows the visitor to move to the next element.
- Activity period in days


