How to add and manage images on my website?
You can add your own images or choose from thousands of free photos we provide to catch your visitors’ attention.
Click here to learn more about how you can store and use your images with GetResponse.
How can I add an image?
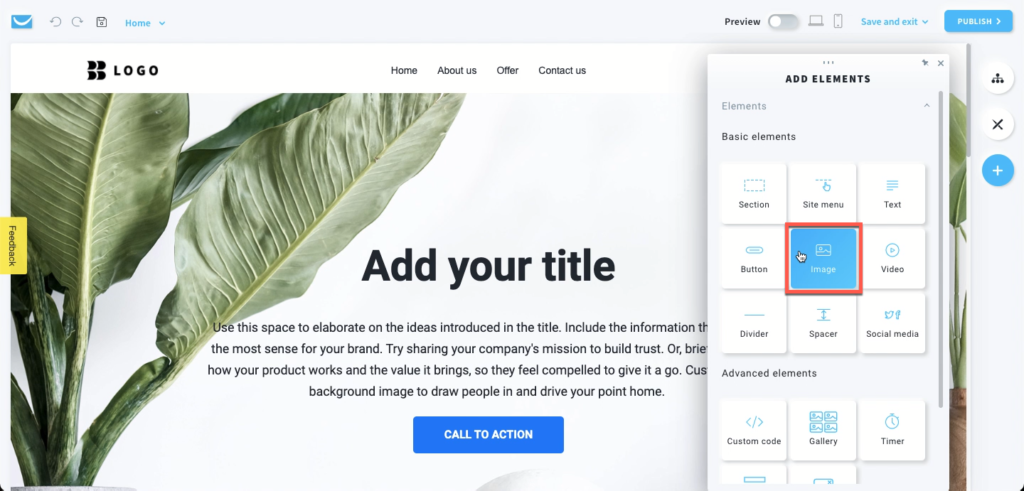
- When in the Website Builder editor, click on Add elements button.

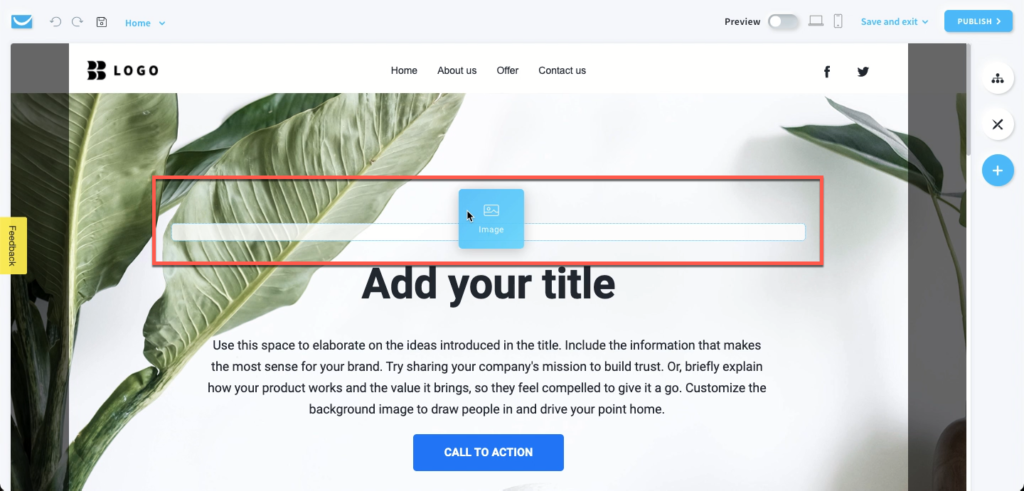
- Drag and drop the Image element into your page content. Note that the editor will highlight the spots where you can drop it.
- Select one of the files from the media library or add a new one.
How can I add a new file?
- Click on the Add files button. All your custom files will be available in the My files tab.
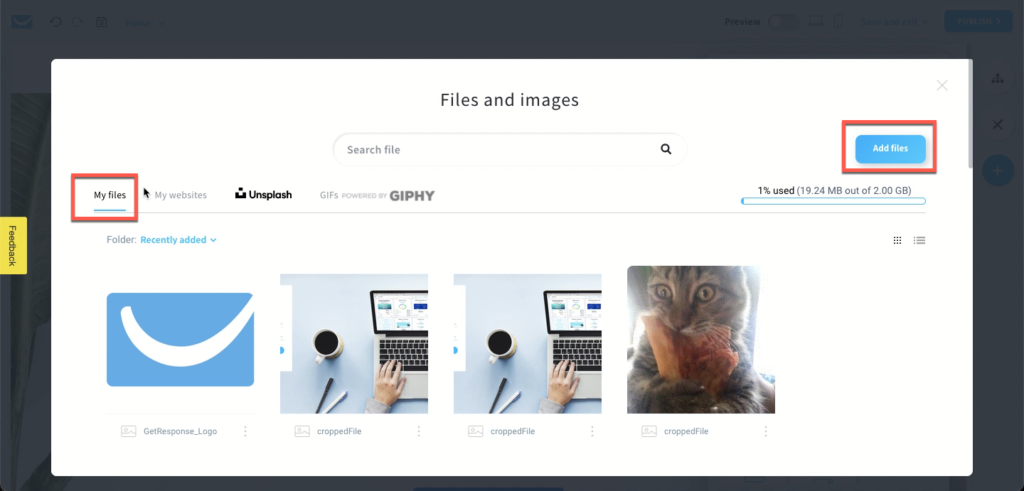
- In the Add files window click on the select a file from your computer link or drag-and-drop a file from your device. Then click on the Add button.
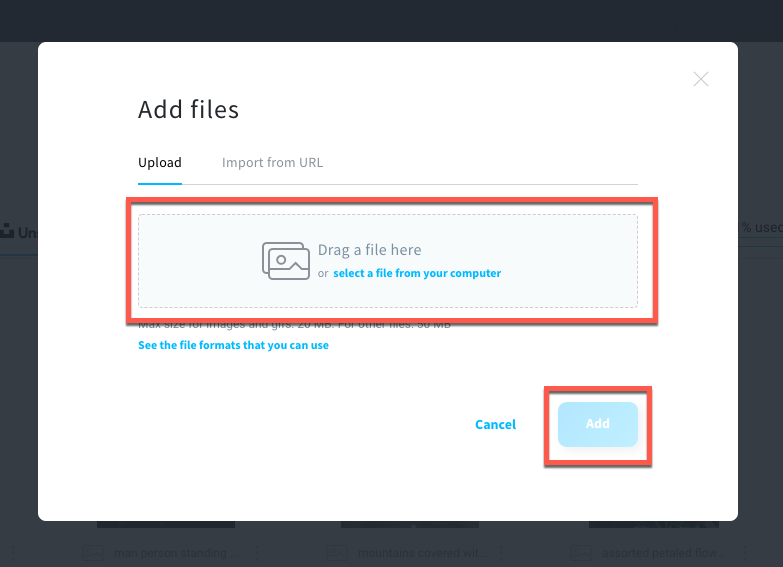
- Your file will be added to the Files and Images stash. Click on the Use button to add it to your website.

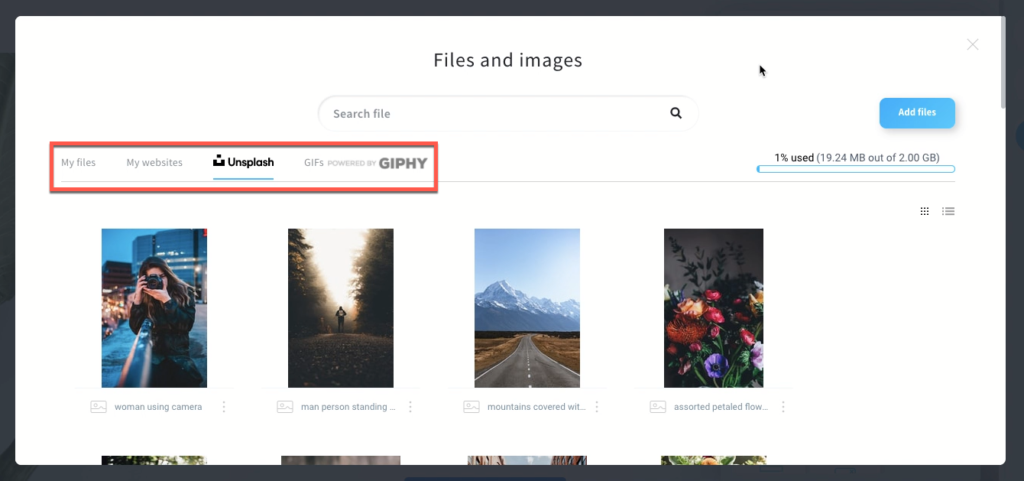
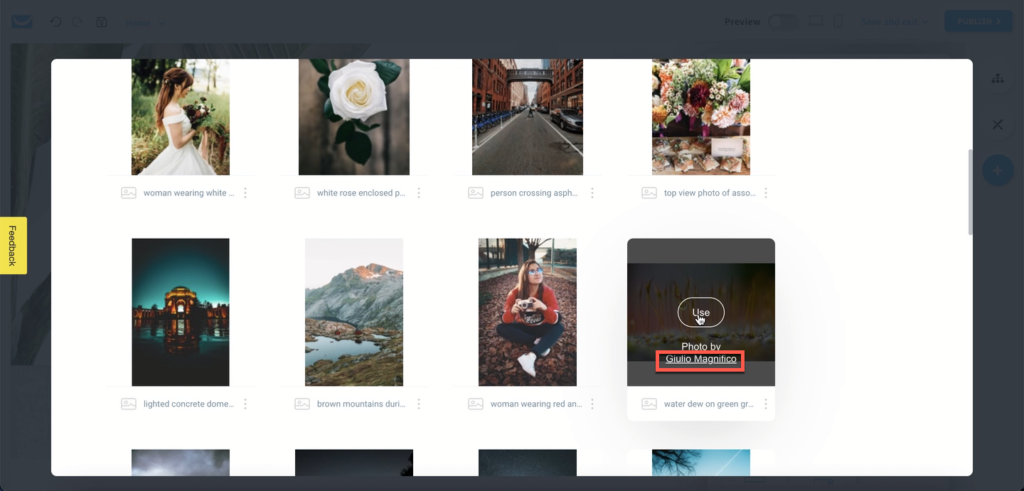
How can I use a file from the library?
Files in the library are sorted in four tabs:
- My files
Select your own image stored in Menu > Files and images. - My websites
Choose from images you’ve already used in the website editor. - Unsplash
Choose from thousands of stunning free stock photos powered by Unsplash. - Giphy
Add an animated GIF powered by Giphy.
- Find the file you want to use. You can use the Search file bar to filter images by keywords.
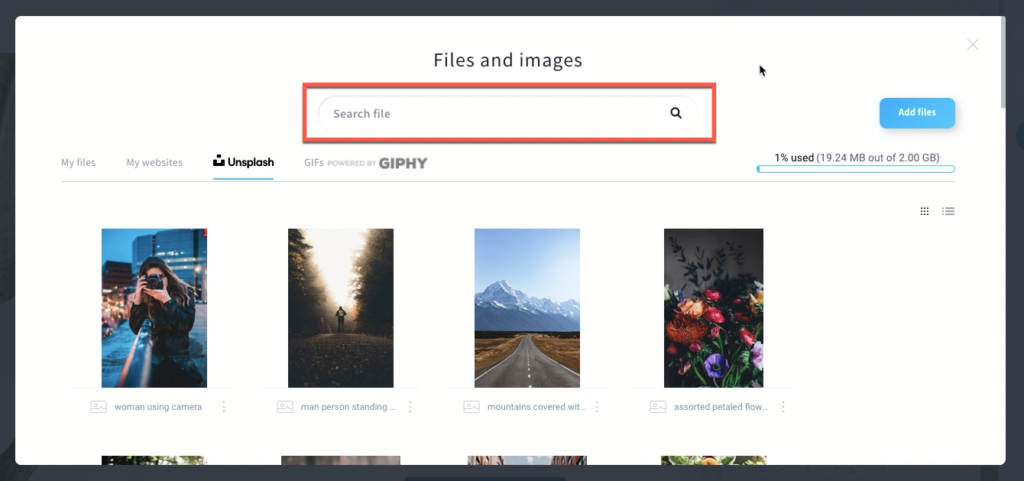
- Click on the Use button to add the image to your website.
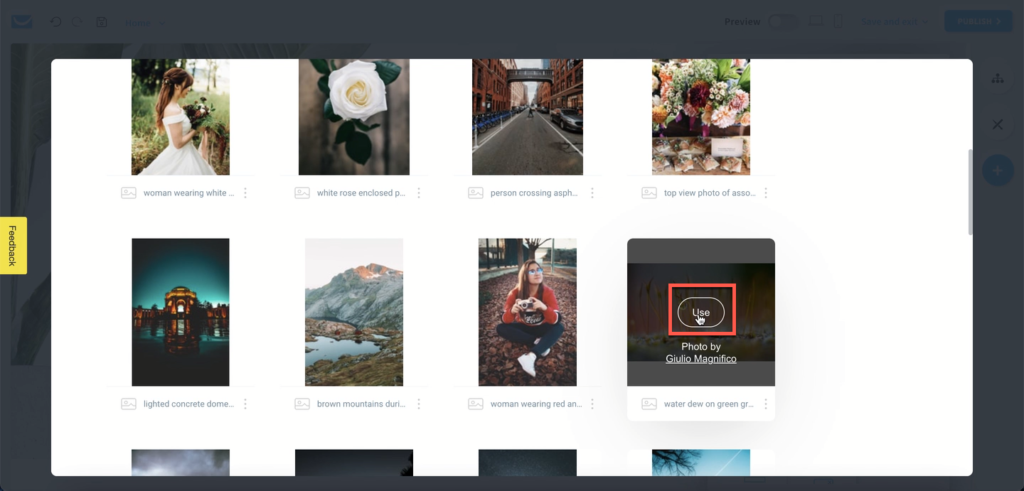
- If you want to find more photos by the same author, click on their name under the Use button. It will open the photographer’s profile on Unsplash in a new tab.
- Adjust the size of the image by using the small circles in the corners. The image will be automatically aligned to the center.
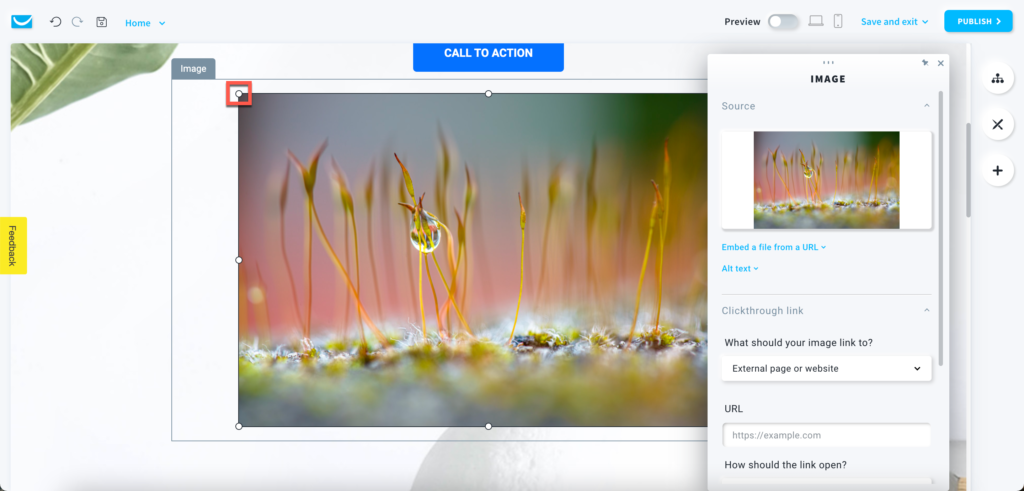
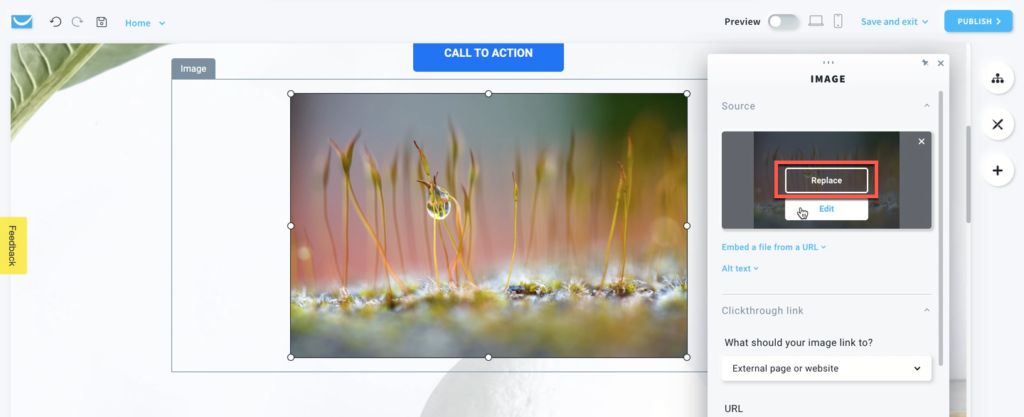
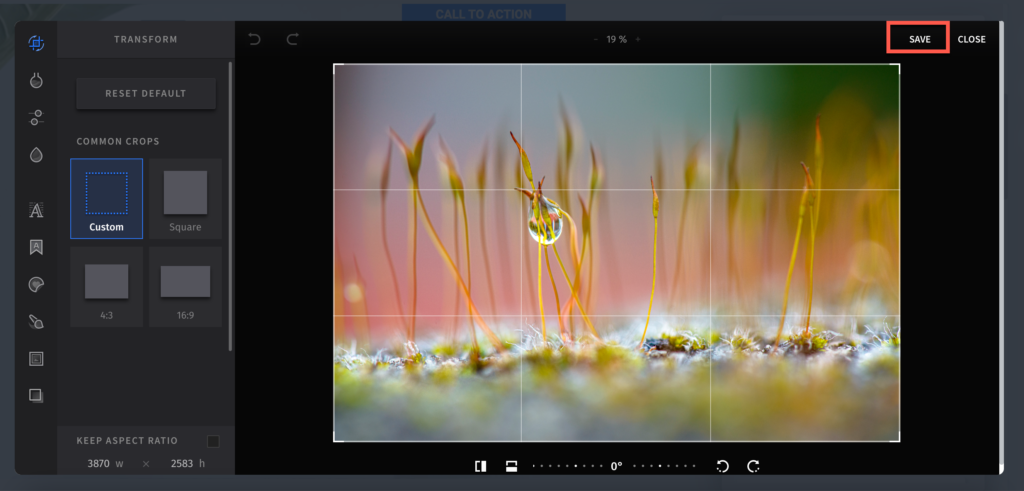
How can I replace or edit an image?
You can replace or edit the image using a built-in photo editor right from the website editor.
Click on the image to open the toolbar.
To replace the image, click on the Replace button and select a different one.
To edit the image in the editor, click on the Edit button.
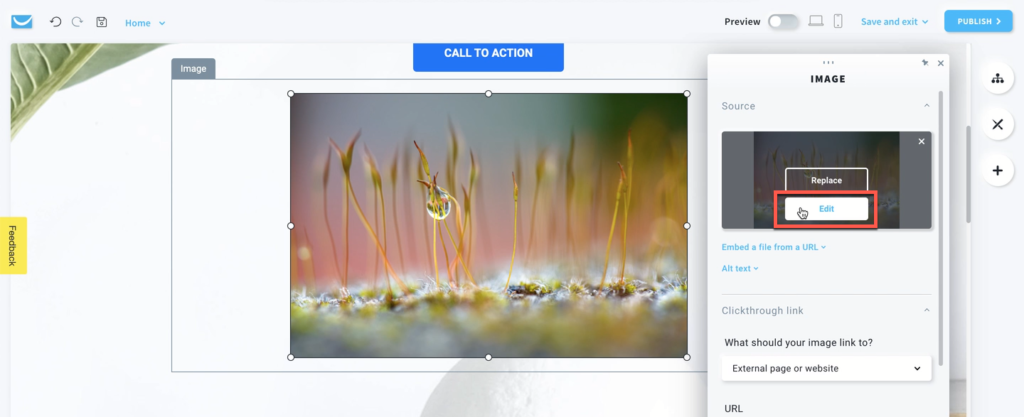
In the editor, you can crop, resize, adjust and transform the image. You can also add filters, overlays, stickers and text.
Once you finish editing click on the Save link to save the edited version of the image.
How can I edit image properties?
You can customize any image on the website. Click on the image that you want to edit to open the toolbar.
Source
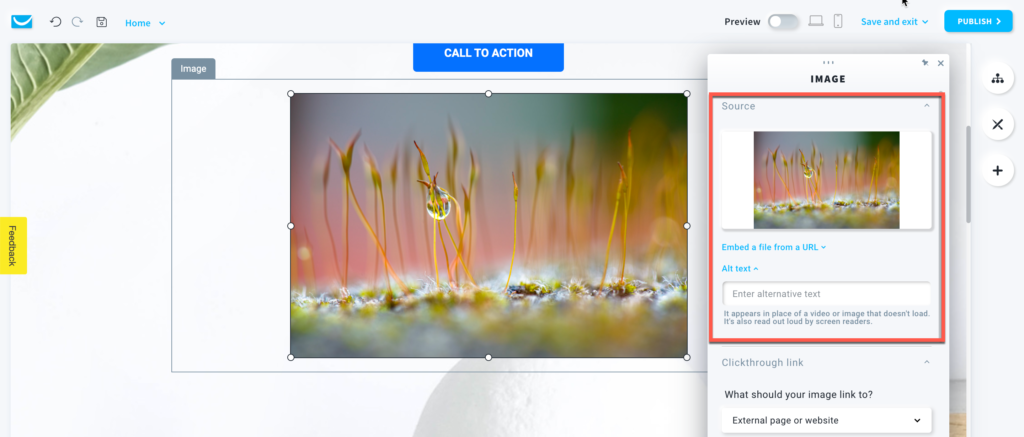
- Embed a file from a URL
You can replace the current image with an image from a URL provided in this field.
Learn more on how to embed an image from a URL here. - Alt text
Add text describing the image that will appear in place of the image that doesn’t load. It’s also read out loud by screen readers.
Clickthrough link
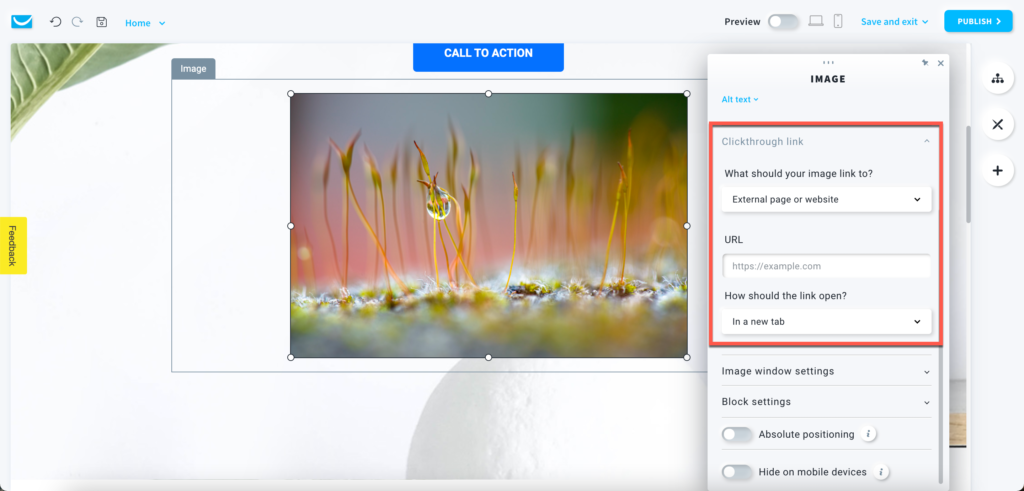
- What should your image link to?
There are several types of links you can use. Make sure to choose the right type.
External page or website – use it to link another site with a URL.
Landing page – select a GetResponse landing page that you want to open.
Email address – add an email address that will be contacted after clicking the image.
Phone number – add a phone number that will be called after clicking the image.
Custom protocol – use to it embed protocols.
Document – add a file you want to open with the image.
Website – select another website created with the GetResponse Website Builder.
Current website – link the image to the current website. Choose the page you want it to open. - How should the link open?
Choose if you want to open the link on the same page or in a new tab.
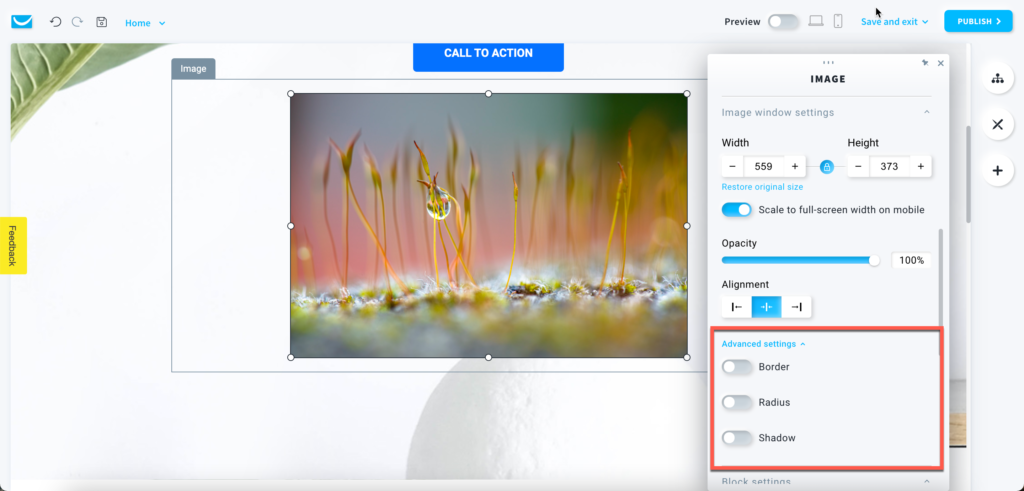
Image window settings
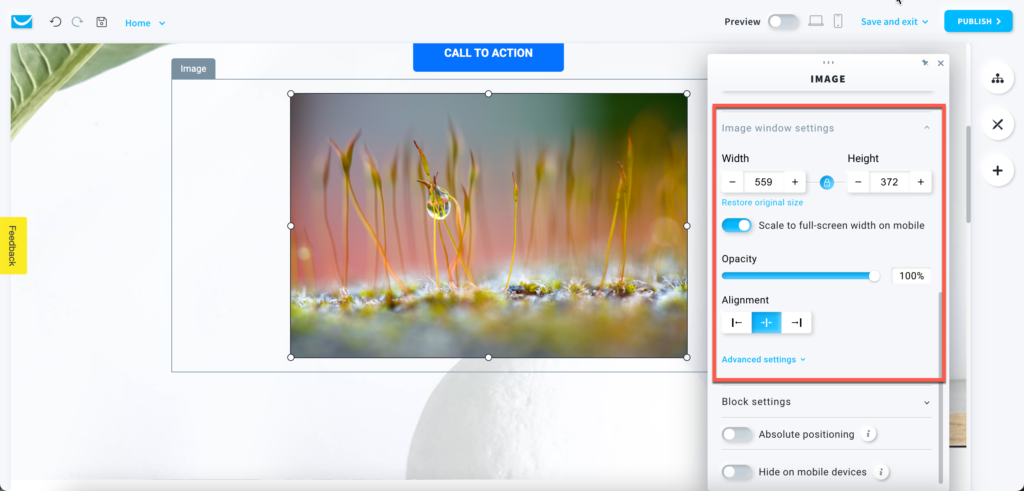
- Width and Height
Set up the size of the image in pixels. You can maintain the image ratio by having the lock icon enabled (blue).
You can always restore the image to its original size by clicking on the Restore original size link. - Scale to full-screen width on mobile
If enabled, it’ll make your image full-width on mobile screens. - Opacity
Adjust the opacity of the image with the slider. 100% is a fully opaque image, and 0% is a fully transparent image. - Alignment
Align your image inside the image block to left, centre or right. - Advanced settings
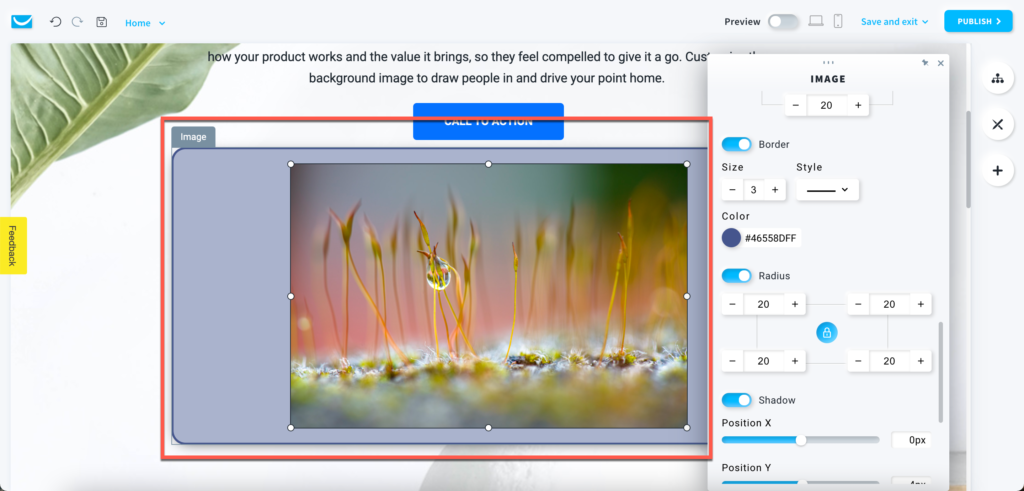
To further adjust your image properties, click on the link to open advanced settings.
You can customize its border, radius, and shadow.
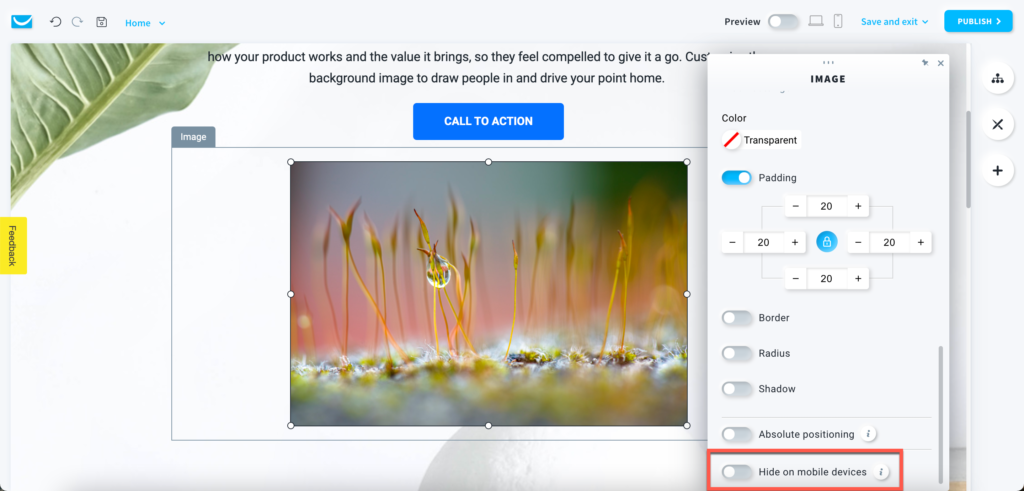
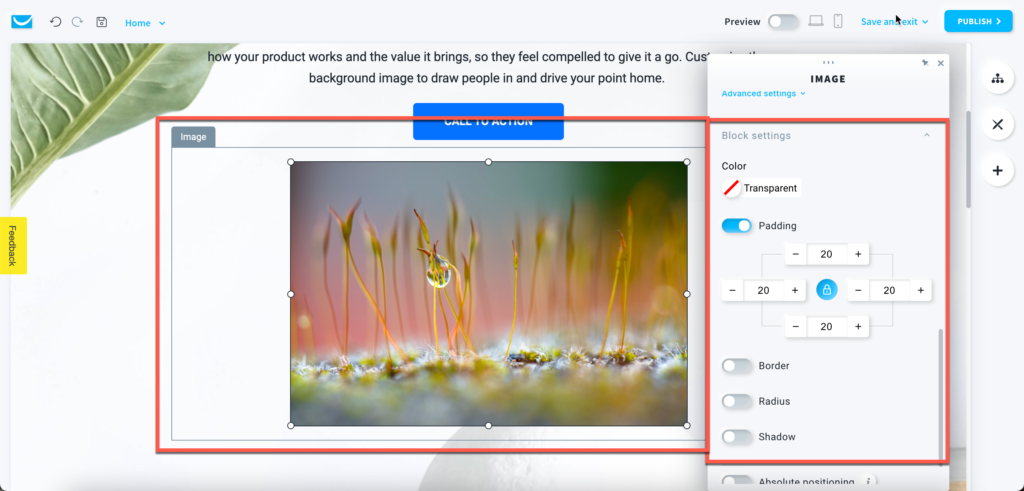
Block settings
The image block is a framed workspace around your image with an Image label on the left. You can only see the frame after clicking on the object. It won’t be visible on your website.
You can customize its color, padding, border, radius, and shadow.
Absolute positioning
Enable this option to move the image to any place on your website.
Note: we only recommend using this option if you have some unusual design that can’t be created in any other way. Using objects with absolute positioning can make your page less responsive on mobile devices.

Hide on mobile devices
Enable this option to hide your image when your page is opened on a mobile device to make it simpler and faster.