How to integrate Magento 2 with GetResponse?
You can easily connect your Magento store with GetResponse to add contacts, products, and e-commerce data. You can manage it all in the GetResponse panel.
Use the data imported from your shop to recover sales with abandoned carts, promote your products, increase sales, or even send product recommendations based on sales history.
To set up the integration, you will need:
- Magento in one of the supported versions: 2.3.x, or 2.4.x CE
- to be compliant with all Magento requirements
- shop name in Magento must have at least two characters for the integration to work
Magento reviewed our plugin with the following versions:
- Adobe Commerce (cloud): 2.4 (current), 2.3 (obsolete)
- Adobe Commerce (on-prem): 2.4 (current), 2.3 (obsolete)
- Magento Open Source: 2.4 (current), 2.1 (obsolete), 2.2 (obsolete), 2.3 (obsolete)
Note: At this point, we don’t provide support for Magento EE , Magento PWA, or Adobe Commerce (cloud).
If your Magento store has modules and plugins installed, it’s best to first test if the GetResponse plugin will work correctly with them.
If you’re not sure if your plugins work correctly with our integration, contact our Customer Success Team and we’ll be happy to help!
How to integrate Magento 2 with GetResponse
Creating the integration is a 3 step process:
- Install the GetResponse plugin in your Magento 2.
- Generate the Access Key from Magento 2.
- Set up the integration details in GetResponse.
Note: it’s important to follow the order above to avoid integration errors.
How to install GetResponse plugin in Magento 2
- Download the plugin from here.
- Install the plugin.
How to get the Access token from Magento
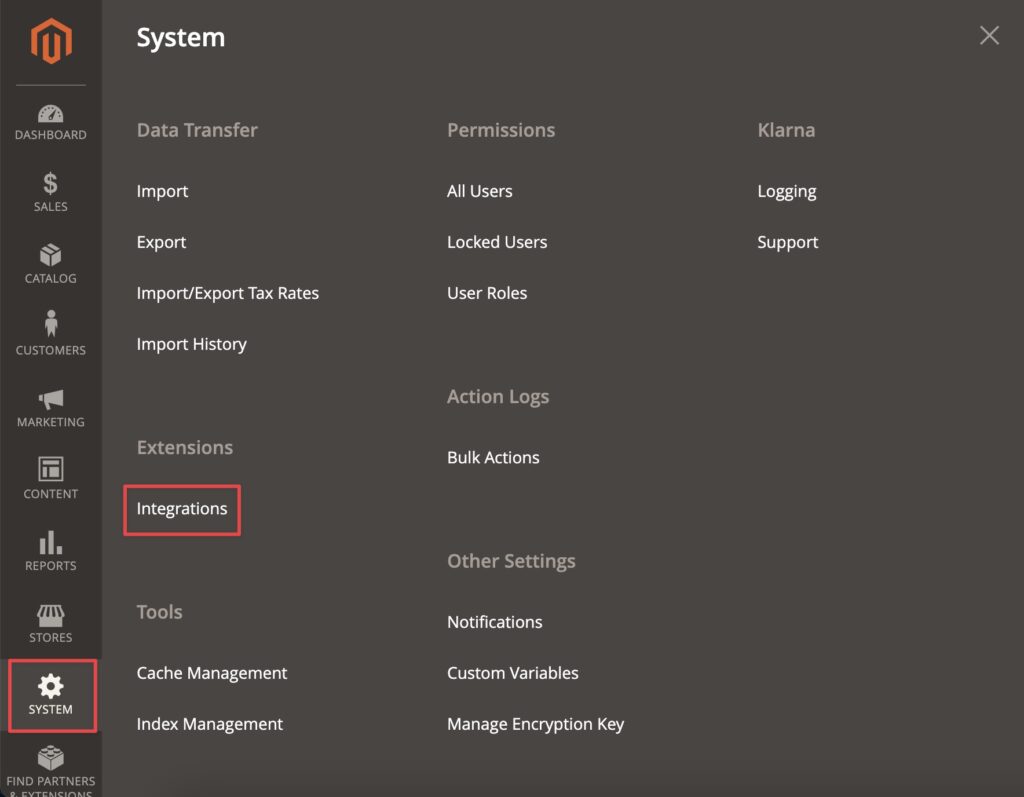
- In you Magento admin account, go to System > Integrations.
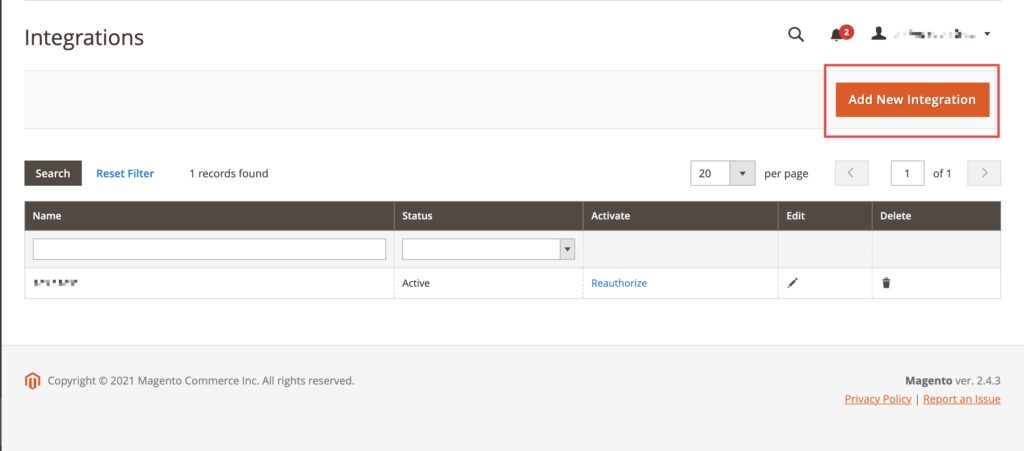
- Click on the Add New Integration button.
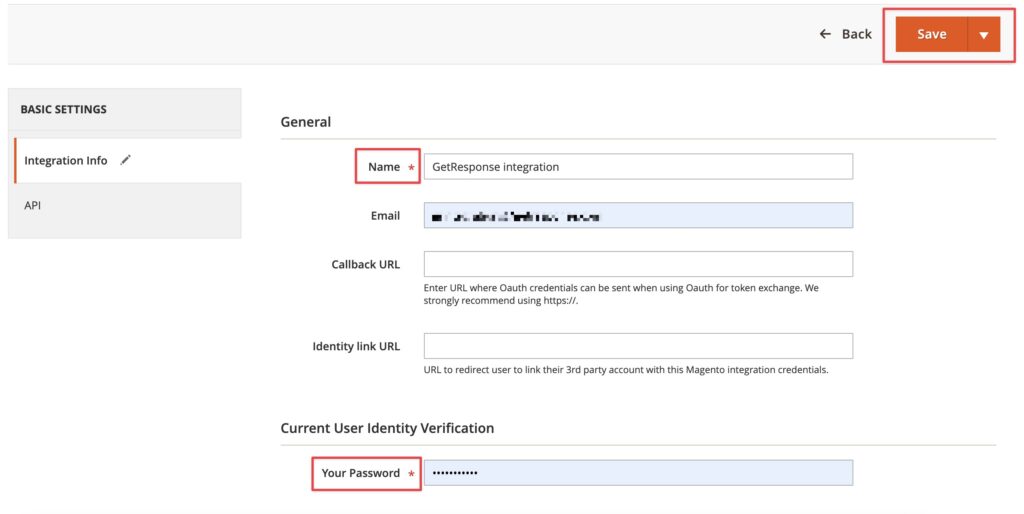
- Enter a Name of the connection and Your Password (the one you use to log into your Magento account). A name can be anything you want.
Leave the Callback URL and Identity link URL fields empty.
Click on the Save button.
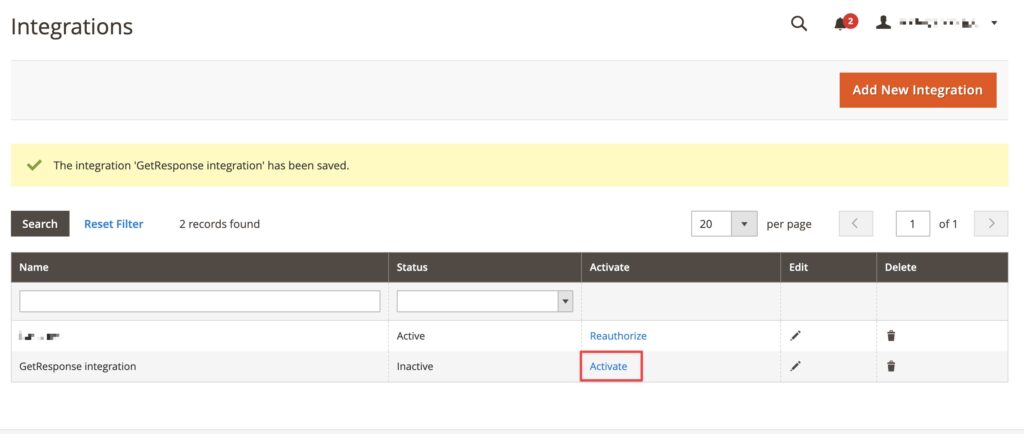
- Click on the Activate link.
- Click on the Allow button.
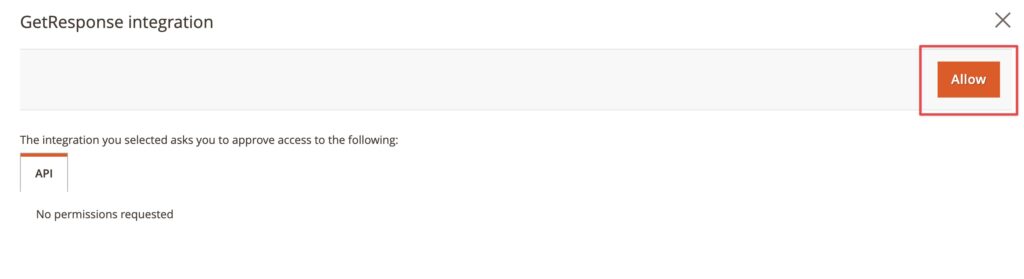
- Copy the Access Token.
You will need to paste it in a moment in your GetResponse account.

To make sure the plugin works correctly, in your Magento dashboard, in: System >> Integrations >> API, set Resource Access to All.

How to set up integration details in GetResponse
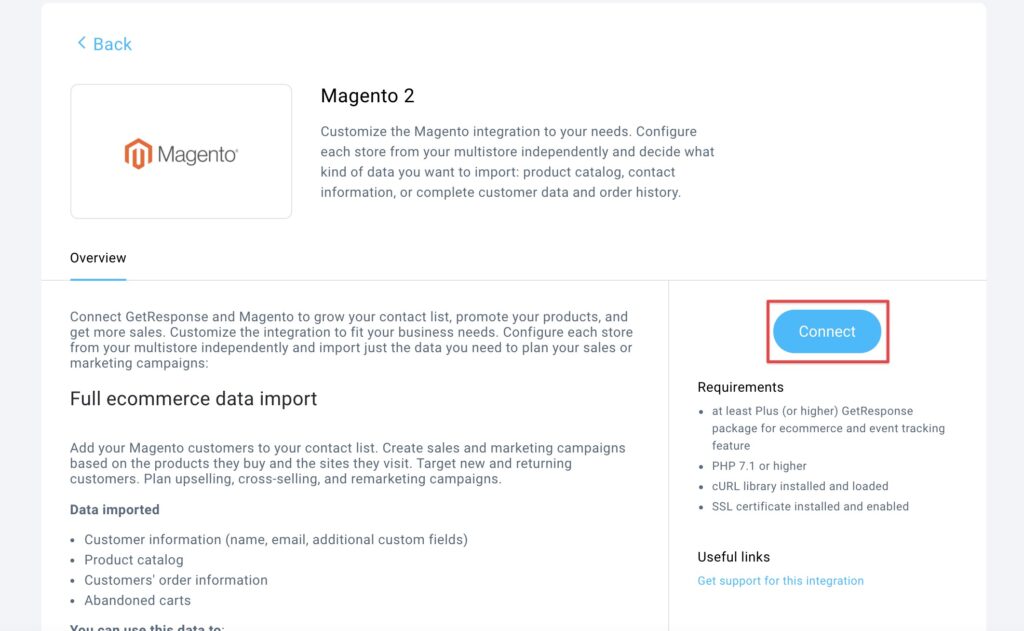
- Go to Integrations and API > Magento 2

- Click on the blue Connect button.
- Provide shop URL and Magento Access Token.
Click on the Connect button.
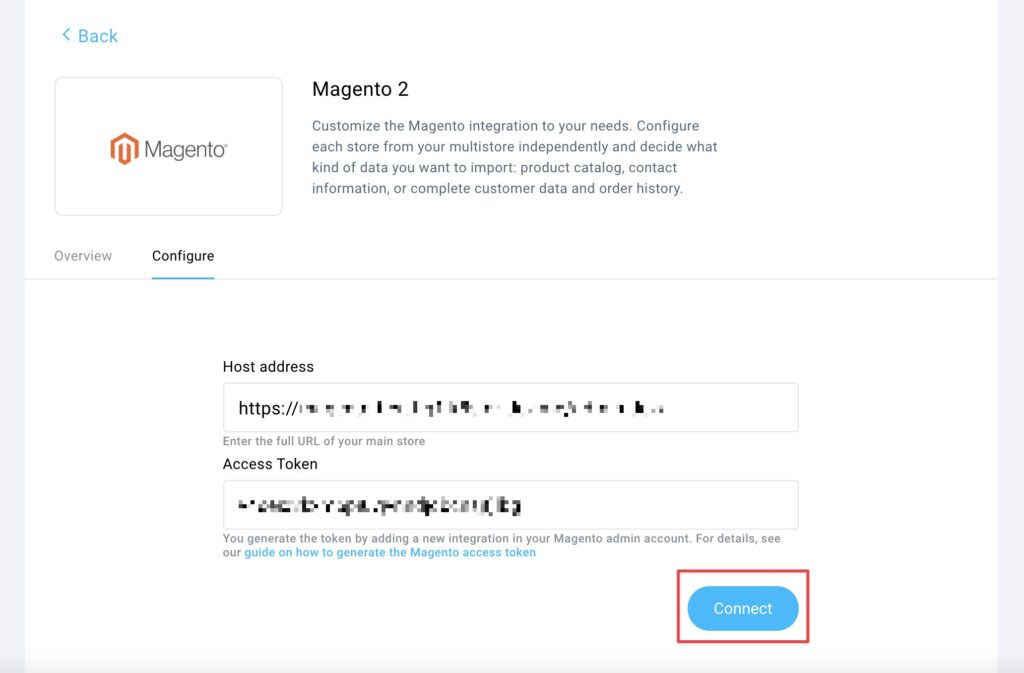
Note: use the URL format starting with https:// to avoid getting an error.
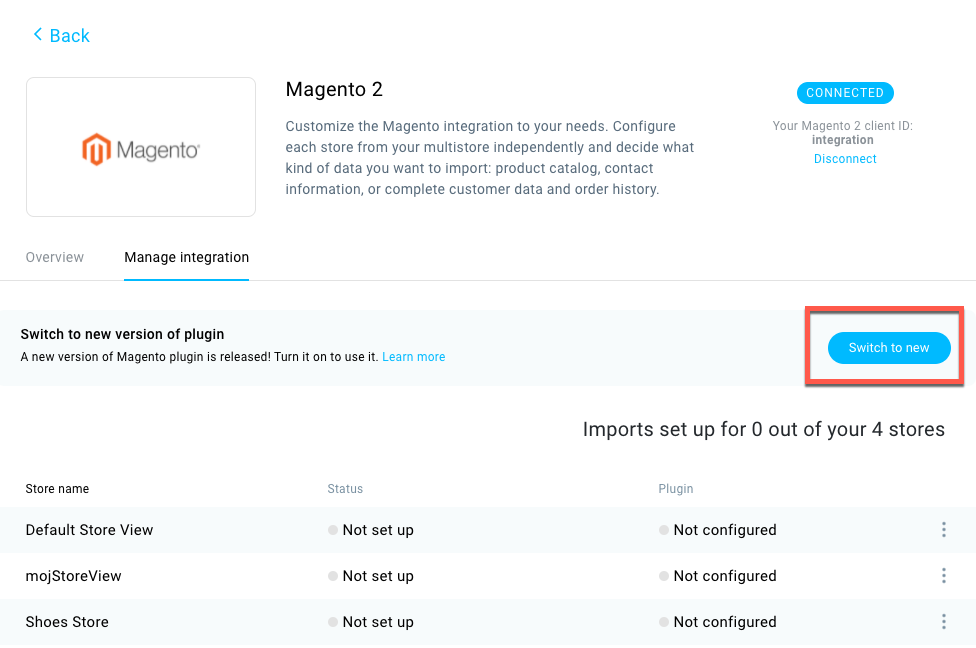
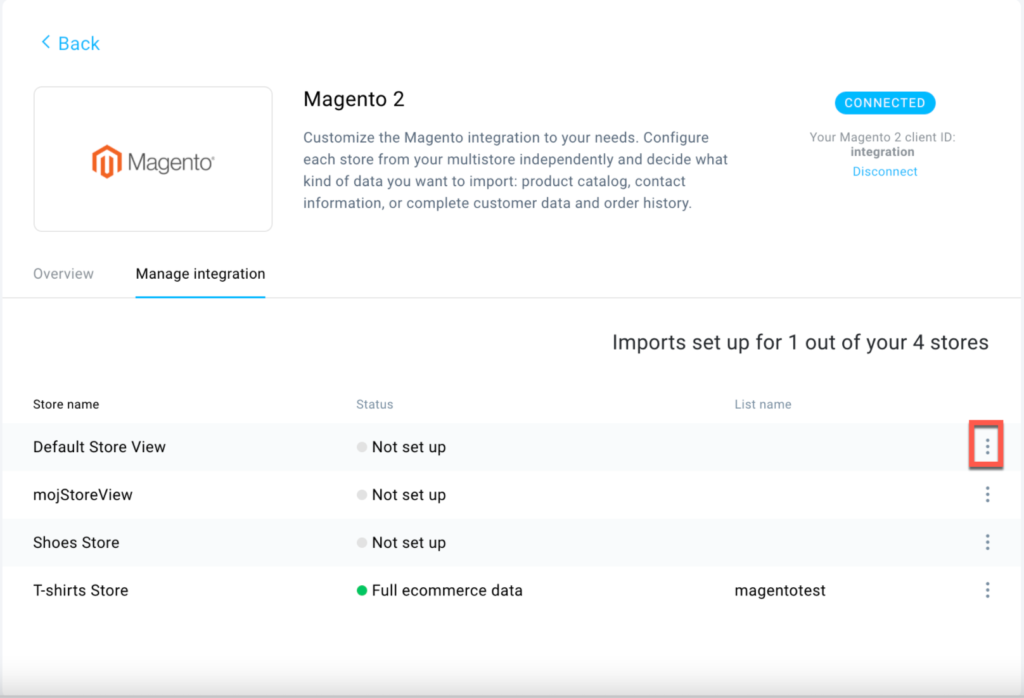
You can also integrate with Multistore Magento installation. You can choose which stores you want to integrate and have an individual setup for each store.
How to configure the import for each store
- In your GetResponse account go to Integrations and API > Magento 2 > Switch to new.
- Click on the Actions icon besides the store > Set up imports
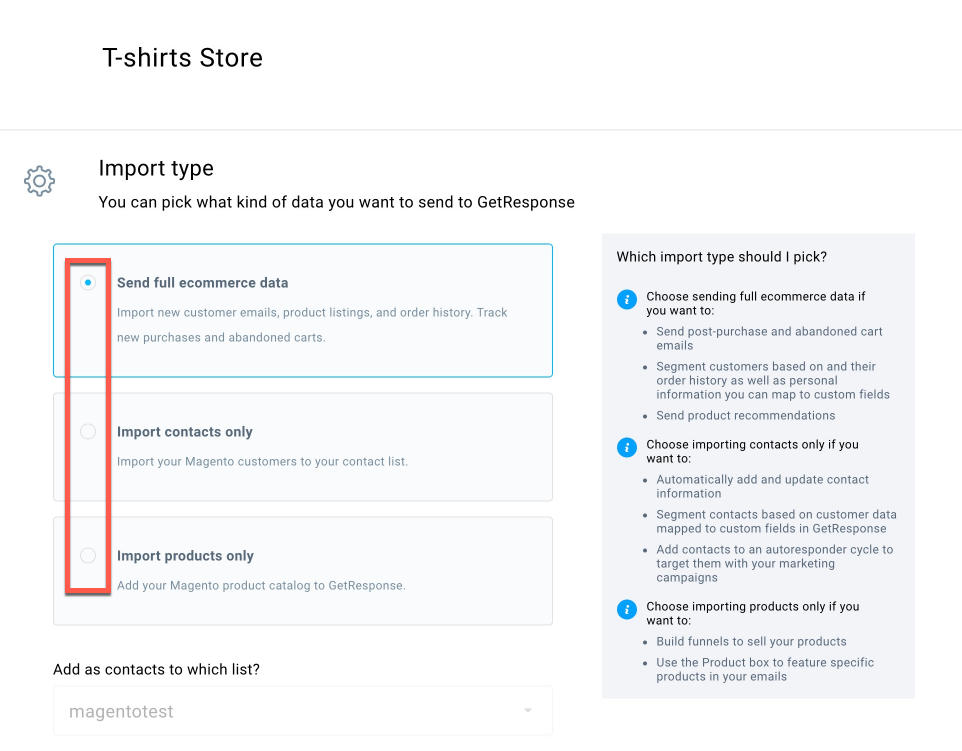
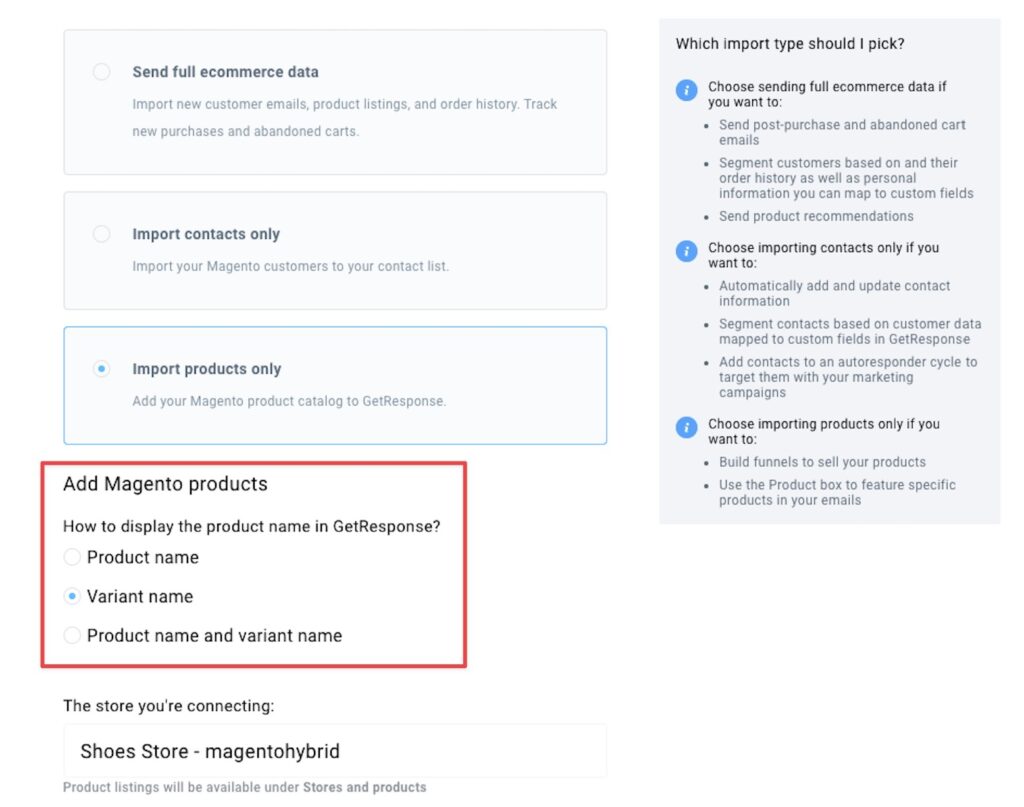
- Select Import type.
Send full ecommerce data
You can import contacts to your list, products to your shop (available in Ecommerce tools), and order history.
Import contacts only
You can add your Magento customers to your contact list.
You can add your customers to the autoresponder cycle and update them with newsletters to nurture your business contacts and keep in touch for a better conversion rate.
Import products only
You can use your Magento product catalogue in GetResponse sales funnels and add product boxes to emails to help promote your shop and generate sales.
Note: We do not import bundle and grouped products from Magento 2
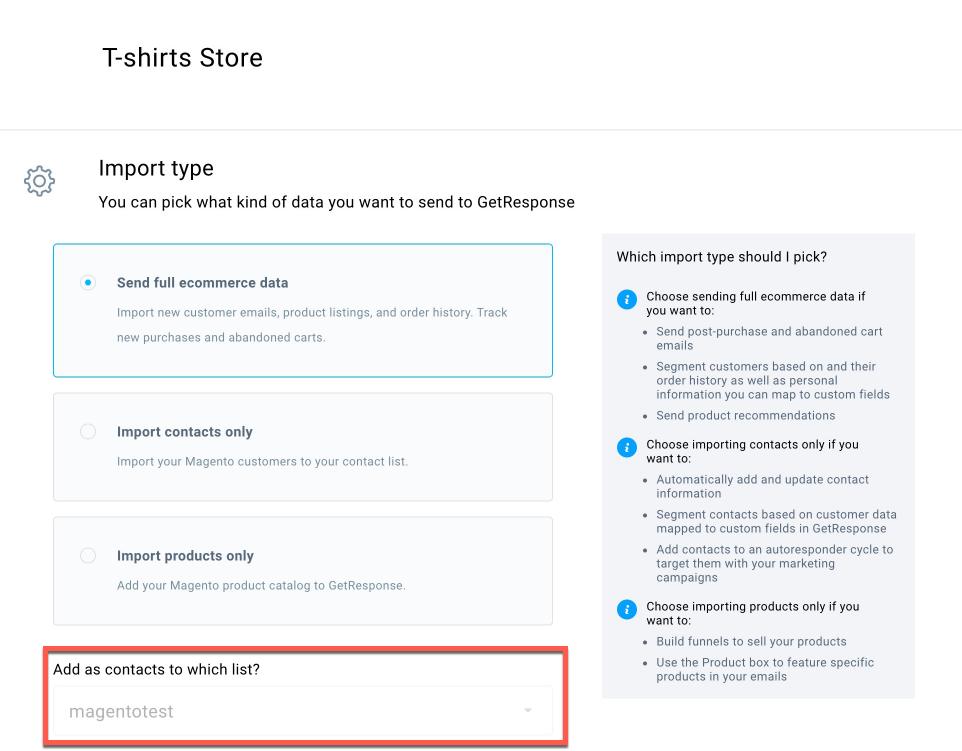
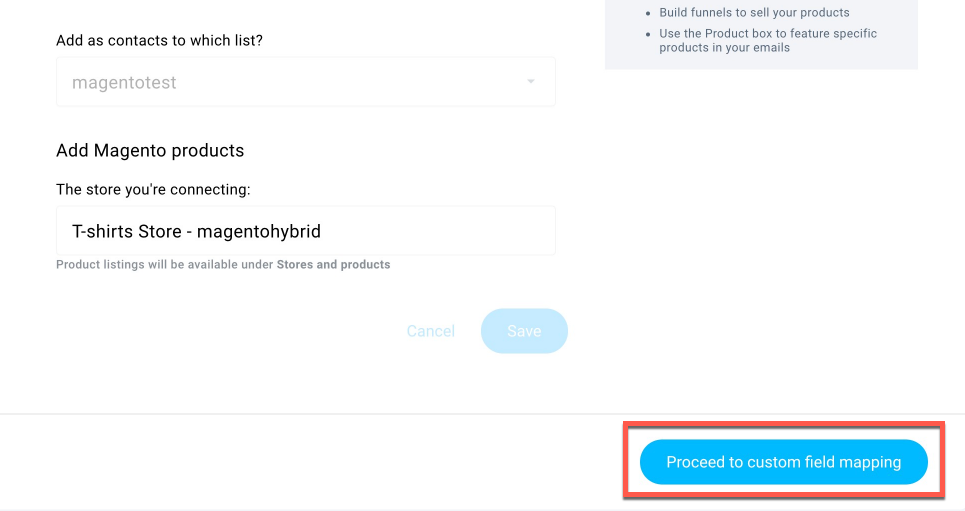
- Select a contact list to add your customers to:
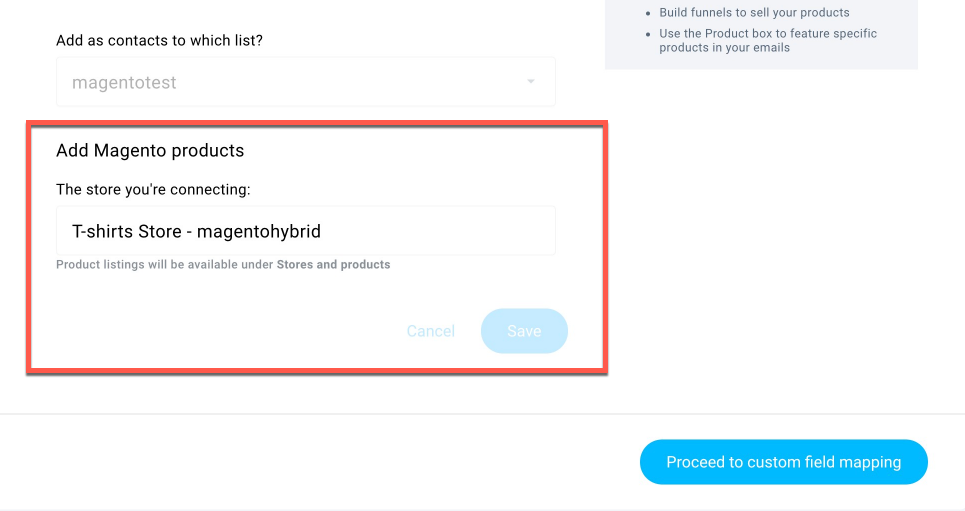
- You can see the name of the Store that will be created for this import.
- If you use Send full ecommerce data or Import products only option, select how to display the products’ names in GetResponse.
- In Plugin details section you can set your tracking codes and add forms for your stores.

- Enable Import product, customer, and e-commerce data on a rolling basis to enable live sync or leave it disabled to import data once every 24 hours. Note that the plugin will use the import settings from the integration. For example, if you import products only, we will only send a live update of your products, not contacts or transactions.
- You can Add a Getresponse form to store pages – to do that, select the previously created legacy form and choose the location in your Magento shop.
- Enable Web Connect if you want to track your customers in automation workflows to follow up with them after they’ve visited a site, made a purchase, or abandoned a cart, display popups to entice visitors with a special offer and increase engagement or send push notifications to send updates and bring customers back to your site.
- Click on Proceed to custom fields mapping button to assign details from the shop to custom fields.
You can use predefined fields and your own custom fields.
Here is how you can create a new custom field in case you need it before the import.
You can import just selected fields or all of them.
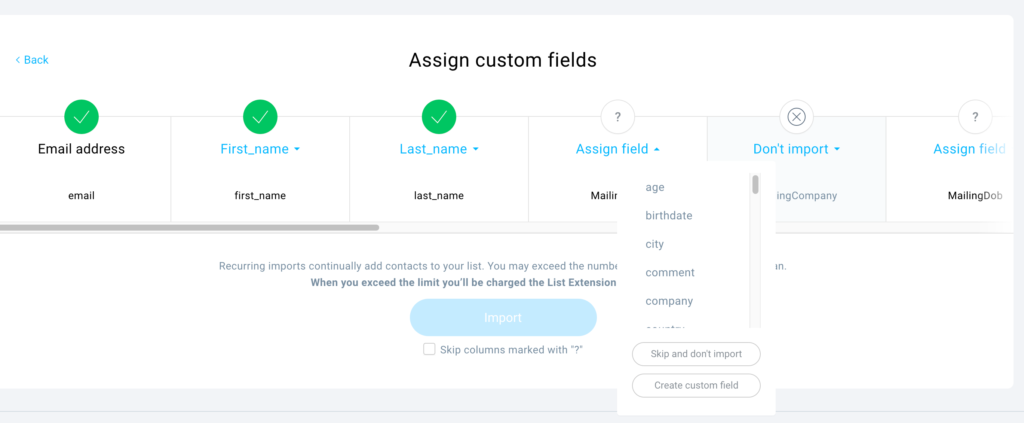
After selecting the fields you want to import, click on the Import button to proceed.
Note: you can ignore all fields you haven’t assigned by checking the Skip columns marked with “?” box under the Import button.
Your import will update once every 24 hours as soon as the initial import is complete.
The integration will start working once the first import is finished.
What happens to contacts in GetResponse when they unsubscribe from Magento
When contacts unsubscribe from Magento they won’t be deleted from corresponding list in GetResponse automatically with one exception – if your subscriber has selected the marketing consent option and they withdraw their consent in Magento, then we remove that contact from GetResponse.
What happens to contacts in Magento when they unsubscribe from GetResponse
When contacts unsubscribe from GetResponse they won’t be deleted from corresponding list in Magento, but their marketing consent in Magento will be removed.
Technical requirements
You need to make sure your Magento has proper infrastructure and security setup to handle the following data exchange conditions:
- GetResponse sends a request and expects a reply from Magento in no longer than 15 seconds.
- If we don’t receive a reply within 15 seconds, it will cause a timeout.
- Each call contains a maximum of 100 entities (products, contacts, orders).
For example, if you have 10 000 products in your shop, we will make 100 calls to get them all.
Note: the integration will be finished and working only after all initial imports are completed. - When importing full e-commerce data, we first check contacts, then products, then orders, all in packs of 100, until all are imported.
Each of those calls needs to be answered within 15 seconds. - Our plugin works only with PHP versions that are currently supported by Magento.
Known issues
- If your product photos weren’t imported from your Magento Multistore, you can apply a fix.
When we request a path to your product photo, Manegnto doesn’t send us a live URL, but a root location known as “no_selection” (for example “/c/s/cs2_example_file01_01_1.jpg”).
When using Multistore, this can cause an issue. You can fix it on Magento’s end using this official guide. - If you delete a product from your Magento shop and there will be an order for that product, then we will not import such order.
- The gender custom field will be saved in the following format: 101 for women, 1 for men.
- Proxy services, like Cloudflare, may block the import. If you use such services you need to allow imports in the proxy settings on your end.


