
How to use the Wait action?
Automation currently has two designs, but the steps are the same in both. The new design shown in this article will eventually become the only available version. You can switch between designs using the toggle in the top-right corner of the editor.
The Wait action lets you define the delay before the next action or filter is triggered.
You can choose whether you’d like to:
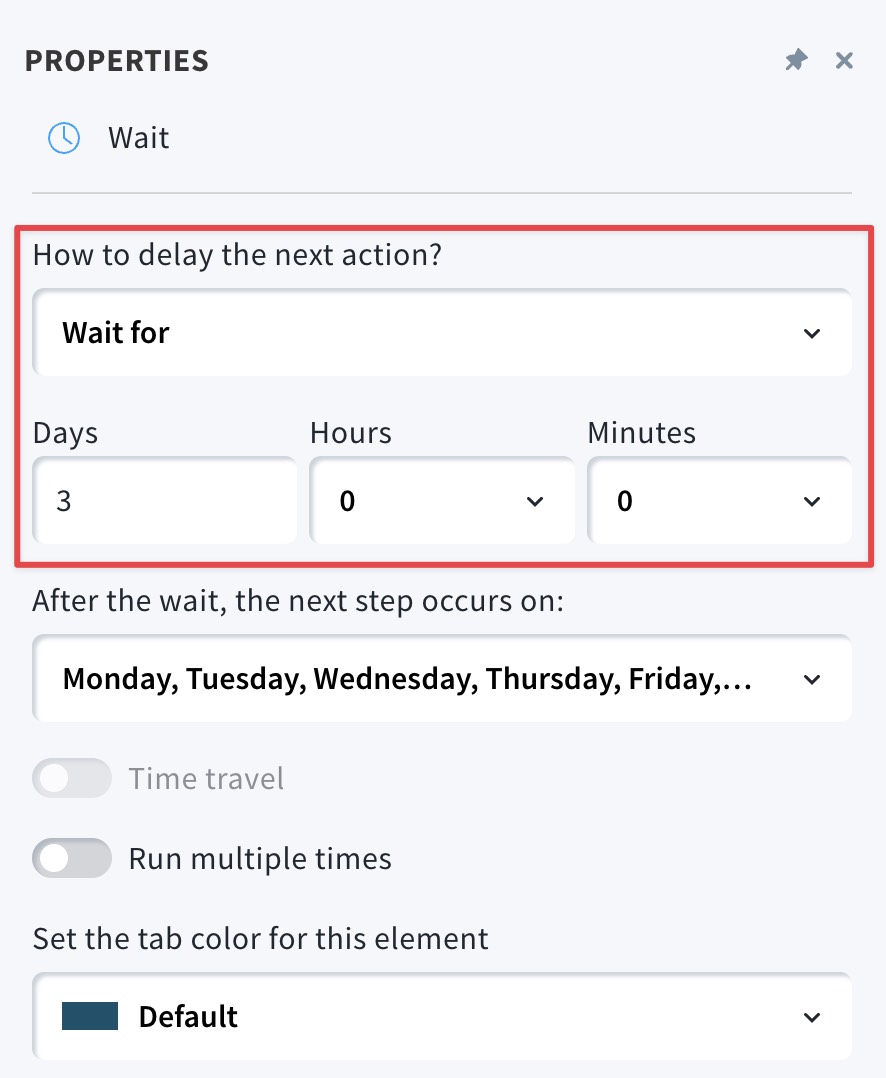
- Wait for a specific amount of time (default setting). In the element Properties, set the delay time. Enter the number of days, or expand the list and select hours and minutes. The minimum delay is 5 minutes and the maximum is 366 days.
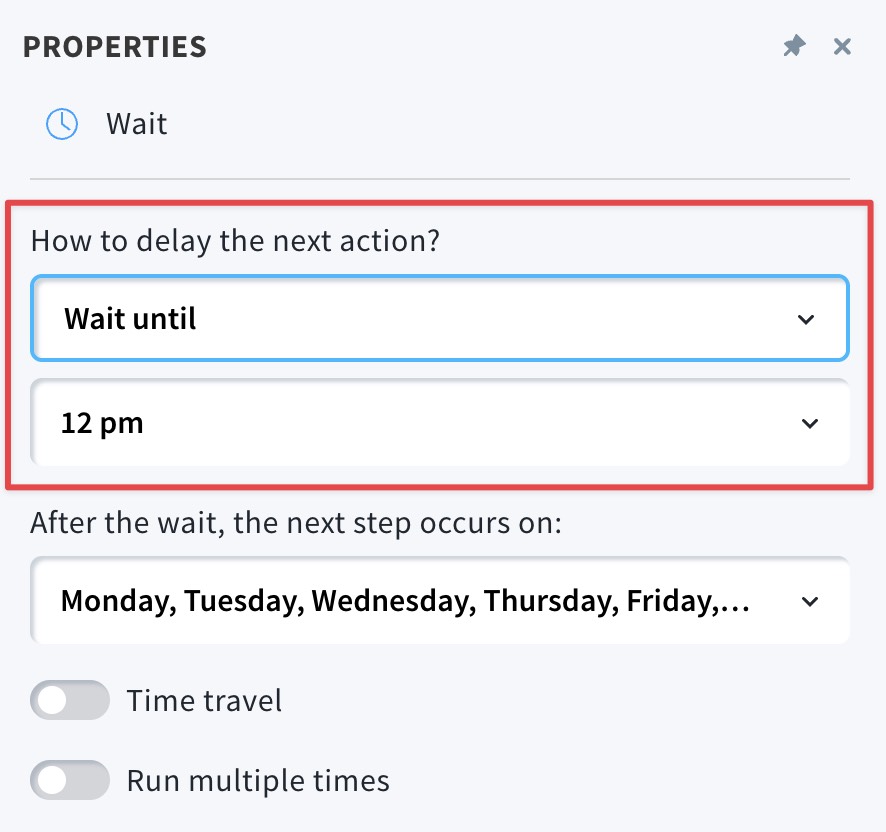
- Wait until a set time to trigger the next event. By default, the delay is set according to the time zone on your account.
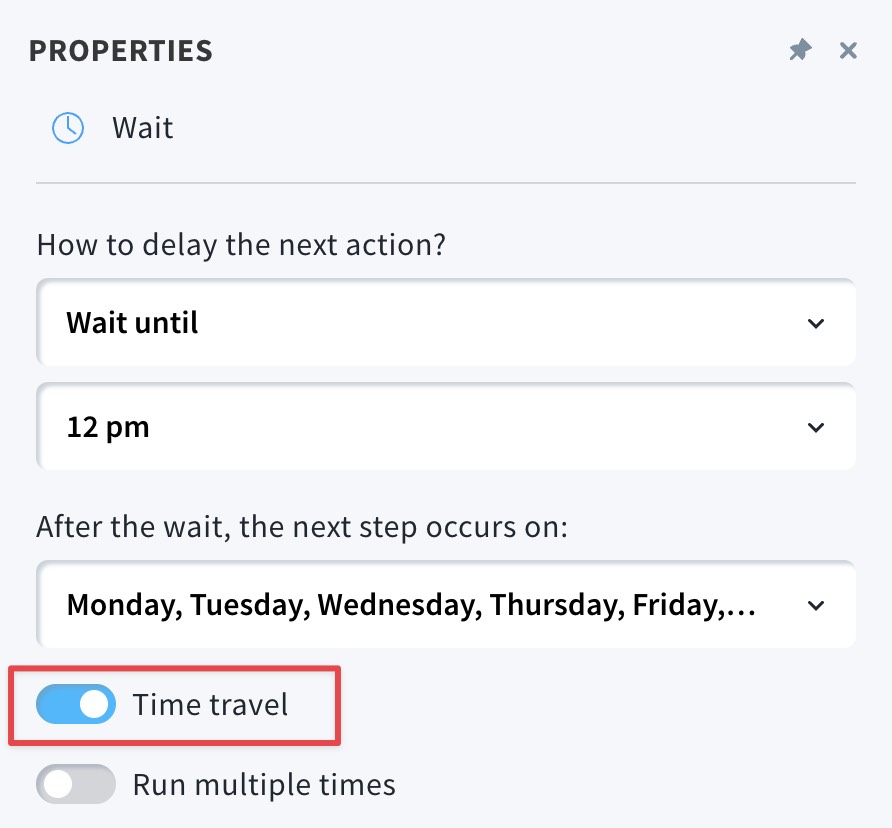
To switch to your contacts’ local time instead, turn on Time travel.
.
- Wait until a specific day and time to trigger the next step. Click to select the day and time to end the delay and click OK. By default, the delay is set according to the time zone on your account. To switch to your contacts’ local time instead, turn on Time travel.
The workflow doesn’t stop after the delay has ended. The contacts simply move to the next element without delay. If you don’t want to trigger any more steps for them, turn on Remove contacts from the workflow after the set day and time.
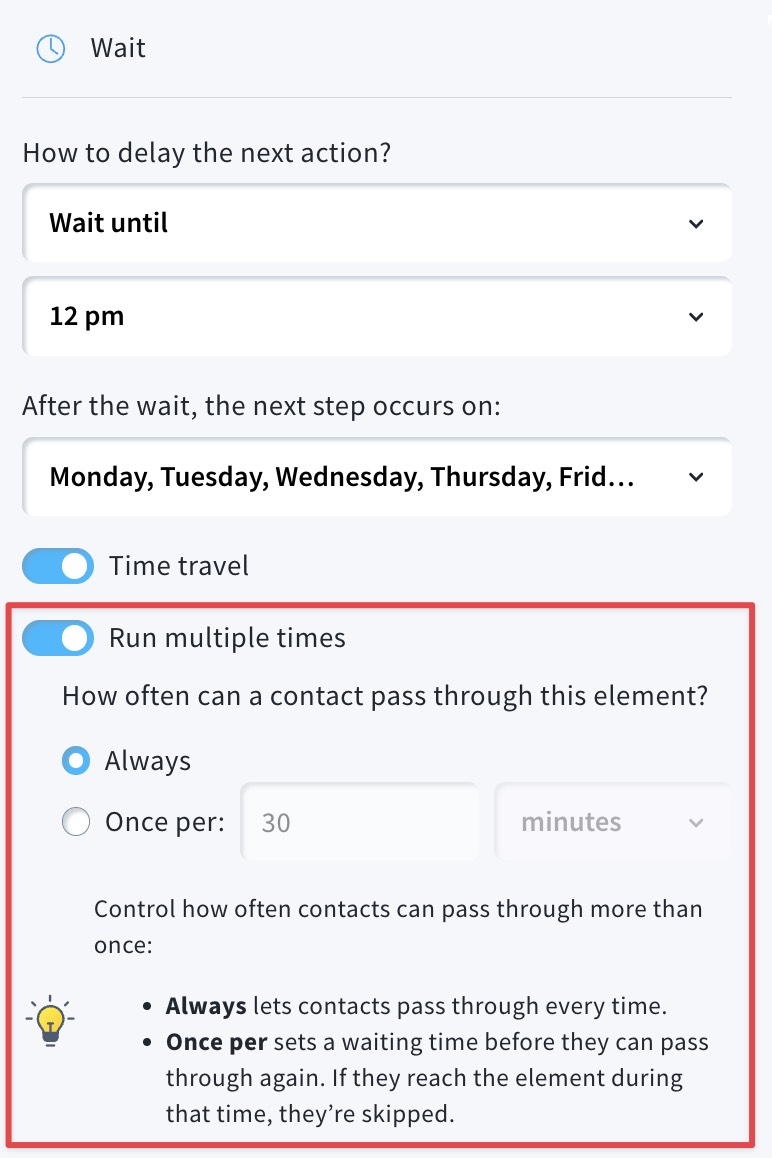
If you’d like the element to perform repeat actions, you can set the element to Run multiple times. This option is available for all delay types.
Can I use the Wait action to send a message on a specific day of the week?
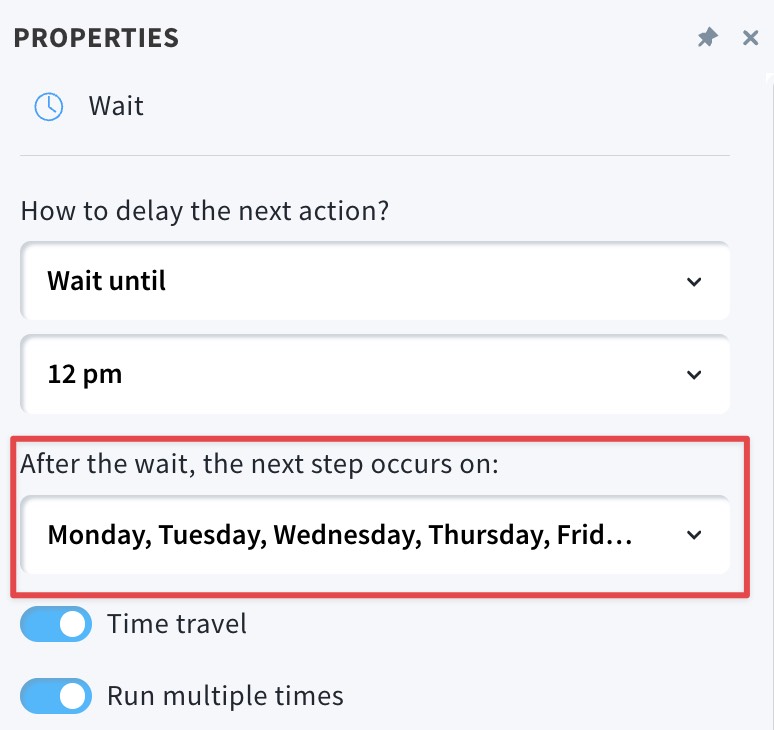
You can set the Wait action to trigger the next step on a specific day of the week. You can use this option if you select Wait for and Wait until.
To specify the days, expand the drop-down list and choose the day or days to trigger the next action on.
.
For example, you want your contacts to receive emails only Monday through Thursday. So, you should deselect Friday, Saturday, and Sunday. This way, your contacts won’t get emails from you on those days.
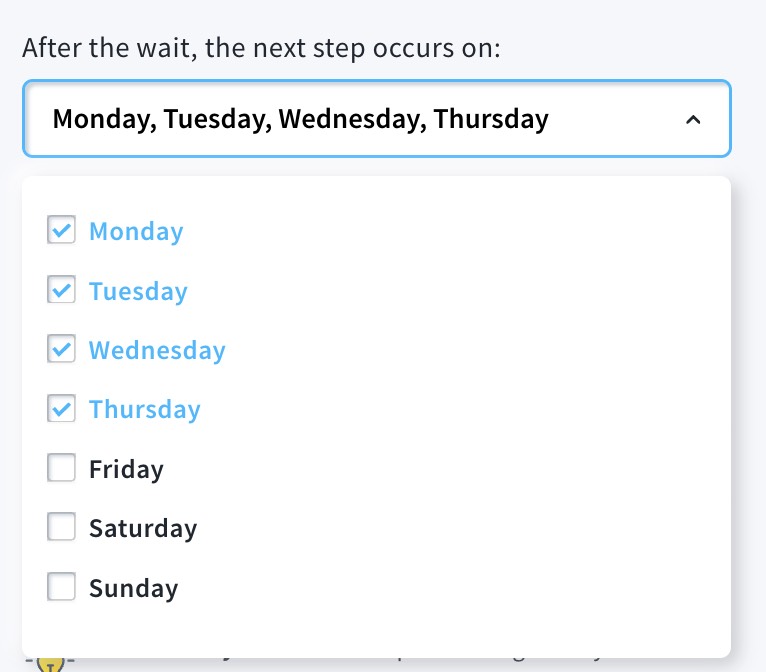
Note that if you exclude days, the delay can be extended. The contacts will leave the element only on the days you’ve picked.
Can I use the Wait action to send a message at a specific time?
The time you set for the Wait element determines when to stop delaying the next action and start moving the contacts to the next element. It doesn’t determine the exact time when that happens. Once it starts passing the contacts through, it will continue to do so for the next 59 minutes.
The contacts who got to the Wait element before the time you set in Properties will move on to the next element on the hour. If additional contacts arrive in the Wait action before the 59 minutes have passed, they’ll also move on to the next element. All contacts who reach the element after that time will wait for the event to be triggered the following day.
Can I use Wait before a condition?
We don’t recommend that you use this action before condition elements because they have their own time settings after which the element assumes the condition hasn’t been met. (The condition waits for an x amount of time before it assumes, for example, your contacts didn’t open your message or click a link.)
Wait temporarily stops your contacts from moving down the workflow. If they meet the condition when they’re still in the Wait element, they’ll move down the negative path of the condition element.
Wait works best for timing action elements. For conditions, you should use condition time settings to time the events in the workflow.


