Affiliate webinar promotion
The Affiliate webinar promotion template helps you set up a series of messages promoting your webinar that go out after the webinar invitation has been sent. It’s helpful for when you want to send personalized reminders with content designed to get your leads interested and excited about the event. You can set up the elements in the template to:
- tag everyone who’s received the invitation,
- assigns specific tags to help you distinguish between the registrants and non-registrants for future communication,
- send follow-up messages to webinar registrants at a set pace,
- send a reminder message to contacts who haven’t registered.
Template overview
Category: Affiliate marketing
Elements in template: 11
Minimum number of elements to configure: 7
Here’s what you’ll need to configure the elements and publish the template as a workflow:
- a scheduled webinar invitation that will trigger the workflow
- an automation message or message that can be used as automation messages
- (optional) tags. You can create tags as you’re building the workflow, but it’s best to have a basic tagging plan set.
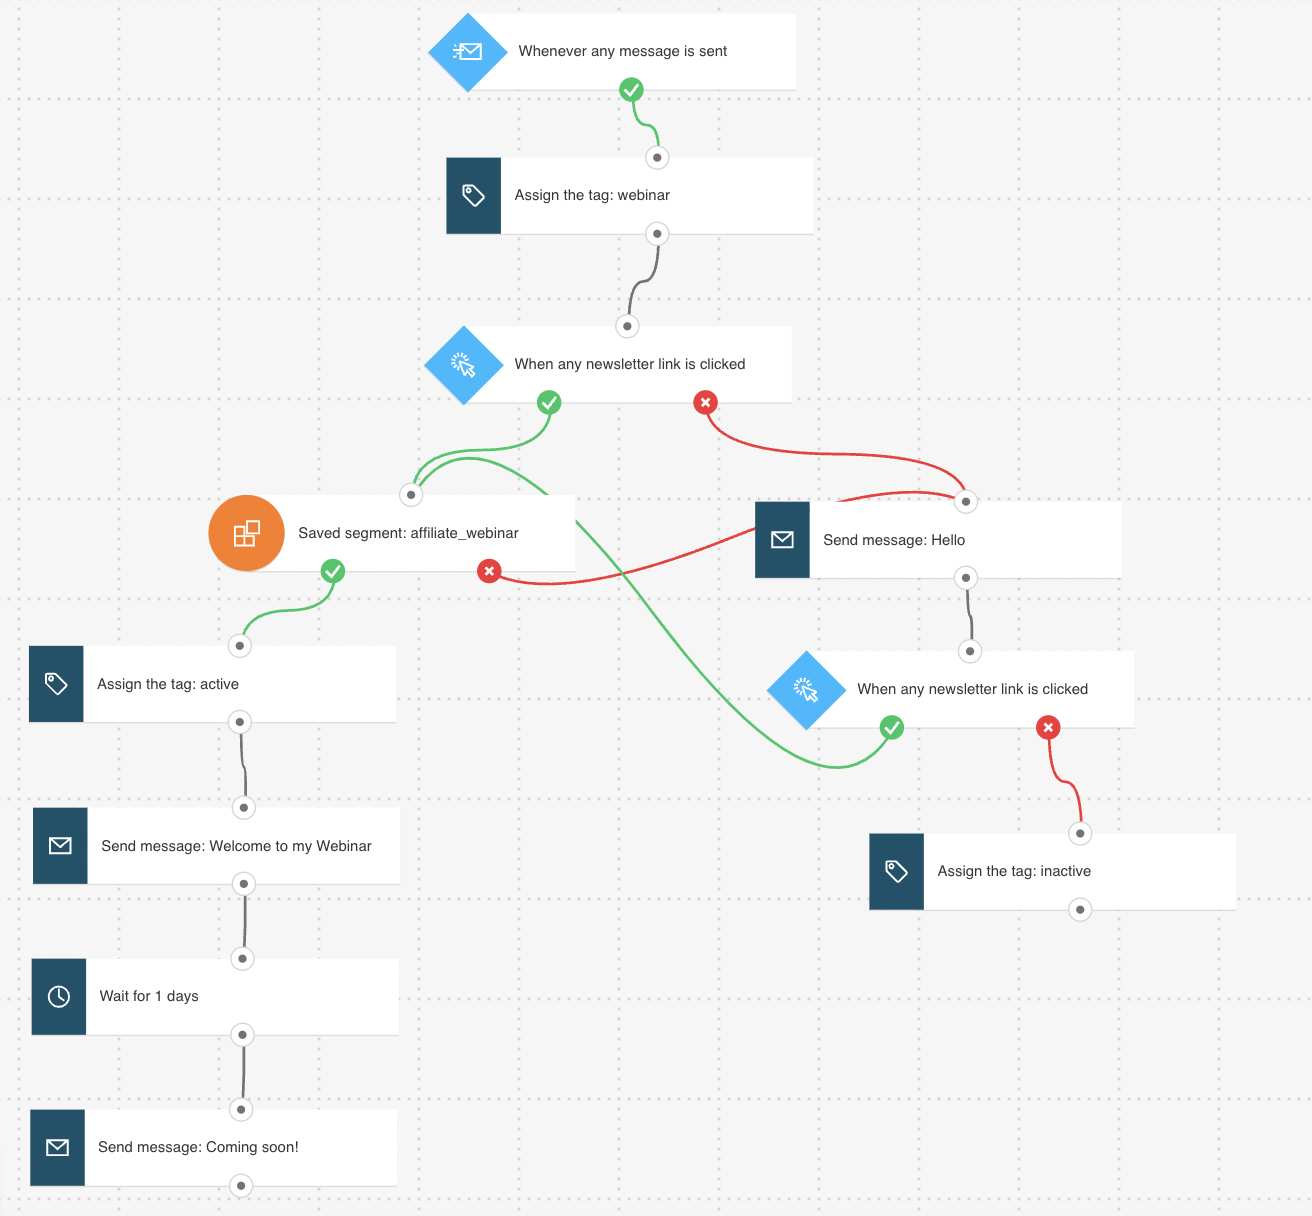
All greyed out elements need to be configured. The Link clicked? condition is preset to any newsletter/any link. The Message sent condition is preset to any message. You can modify the settings to better suit your needs. Click an element to open its Properties tab.
Note: The Wait element and the time settings in the Link clicked? condition have been preset to the recommended delay.
- In the Message sent condition, select the message that will trigger the workflow. Typically, this would be a webinar invitation with a registration link.
- In the Tag action, select the tag that should be assigned to your contacts, e.g. “invitation sent”.
- In the Link clicked condition, use the drop-downs to select the invitation and link.
Targeting leads who registered
- Set up the Dynamic segment filter linked to the “if yes” (green) connector of Link clicked. In the element Properties, you can use the segment you previously created. In order to create the segment, first you need to use advanced search. Go to Contacts -> Show all contacts -> Advanced search and then, click on Add condition. The conditions should be set to: “contact actions -> webinars -> participated -> registrants and contact actions -> webinars -> not participated -> attendee.” This way you can be certain you’re tracking everyone who has registered. Then, click on Create segment in order to be able to use it in the Dynamic segment filter.
If you need a new targeted segment, you can also click the Create new segment button in the element Properties:
- For tracking purposes, select the tag you want to assign to them in the Tag action. For example, you can tag people as “registrants”.
- For the 2 Send message actions, use the drop-downs to select the messages promoting the webinar that you want to use.
Targeting leads who haven’t registered
- For the Send message action, linked to the “if no” (red) connector of Link clicked, select the reminder message with the registration link.
- In the Link clicked condition, use the drop-downs to select the reminder message and the link. People who click on the link will automatically start receiving the follow-up messages.
- In the Tag action, select the tag that will be assigned to your contacts who didn’t register.
Finishing setup
Click Publish when you’re done setting up the template or Save and exit if you want to finish editing the template later (it will appear as a draft on the Manage workflows page).


