Affiliate cross-selling
You can use the Affiliate cross-selling template to automatically send a message to leads 7 days after they purchase to encourage them to take part in a new offer. It’s useful when you have a group of leads whose interests and behavior (spending habits, participation in your specials or events) show they might be interested in your premium offer – for example, upgrades or add-ons.
The template lets you:
- target the right group of leads when they are ready to see more of your offer,
- ensure that everyone who received your message and made the purchase is tagged to help you distinguish them from your other groups of leads.
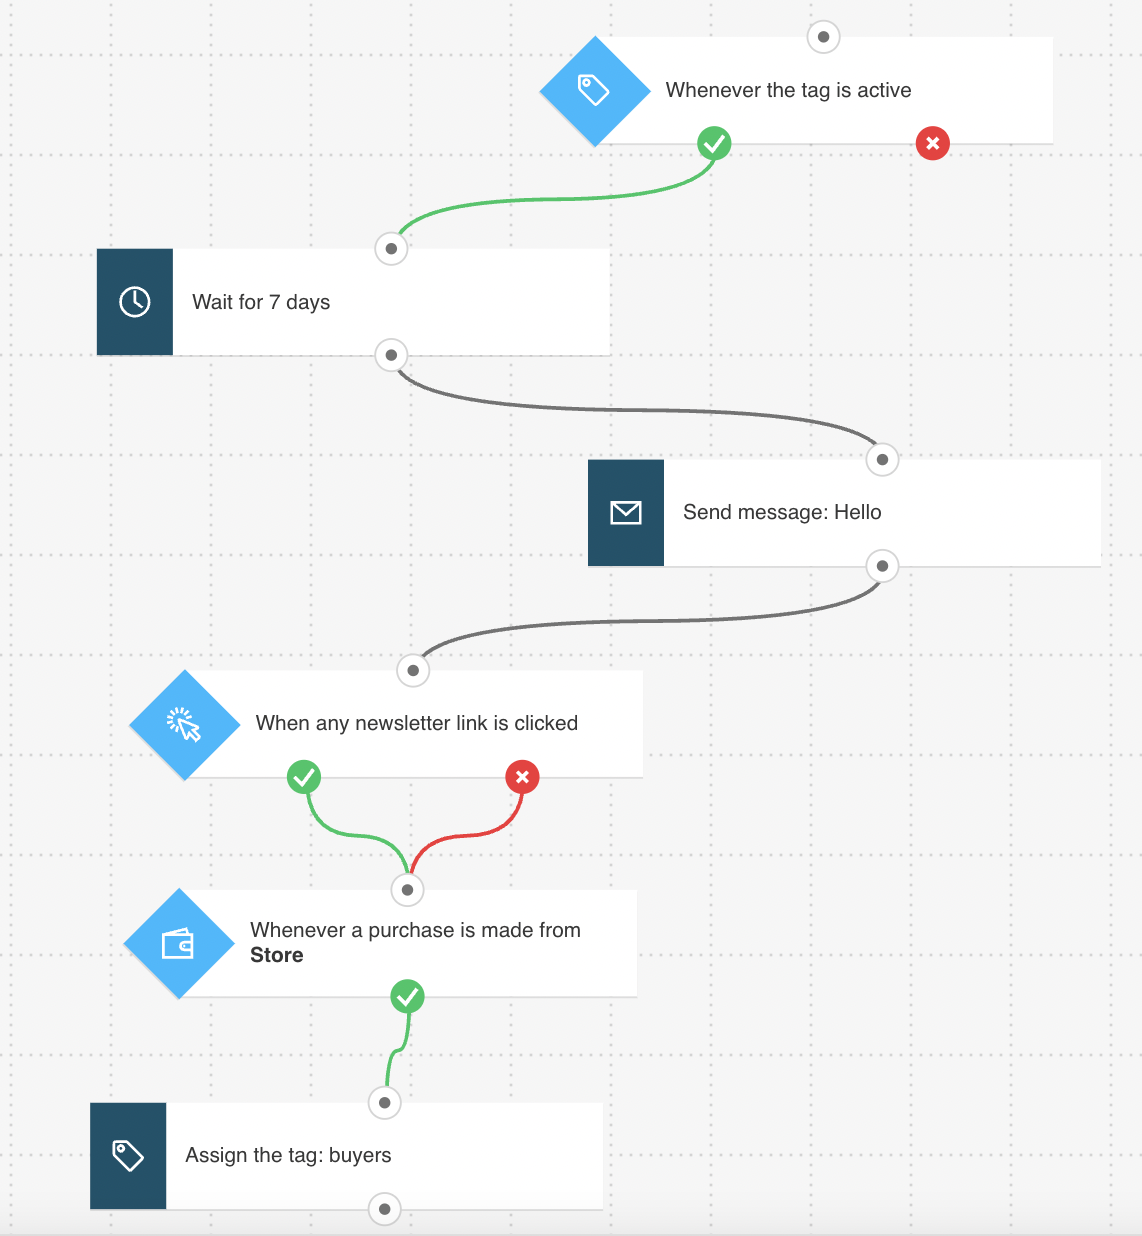
Template overview
Category: Affiliate marketing
Elements in template: 6
Minimum number of elements to configure: 4
Here’s what you’ll need to configure the elements and publish the template as a workflow:
- an automation message or a message (or draft) that can be used as automation messages,
- (Optional) tags. You can create tags as you’re building the workflow but its best to have a basic tagging plan set.
Setup
All greyed out elements need to be configured. Click an element to open its Properties tab. Note The Link clicked? condition is preset to any newsletter/any link. The Wait element is preset to our recommended settings but you can adjust them to fit your strategy). You can modify their settings to better suit your needs.
- For the If tag condition, select the tag starting the workflow. It can be applied in another workflow (e.g. Welcome new customers) or assigned by you. By default, this condition will work for the leads who get the tag after the workflow is published. If you want to include the leads who had the tag before the workflow is published, turn on the switch that enables adding them. Don’t change the time settings from Never to After some time.
- For the Send message action, use the drop-downs to select the message you want to use.
- For the Link clicked conditions, decide if you want to keep the default general settings or use the drop-downs to narrow down the condition to a specific message and link. In this case, it’s best to select a specific message and link to your product offer.
- Configure the Purchase element to track if your contacts completed the purchase. To do this, click the element. This will open its Details. The next step depends on the integration method you use:
- for API, select API as the integration method. Then, use the drop-downs to specify the purchase you want to track.
- for JavaScript, click the Get Web Connect button, copy the snippet to the clipboard and after that click on ‘Back’ on the top left. (At this point it’s best to save it to a temporary document in case you copy something else to the clipboard). Under Properties, enter the URL of the post-purchase thank-you page.
Once you’re done configuring the template, you’ll need to copy the snippet to your website’s management system or insert it directly into the HTML source code. For detailed instructions on installing the tracking code, please go to How do I add the tracking JavaScript code to my website?
Note: To track customers who didn’t open your message or click the link, you’ll need to use the gaSetUserId method. It makes it possible to identify the visitors who haven’t come to your via a GetResponse message link. It requires passing on a user email as a parameter to GetResponse. To learn more, go to our help materials explaining how to do it.
- For the Tag action, select tags that will help you identify the leads.
- Click Publish when you’re done setting up the template or Save and exit if you want to finish editing the template later (it will appear as a draft on the Manage


