How to add another message to an existing autoresponder cycle? Video
You may already have an existing autoresponder cycle, and decide that you want to add a new message to it. You can do it by creating a new autoresponder message. Repeat the process every time you want to expand your cycle with new messages to create a continuous sequence. We explain the process in detail below.
- Go to Menu>> Autoresponders.
- Click Create autoresponder.
- Give your message an internal name.
- Choose the list linked to the autoresponder. This is the list your contacts subscribe to. If you’re planning to create more than one autoresponder in a cycle, make sure to select the same list for all of them.

- Assign the autoresponder to a specific day in a cycle. Keep in mind that day 0 is the day of subscription, with day 1, day 2 etc. following at 24-hour intervals. For example, if your first message is scheduled for day 0 and you want the new message to go out the next day, type in “1”.

- Select if you want to send the message on same time signed up, with a delay of, or exactly at a specific time.
- Choose the days of the week you’d like for the message to go out on.
- Select the from and reply-to addresses.
- Add your message subject line.
- Next click Design message to design how your message should look like. For more on using the new editor visit this section.
- Choose if you want to send the message as a source to Google Analytics.
- When you’re done, click the button to Save the message if you don’t want to turn it on just yet. Click Save and publish if you want it to start working right away.
Legacy editor
1. Go to Menu>>Autoresponders.
2. Click Create autoresponder to get to the autoresponder editor, the same way you would create a new autoresponder message. Choose No, thanks. I’ll use the older version.
3. Type in the name of the message. Inside the calendar, enter the day of the cycle you want this particular message to go out on. Keep in mind that day 0 is the day of subscription, with day 1, day 2 etc. following at 24-hour intervals. For example, if your first message is scheduled for day 0 and you want the new message to go out the next day, type in “1” into the calendar.
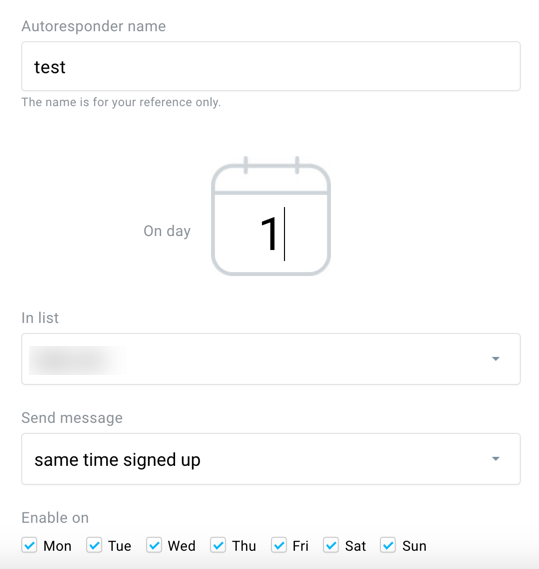
4. Select the list for this autoresponder message. Make sure to use the same list your first message is already in. If the first message goes out to contacts in list A, choose the list A for the new messages as well. This allows the messages to go out in a cycle, one after the other.
5. Select when to send the message:
– Same time signed up sends time-based autoresponders as soon as your contact is added to your list. The second message sends at an hour matching the time your contact subscribed. If your contact signed up at 1:00 pm, for example, they will get your day 1 message the following day, also at 1:00 pm.
– With a delay of sends the message with a delay you specify, from 1-23 hours.
– Exactly at a specific time. Enable Time Travel if you want it delivered at the local time of your subscribers.
6. Select an existing message to use, or create a new one.
7. When you’re done, click the button to Save the message if you don’t want to turn it on just yet. Click Save and publish if you want it to start working right away.
Sending the new message to contacts who passed it in the cycle.
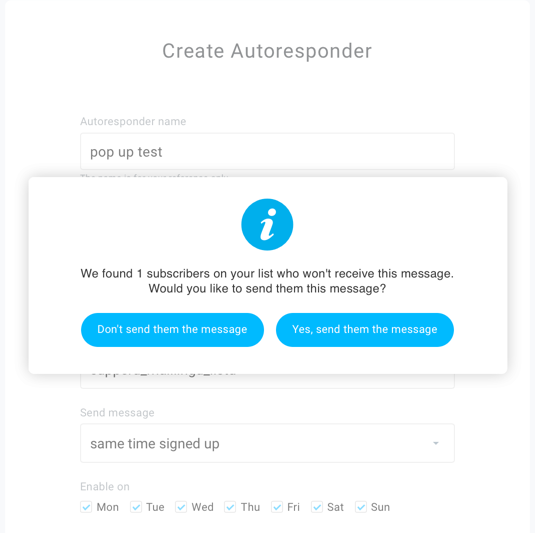
It’s possible to schedule a new autoresponder message on a day of the cycle that some of your contacts already passed. In such cases, a pop-up message will inform you about this situation. It gives you the option to send a message to those contacts right away. Choosing the Don’t send the message option still activates the message in the cycle, but the contacts who are ahead won’t receive it. Those who haven’t reached the day you scheduled your new message for will receive it when they reach this stage in the cycle.
For example, let’s assume that you’re adding a message on day 5 to a list with 10 subscribers. 5 of them are on day 0, 3 of them are on day 6, and 2 are on day 8 (because they subscribed earlier). When you publish this new message on day 5, our system displays a notification that 5 contacts – those on days 6 and 8 – are ahead of this message in the cycle. Contacts on day 0 aren’t mentioned, because they will get to this day of the cycle naturally in 5 days. You can choose if you want to send the new message to the 5 contacts who wouldn’t get it otherwise.