How to add a signup form to my website? Video
You can add signup forms to your website to convert visitors into subscribers and grow your business online reach.
Use other GetResponse tools, like autoresponder, newsletters or marketing automation, to stay in touch with your new contacts and keep them engaged with your business.
How can I add a signup form?
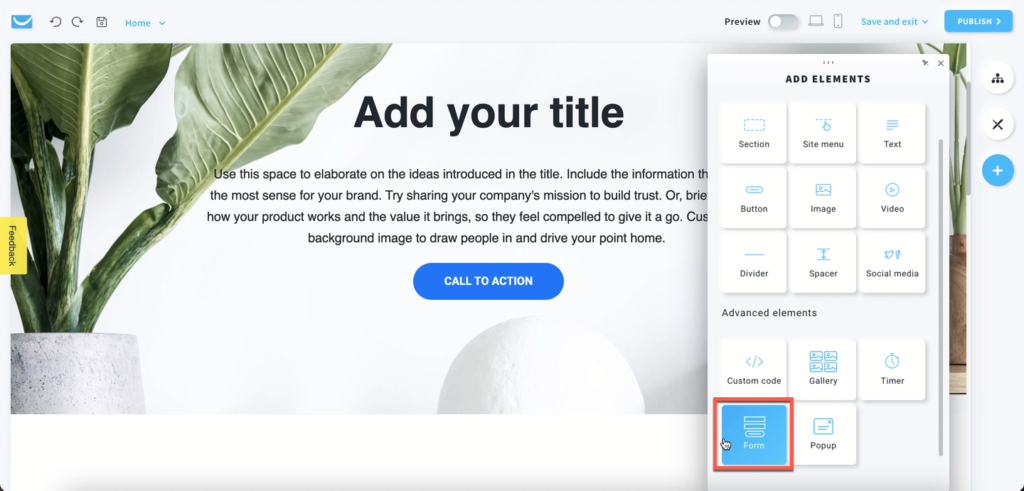
- When in the Website Builder editor, click on the Add elements button.

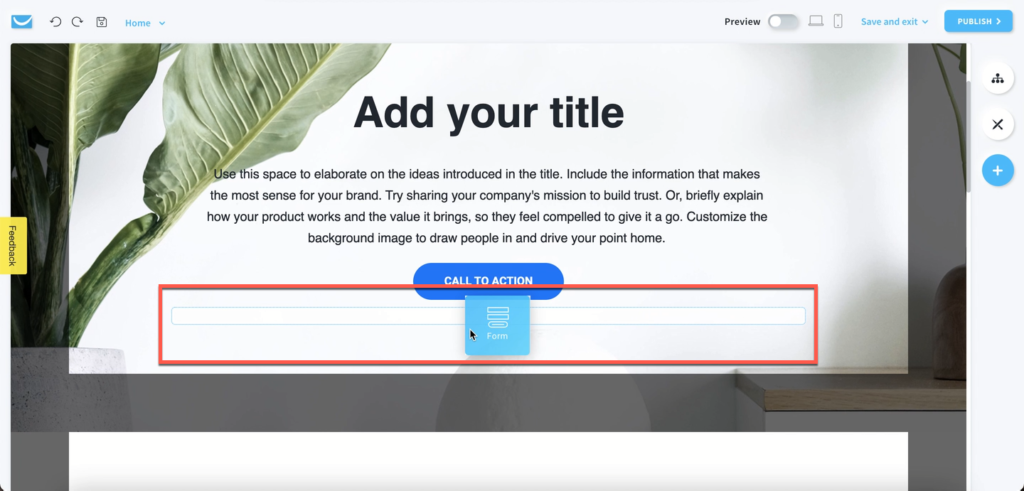
- Drag and drop the Form element into your page content. Note that the editor will highlight the spots where you can drop it.
- Click on the Signup type of form on the left.
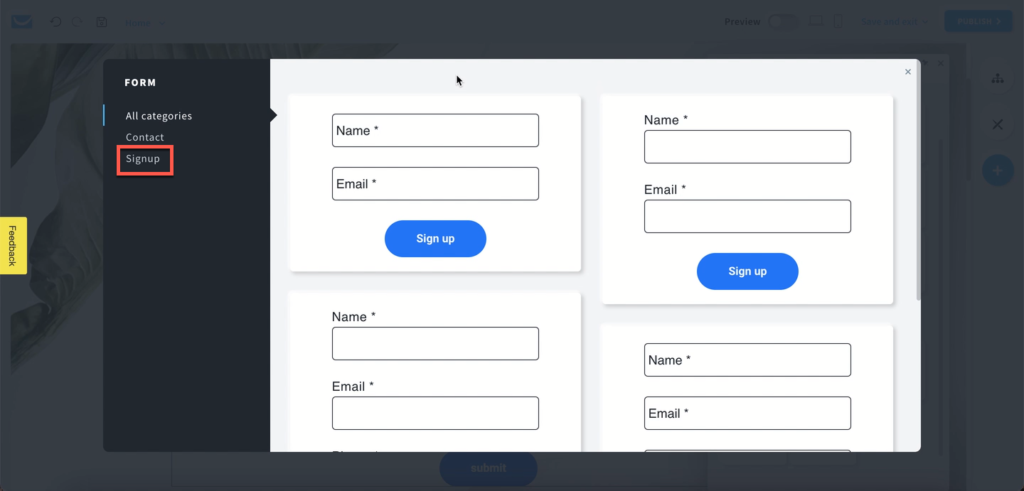
- Click on the form you want to add to your page.
Note: it is important that you select the correct type of form.
A signup form will add subscribers to your contact list.
A contact form will allow visitors to send you a message, but won’t add them to your list.
Click here to learn more about the difference between contact and signup forms.
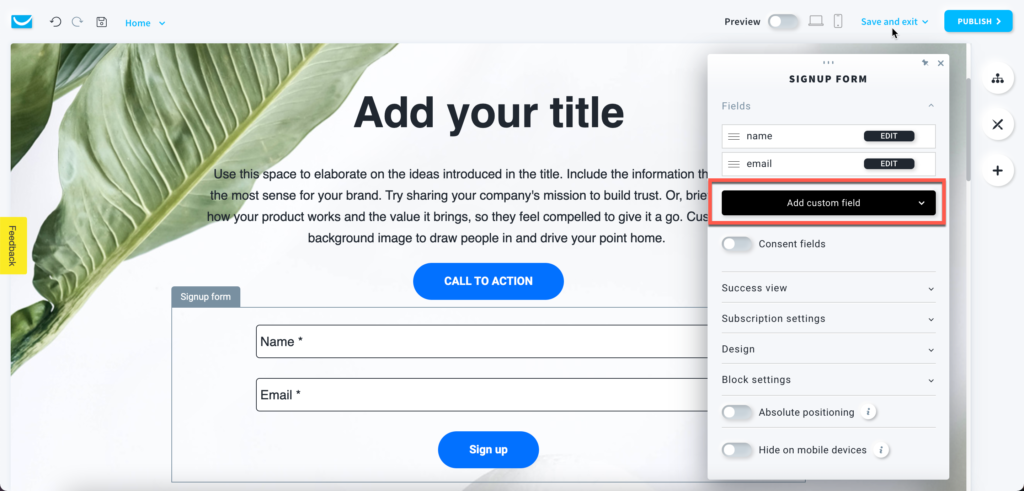
How can I add custom fields?
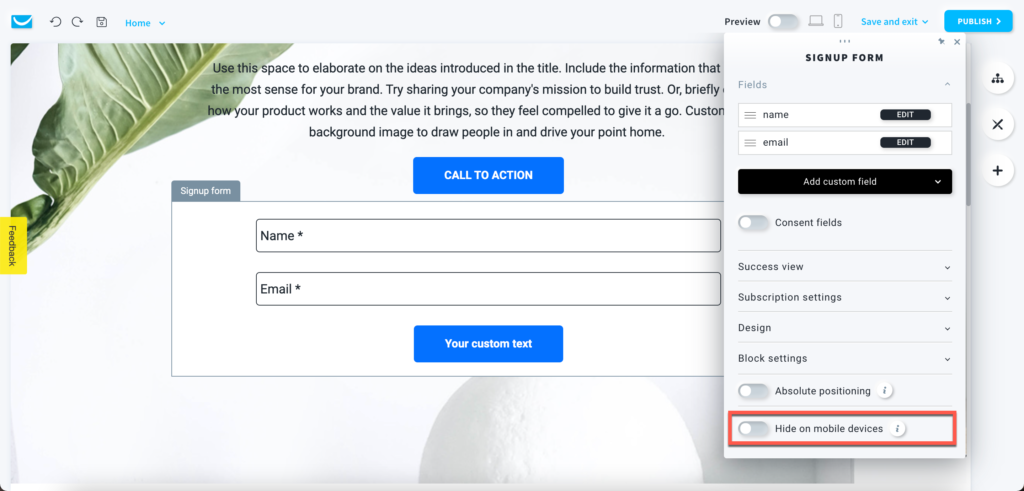
Click on the Fields section to add any custom fields to your form.
The default subscription form contains email and name fields.
Click on the Add custom field button to select the custom field you want to add. You can add multiple custom fields.
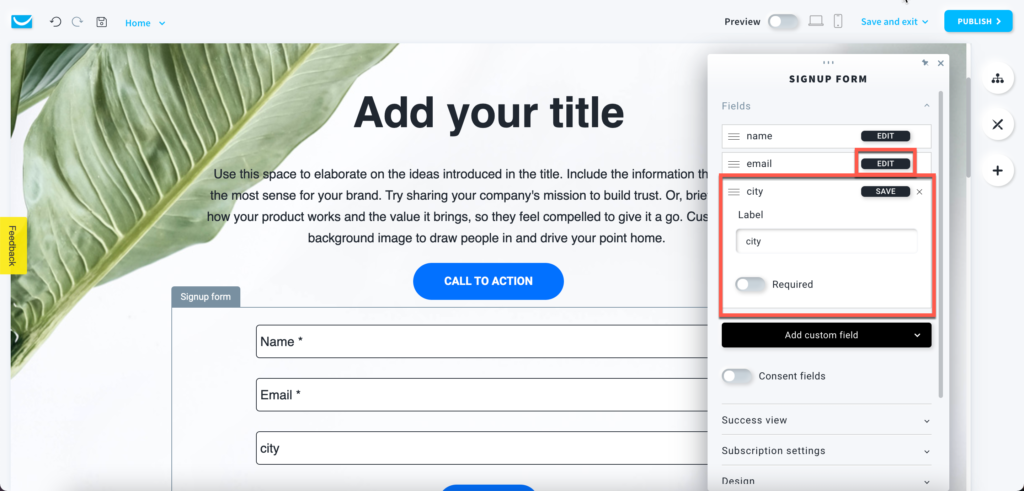
How can I edit fields in my form?
Click on the Edit button next to the field you want to adjust. You can type a custom label and decide if the field should be required.
Click on the Save button to save your changes.
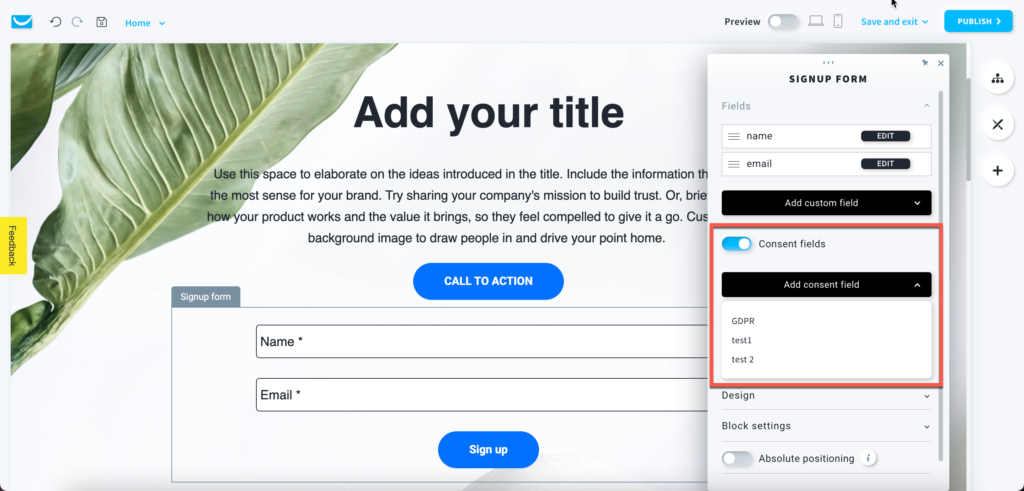
How can I add a consent field?
Click on the Consent field toggle to enable it. Then click on the Add consent field button to select a specific consent field.
Decide if it should be required with the Required toggle.
Learn more about creating consent fields here.
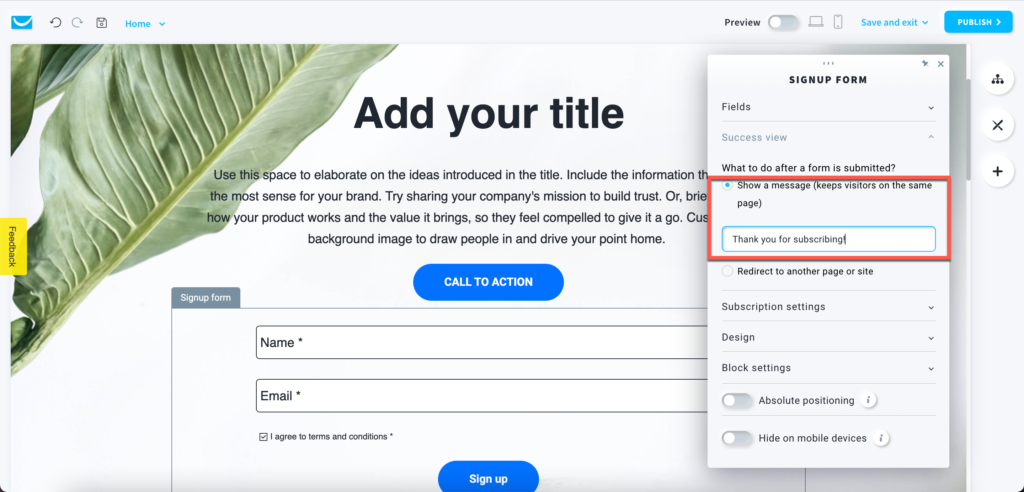
How to set up a success view?
Click on the Success view section to choose what will happen after a visitor subscribes.
Select the Show a message (keeps visitors on the same page) option and add a message you want your new contacts to see if you prefer them to stay on the current page.
Use the Redirect to another page or site option if you prefer to use a link.
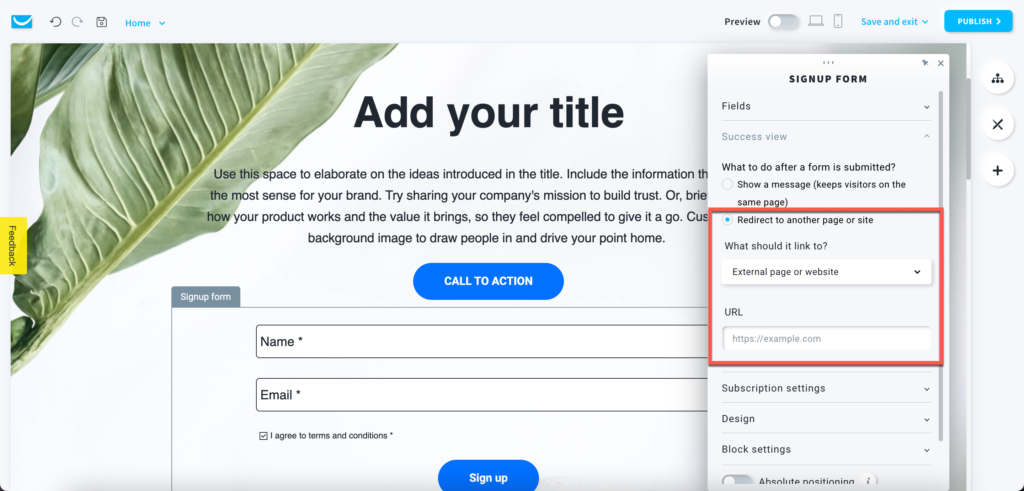
There are several types of links you can use. Make sure to choose the right type.
- External page or website – use it to link another site with a URL.
- Landing page – select a GetResponse landing page that you want to open.
- Custom protocol – use to it embed protocols.
- Website – select another website created with the GetResponse Website Builder.
- Current website – link to the current website. Choose the page you want it to open.
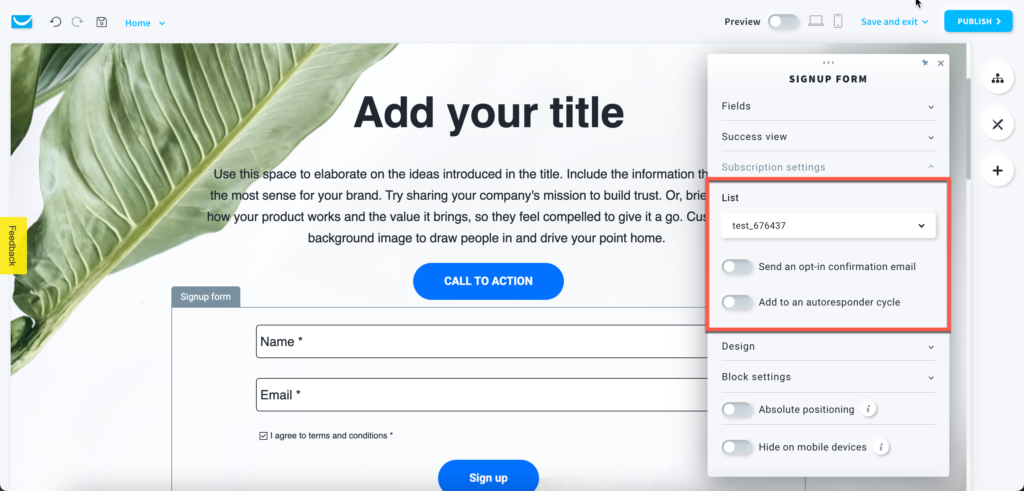
How to adjust subscription settings?
Click on the Subscription settings section to decide what will happen with your new contacts.
Choose the list you want to add new contacts to in the List dropdown menu.
If you want a double opt-in process, set the Send an opt-in confirmation email toggle to the right (enabled).
Set the Add to an autoresponder cycle toggle to the right if you want to enable it.
Select the day you want them to start on.
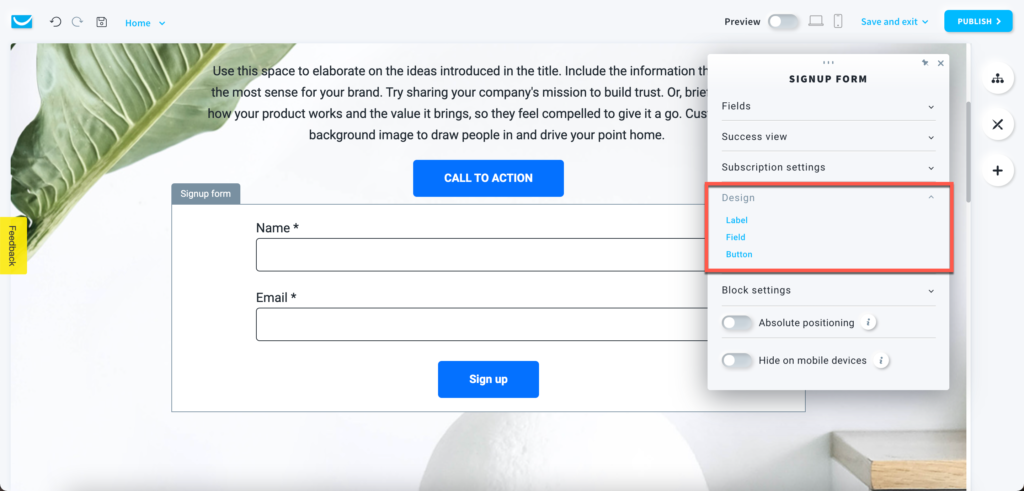
How to change the form’s design?
Set up design details for labels, fields and buttons in your form in the Design section.
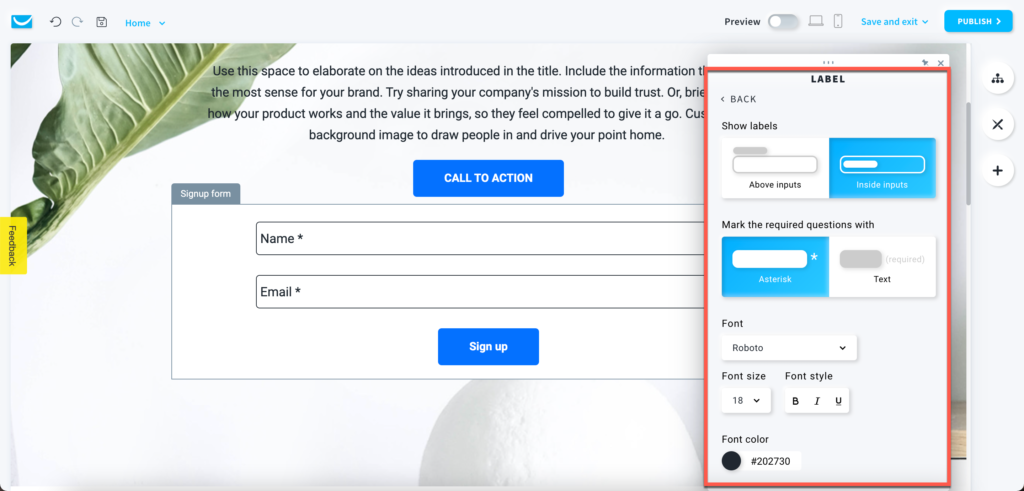
Labels
- Show labels
Choose if you want to place fields labels inside or above fields. - Mark the required questions with
Decide if you want to mark required fields with the asterisk* or “required” text. - Font, font size, font style, font color
Select a font type, size, style and color for the labels.
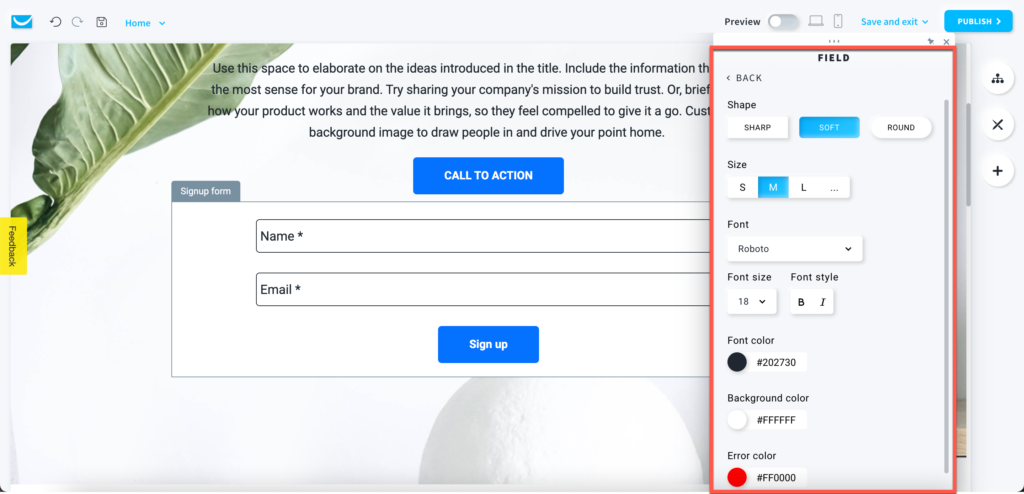
Fields
- Shape
Choose the sharp, soft or rounded shape of the fields. - Size
Choose from three predefined sizes or click on the … button to enter your own size manually. - Font, font size, font style, font color
Select font type, size, style and colour for the text your visitors will input in the form fields.
Note: it can be different from the labels font settings. - Background color
Choose the background color of the fields. - Error color
Select a color for the error message.
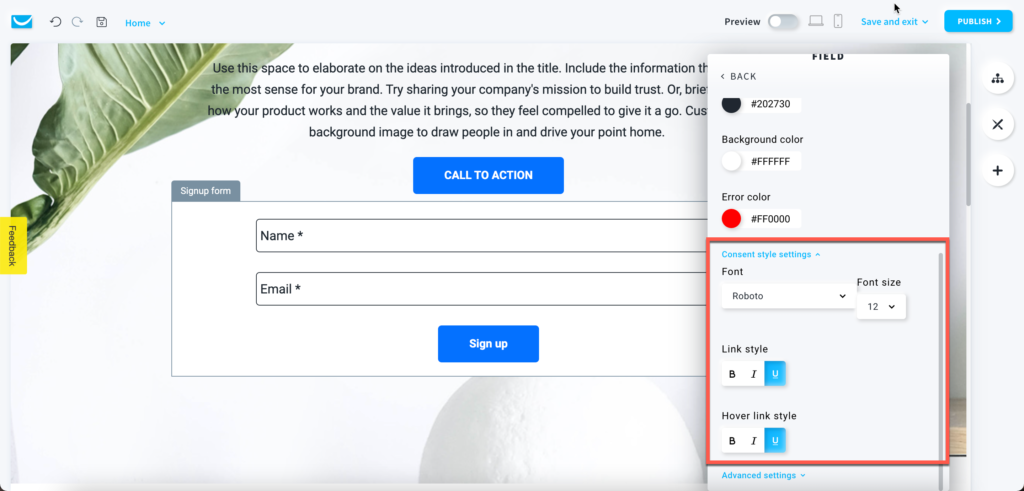
Click on the Consent style settings section to adjust the font type and size and the link style.
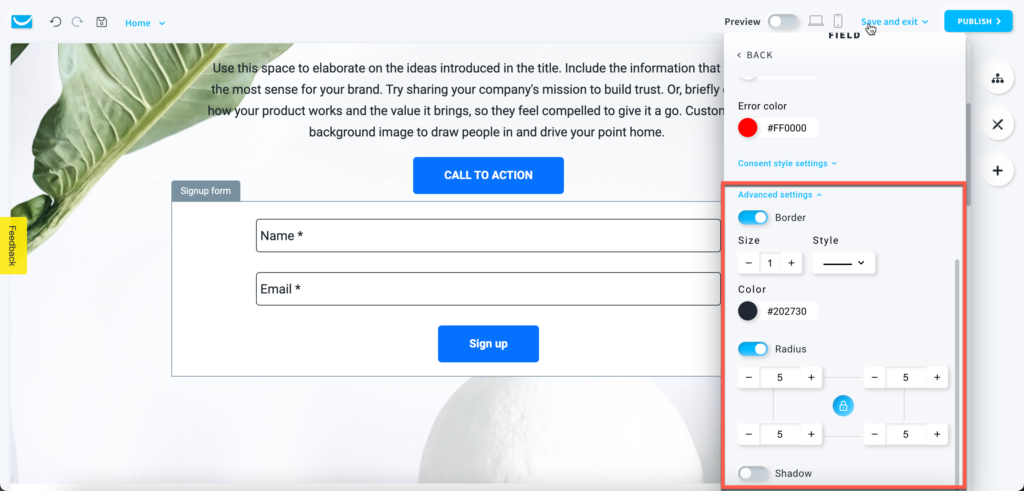
Click on the Advanced settings section to set up the border, radius and shadow setting of the fields.
Buttons
- Type your custom text for the form’s button in the Button text field.
- Style
Select one of the predesigned styles or choose one from our library by clicking on the More styles link. - Shape
Choose the sharp, soft or rounded shape of the button. - Size
Choose from three predefined sizes or click on the … button to enter your own size manually. - Alignment
You can move the whole button to the left, right or centre of the section.
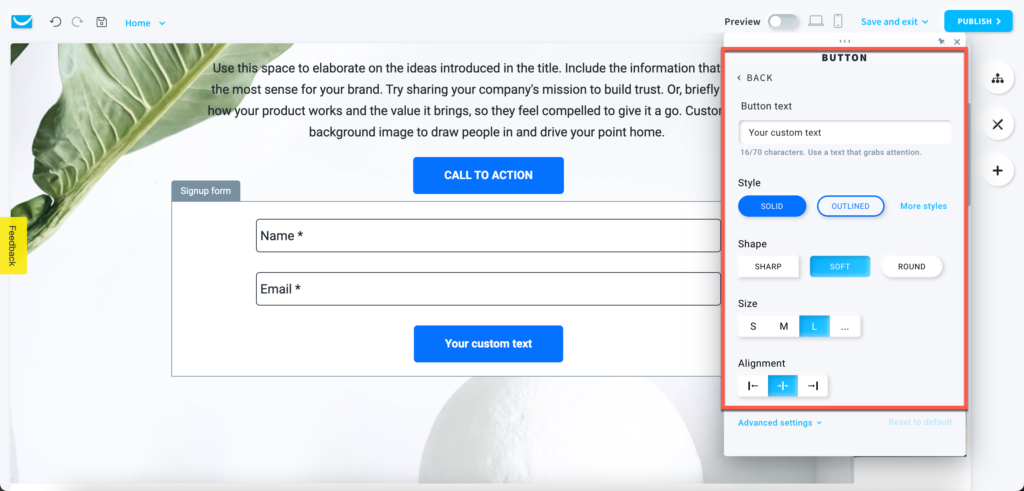
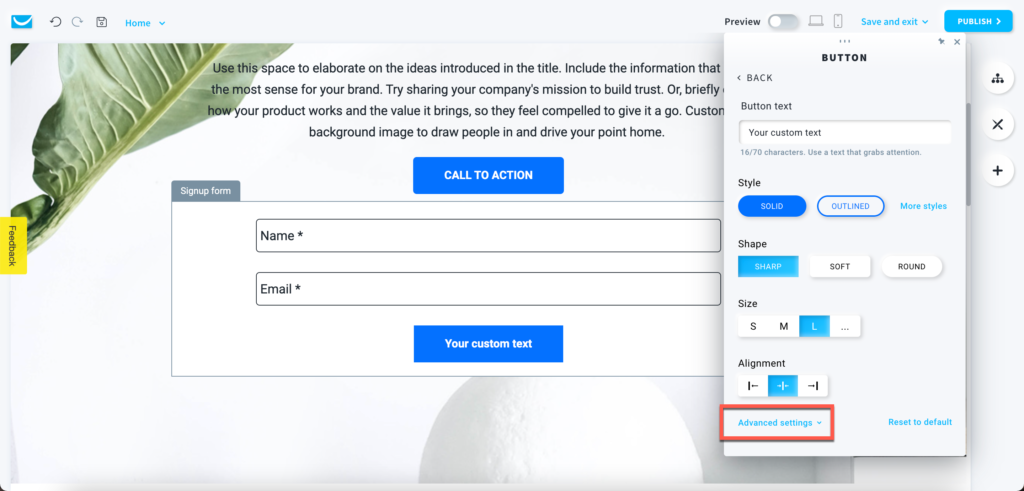
- Advanced settings
If you want to further adjust your button, click on the link to open advanced settings.
You can customize font, colours, border, radius, and shadow.
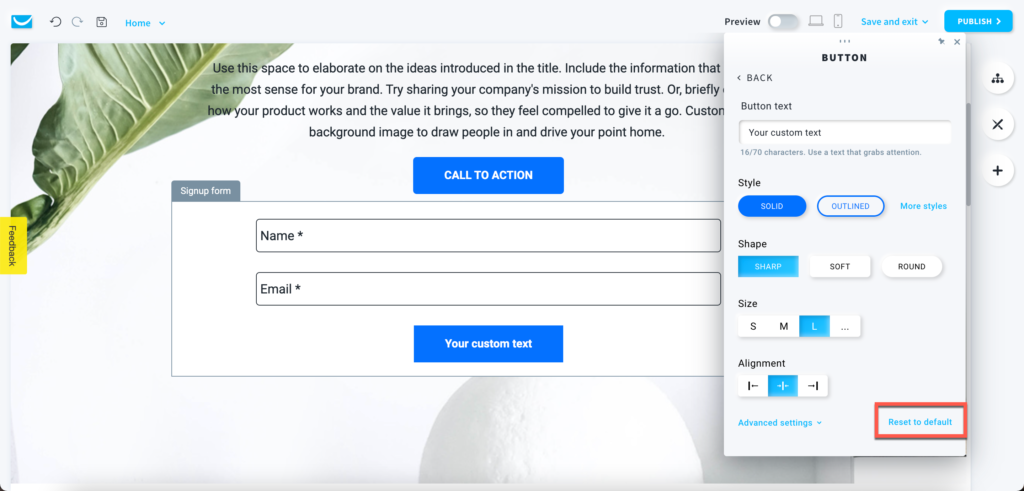
- Reset to default
To reverse all custom changes, use this link to restore the default button settings.
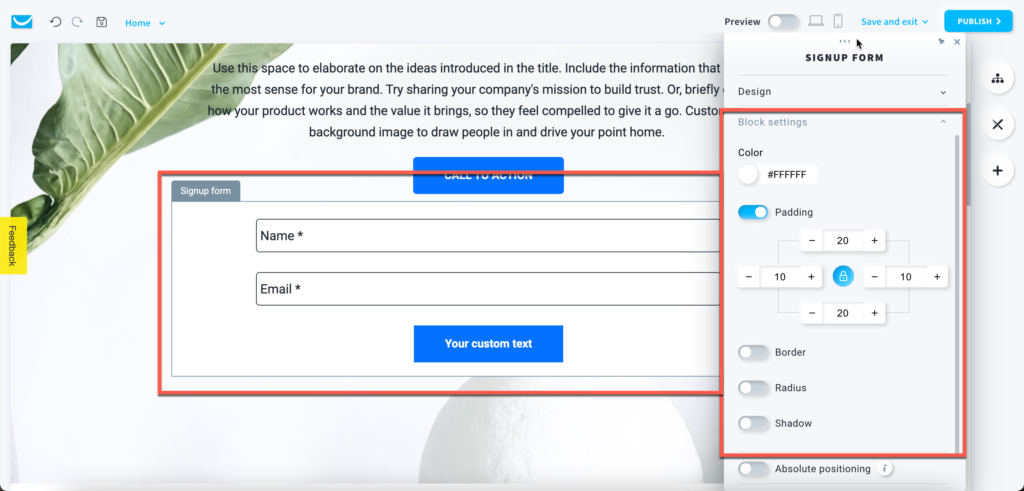
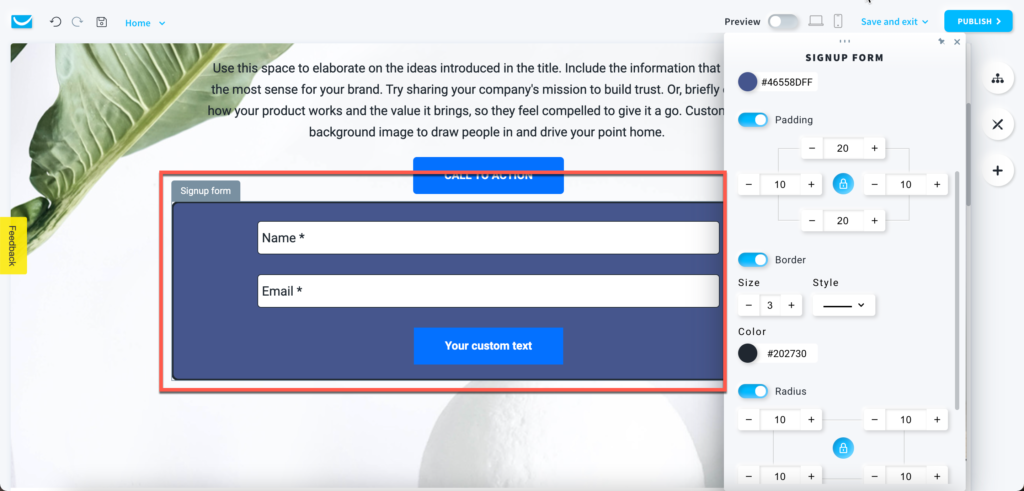
Block settings
The form block is a framed workspace around your form with a Signup form label on the left. You can only see the frame after clicking on the object. It won’t be visible on your website.
You can customize its color, padding, border, radius, and shadow.
Absolute positioning
Enable this option to move the form to any place on your website.
Note: we only recommend using this option if you have some unusual design the can’t be created in any other way. Using objects with absolute positioning can make your page less responsive on mobile devices.
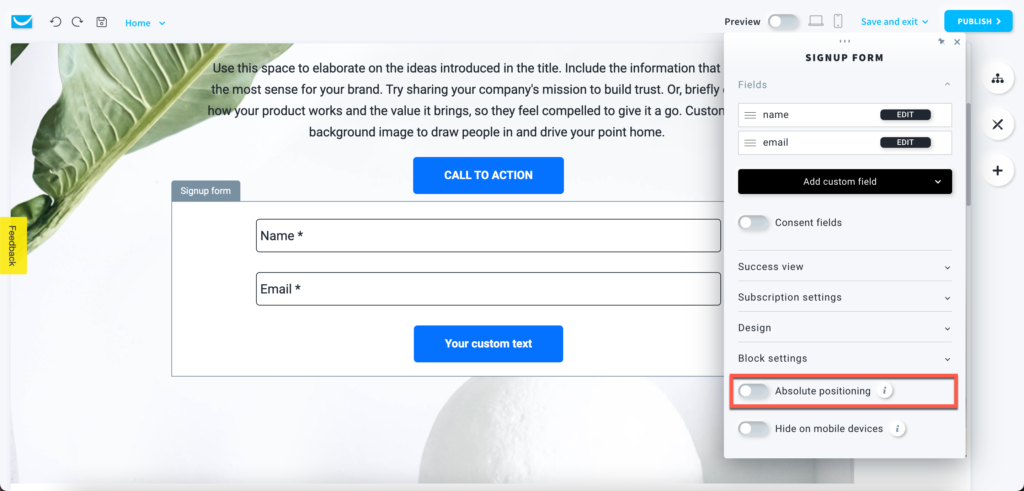
Hide on mobile devices
Enable this option to hide your form while your page is opened on a mobile device.
You may want to use this option to make your page simpler for mobile users.