How to create a lead magnet funnel? Video
In GetResponse you can create lead magnet funnels in order to gather more subscribers and send them files in return for their opt-in. This can help drive traffic to your list and increase the list quality by only having people interested in your content.
The lead magnet funnel is a funnel that sends people a file after they subscribe to your list. The link to the download page is included in an email that is sent after opting in.
How to create a lead magnet funnel?
- Go to Conversion funnel.
- Click Create funnel.
- Click Build a list.
- Select Lead Magnet Funnel.
- Add a name of your funnel.

- You can use existing lead magnets or create your own.

Add another lead magnet
Select this option if you want to add a new file to send to your contacts.
- Provide the file name (required).
- Fill out the file description (required).
- Upload an image for your file. You can use: JPG, .JPEG, .PNG, .GIF.
- Upload the file. It can have up to 50 MB and it’s best to use a zip file.
- Click Add and go to funnel to finish.
Use an existing lead magnet
- Select the file you want to send.
- Click Save.
Note: you can also access, manage, and add lead magnets by going to Conversion funnel >> Lead magnets.
Editing the funnel
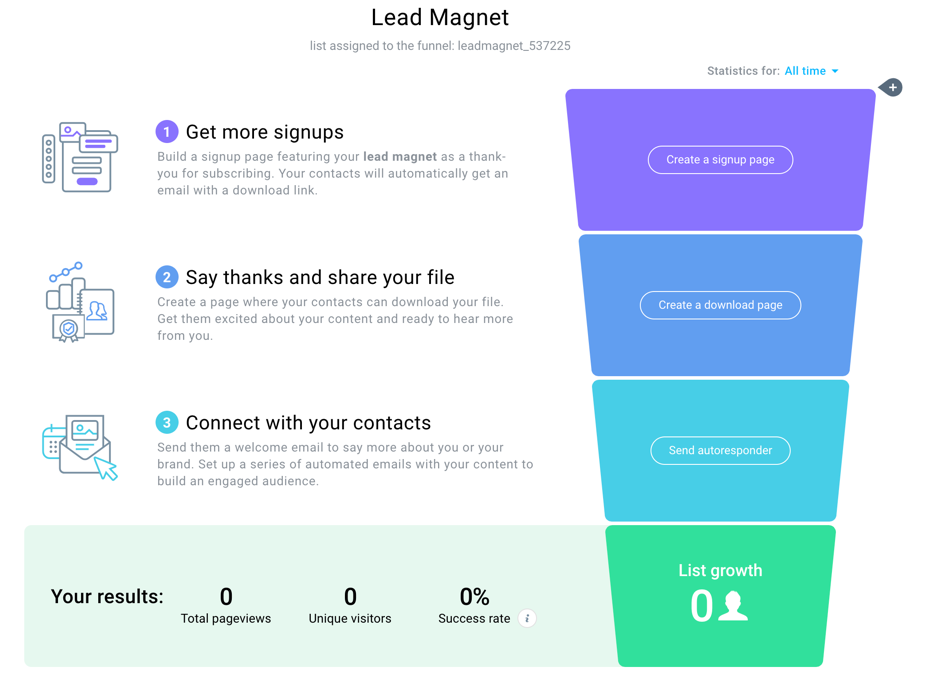
Get more signups
Build a signup page featuring your lead magnet as a thank-you for subscribing. Your contacts will automatically get an email with a download link. The page will have a form, as well as an exit pop up to it. It is a good opportunity to inform your leads what they will get after they sign up.
- Click on Create a signup page and choose the template.

- Select one of the templates, enter the name of your page and click on Next step. This will take you to the page editor, where you can design the page according to your preferences.
Note: The page has an exit pop up form installed by default. Exit pop up appears when your visitors try to exit the page and it encourages them to sign up. Double click on the exit pop up to edit.
If you don’t wish to have the exit pop up form on your signup page at all, hover over it and click on the trash bin icon to remove it.
- If you are ready with the design of your signup page, click on Next step.
- Fill in the settings and click on Publish. If you do not want your page to be live just yet, click on Save.
You can always publish the page in Landing pages.
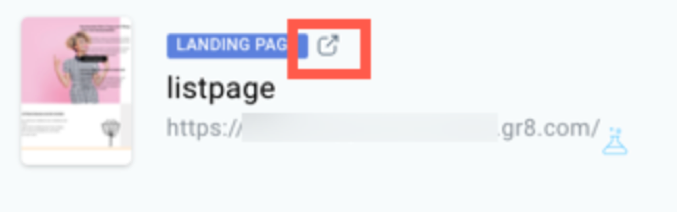
From now on you will be able to see your signup page statistics:

Click on the preview icon to see the signup page you created.
Say thanks and share your file
Create a page where your contacts can download your file. Get them excited about your content and ready to hear more from you. That page will be displayed after they click a link in the email which is sent after signing up. The email template can’t be edited. Each person gets a unique link.
Note: The download page will be displayed only if you click on its URL from within the message we send upon signing up. In this way, we are able to track link clicks properly.
- Click on Create a download page.
- Select one of the templates, enter the name of your page and click on Next step. This will take you to the page editor, where you can design the page according to your preferences.
The page will have a special section where the file with the download link will be displayed:
- If you are ready with the design of your signup page, click on Next step.
- Fill in the settings and click on Publish. If you do not want your page to be live just yet, click on Save.
You can always publish the page in Landing pages.
From now on you will be able to see the download statistics for your download page:

Connect with your contacts
Send them a welcome email to say more about you or your brand. Set up a series of automated emails with your content to build an engaged audience.
- Click on Send autoresponder. This will take you right to the Autoresponder settings page, where you can name your message, fill in the subject line, select from and reply-to fields, as well as distribution settings.

- Click on Next step if the settings of your Autoresponder are completed.
- Click on one of the message templates to select it.
- Once you are ready with the design of your welcome email, click on Next step.
Wonder why there was no Day 0 in the process of creating your Autoresponder? It’s because we assume that this is the welcome message that will be sent immediately after your leads sign up. Each next Autoresponder will have the option to choose the day of the cycle. Note that you can always change the day of the cycle for all your Autoresponders. Visit this section to find out how to do it.
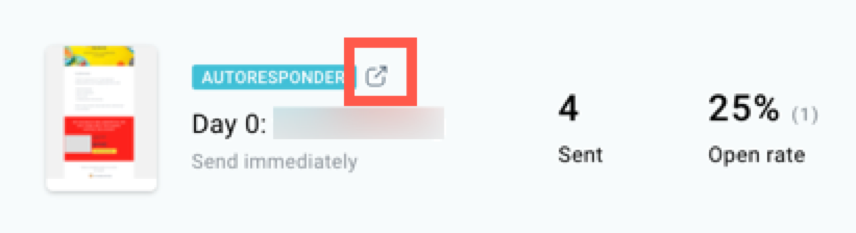
From now on you will be able to see the statistics of your Autoresponder:

Click on the preview icon to see the autoresponder you created:
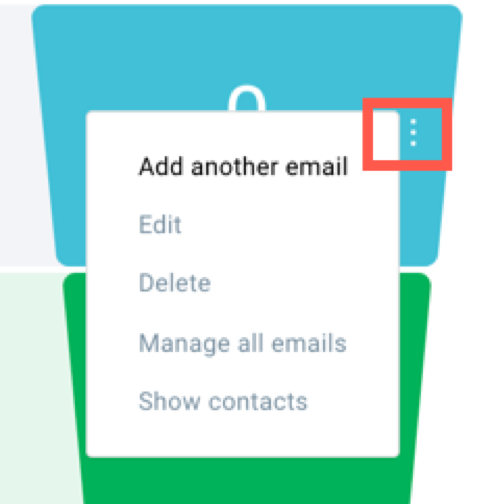
To create more Autoresponders, hover the mouse over actions and click on Add another email. You can have up to 64 Autoresponders in the funnel:
(optional) Set up a Facebook Ad
After setting up your first funnel page, you can create a Facebook ad for it.
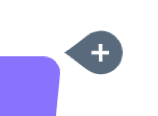
- Click the + icon to add a Facebook ad.
- Click Create an ad.
- Follow the process of creating an ad as described here.
All linked ads will appear on the top of the funnel. If ads are active, we will show overall clicks and reach.
Note: The ad will be linked to the first page of the funnel and cannot be changed. The ad can only be created for the first page of the funnel.
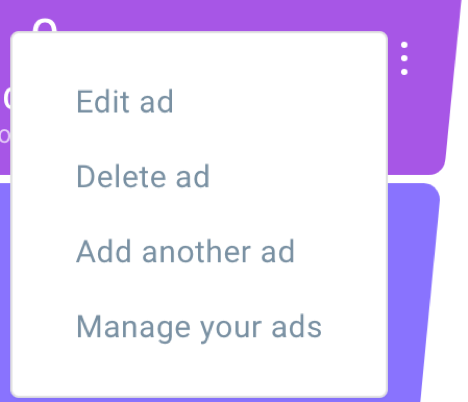
You can manage the ads under the Action menu (vertical ellipsis):
Funnel statistics
You will also get to see the total results of your funnel:
- Total pageviews: the number of views on your signup page.
- Unique visitors: the number of unique visitors on your signup page.
- Success rate: the number of new contacts divided by the number of visitors to a signup page, shown as a percentage.
- List growth: the number of new contacts on your list.


