Tagging affiliate contacts
Tagging affiliate contacts lets you identify your contacts based on the type of their engagement. It automatically assigns tags based on the type of offer your leads respond to. This will help you segment your contact list based on the leads’ interests and behavior, which means you can send them relevant offers in the future.
Template overview
Category: Affiliate marketing
Elements in template: 7
Minimum number of elements to configure: 4
Here’s what you’ll need to configure the elements and publish the template as a workflow:
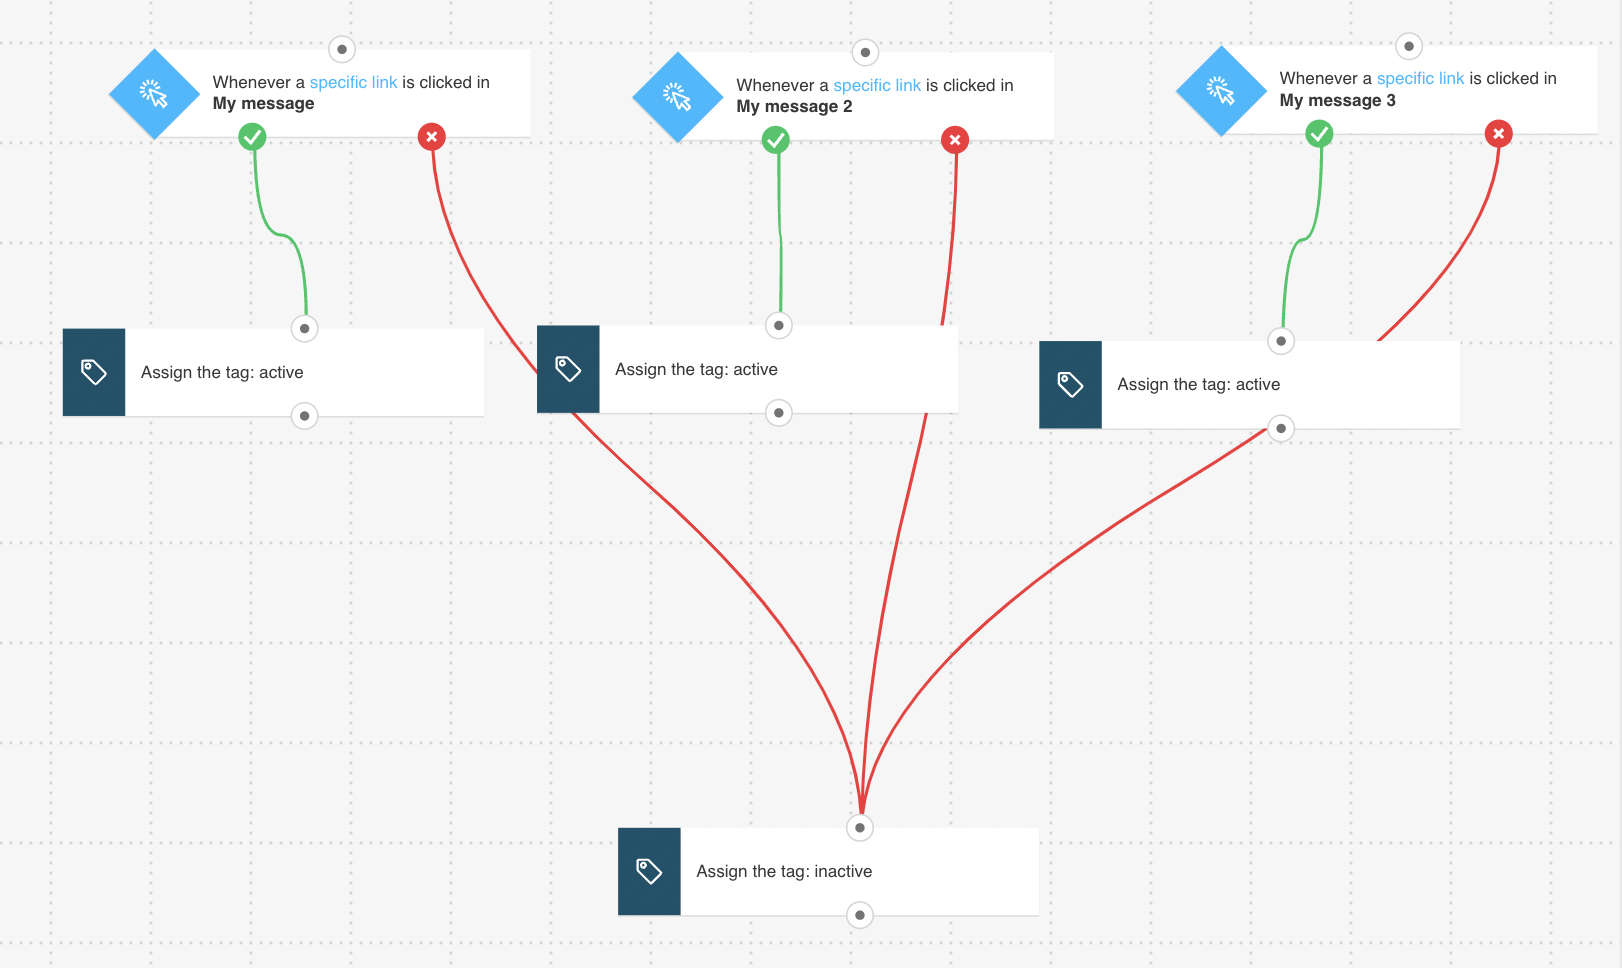
- 3 scheduled messages that will trigger the workflow when people click on the link to the offer
- an idea what tags to assign to distinguish between contacts interested and not interested in your offer.
Setup
All greyed out elements need to be configured. The Link clicked? condition is preset to any newsletter/any link. You can modify the settings to better suit your needs. Click an element to open its Properties tab.
- For each of the Link clicked conditions, select the messages and links to your offers that you want to track. Note: Leave the time settings set to Never. This will ensure continuous adding of new leads and will even work for messages you sent before you publish the workflow.
- For the Tag actions connected to the “if yes” (green) connector, select the tags that will be assigned to your contacts based on the offer they clicked.
- For the Tag action linked to the “if no” (red) connector, select a “placeholder” tag. It will never be assigned because the negative path in the Link clicked condition has been disabled. We need this placeholder tag to be able to connect all the elements and publish the workflow.
- Click Publish when you’re done setting up the template or Save and exit if you want to finish editing the template later (it will appear as a draft on the Manage workflows page).


