Affiliate online course
You can use the Affiliate online course when you want to automatically deliver course lessons at a prescribed time interval. When you use this template, you will select the messages you want to send to your leads and the tags you want to start and finish the workflow with. Note: You can always add more elements (or delete them), depending on your course length.
Template overview
Category: Affiliate marketing
Elements in template: 8
Minimum number of elements to configure: 5
Here’s what you’ll need to configure the elements and publish the template as a workflow:
- automation messages or messages that can be used as automation messages with your course lessons
- an idea what tags you want to use at the beginning and the end of the workflow.
Setup
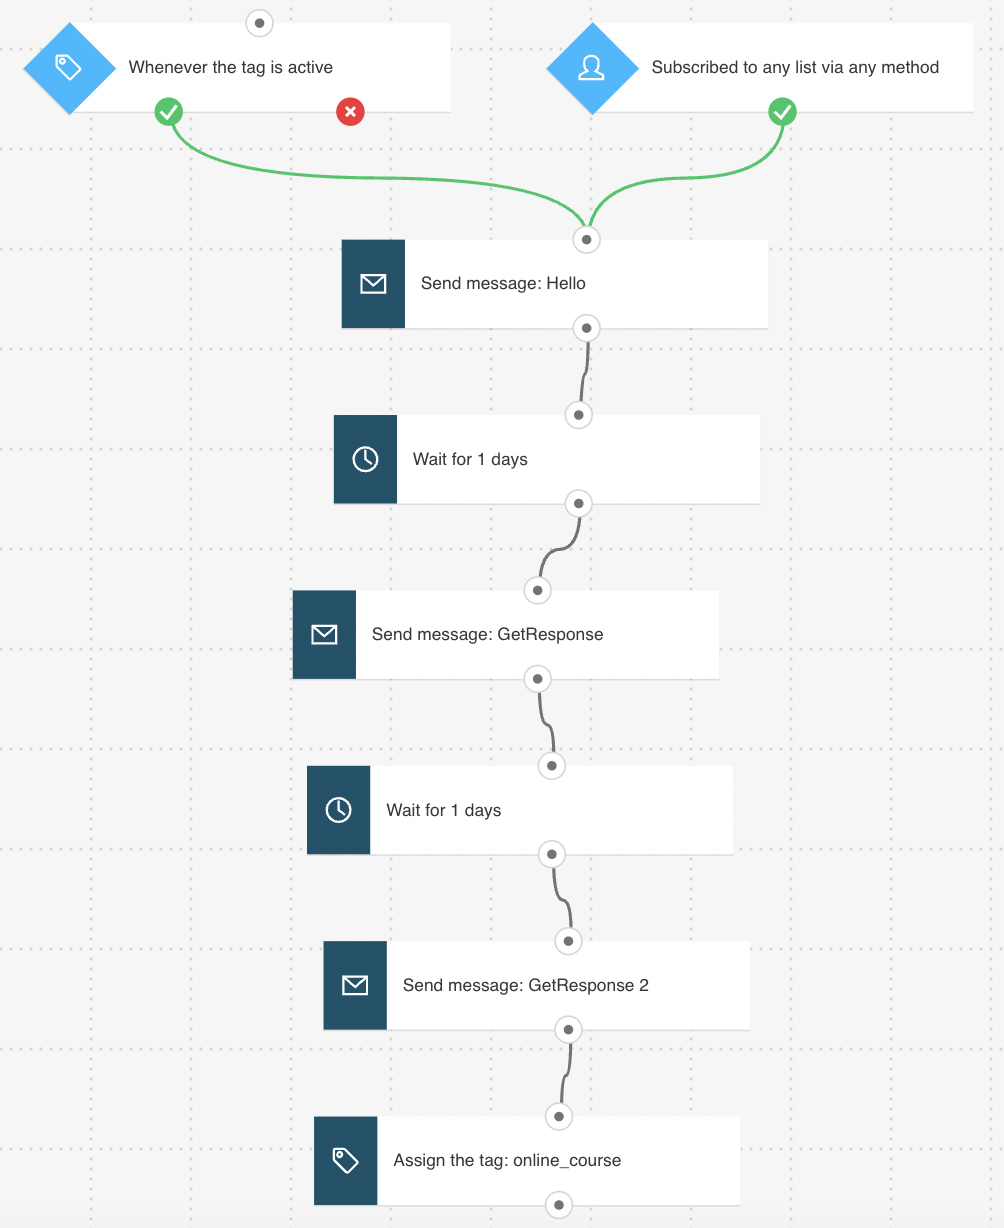
All greyed out elements need to be configured. Click an element to open its Properties tab. The Wait elements have been preset with the recommended delay time.
- 1. For the If tag element, select which tag should trigger the workflow. Everyone who is tagged with it will be automatically added to this workflow and start receiving the course lessons. It can be applied in another workflow (e.g. Affiliate course promotion) or assigned by you. It should be descriptive, e.g. you can use a tag “course_ready”.
By default, this condition will work for the leads who get the tag after the workflow is published. If you want to include the leads who had the tag before the workflow is published, turn on the switch that enables adding them. Keep the time settings set to Never.
- The Subscribed via condition is preset to any list and any method. Optionally, you can modify the settings to better suit your needs. Under the Properties tab for the element, use the drop-downs to narrow it down by list and method.
- For each of the Send message elements, use the drop-downs to select the message you want to use.
- For the Tag action finishing the workflow, select the tag you want to assign to show that they’ve completed the course. They will help you identify them if you want to target them specifically or add them to another workflow.
- Click Publish when you’re done setting up the template or Save and exit if you want to finish editing the template later (it will appear as a draft on the Manage workflows page)


