How to use Zapier with my GetResponse account? Video
If you have a GetResponse MAX account, please note that Zapier is not available in the integrations hub under Tools > Integrations and API section, but you can still use it to create an integration.
When you connect your GetResponse account to Zapier you can create Zaps–automated workflows–between GetResponse and other applications you use. For example, you can have a Zap that sends a message to your Slack channel when you send out a newsletter. Here are the triggers and actions you can use to create Zaps and automate your tasks:
Triggers
Creating these in your GetResponse account will trigger an action:
- New Campaign (This integration uses terms from the previous version of GetResponse. “Campaigns” are “lists” now.)
- New Contact
- New Newsletter
- New Landing Page
- New Autoresponder
- New Form
Supported actions
- Remove Contact: remove a contact from a list of your choosing.
- Create Contact: add a new contact to a list of your choosing. If you want to configure custom fields for your new contacts, assign tags to them or add them to an autoresponder cycle, click Show advanced options when you get to the Set up GetResponse contact step.
Note: For new contacts to be successfully added, the value of imported custom fields must match the value of the predefined GetResponse custom fields, including currency, country, gender, date, datetime, phone, and age.
- Update Contact: update the information for an existing contact. The information you can update includes tags and custom fields.
If you don’t see the Update Contact action or tag fields in Zapier, you might be using our older integration. To use those functions, disconnect the integration and then connect it again to make sure you’ve got all the updates.
- Create Newsletter: create an HTML newsletter or draft.
Setting up a newsletter template in Zapier
When you select Create newsletter for your Action, you’ll be able to send up to 256 messages a day. To set it up, you’ll need to:
1. Enter the name of your newsletter.
2. Enter the subject line.
3. Select the list the newsletter statistics are linked to.
4. Select a From email address.
5. Enter the text of the message in the Body field.
6. Select which type of message to create: “broadcast” (creates a newsletter) or “draft”.
Additionally, when you select “broadcast” as the message type, you can:
– select or exclude the recipients from specific lists,
– schedule the message (use ISO 8601 format)
– choose between Time Travel (delivers your email at a specific local time) and Perfect Timing (messages are delivered when your contacts are most likely to open and click your emails). Note: It’s not possible to use both options at the same time.
- Find Campaign: search for an existing contact list.
- Find Contact: search for an existing contact.
How do I connect GetResponse to Zapier?
If you’re creating a Zap and you haven’t connected your GetResponse account to Zapier yet, you’ll need to do it as one of the steps.
Before you begin: You need your API key to connect your GetResponse account, so grab it before you start.
Finding the API key
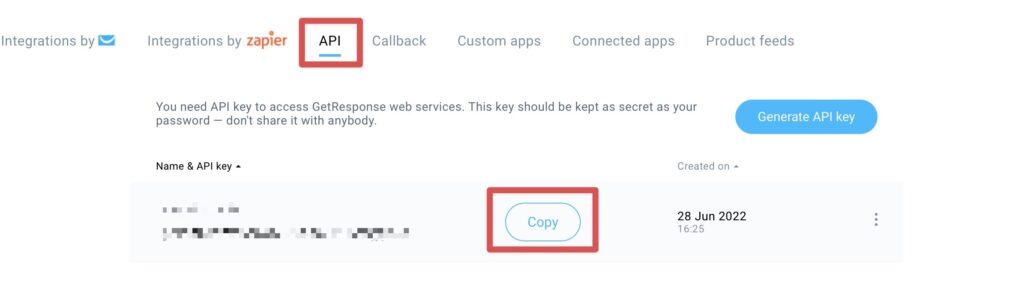
1. Go to Integrations and API > API.
2. Copy the key. Use the Copy button to make sure the API key is properly copied to your clipboard. !
Connecting Zapier and GetResponse
- In a separate tab or window, log into to your Zapier account and click Create Zap.
- Choose GetResponse for your trigger app.
- Select an Event, which is an action that will be performed after the Zap starts. Click Continue.
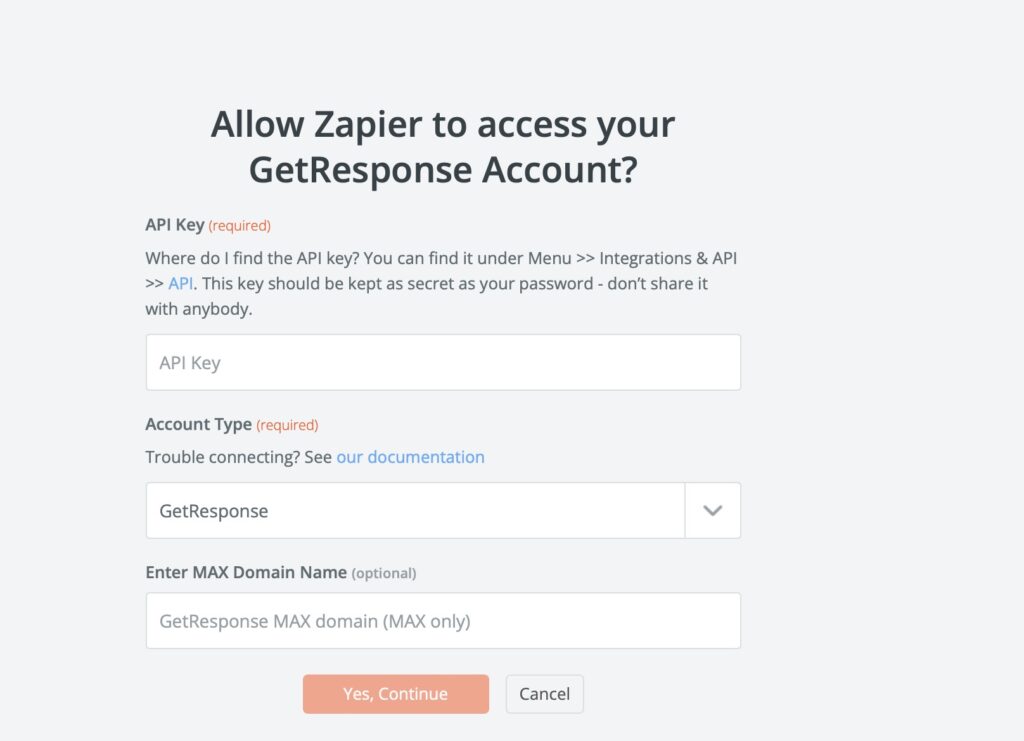
- Now it’s time to connect to GetResponse, click Sign In. A popup modal will open.
- Paste the API key in the API key field and click Yes, Continue. Note: If you have a MAX account, you’ll also need to select your account type (this integration still uses the previous name – Enterprise) and enter your GetResponse MAX domain name.
- When you click the button, the modal closes and you automatically return to the Zap. It now shows the GetResponse account that you’ve just connected. Click Continue to move to the last step.
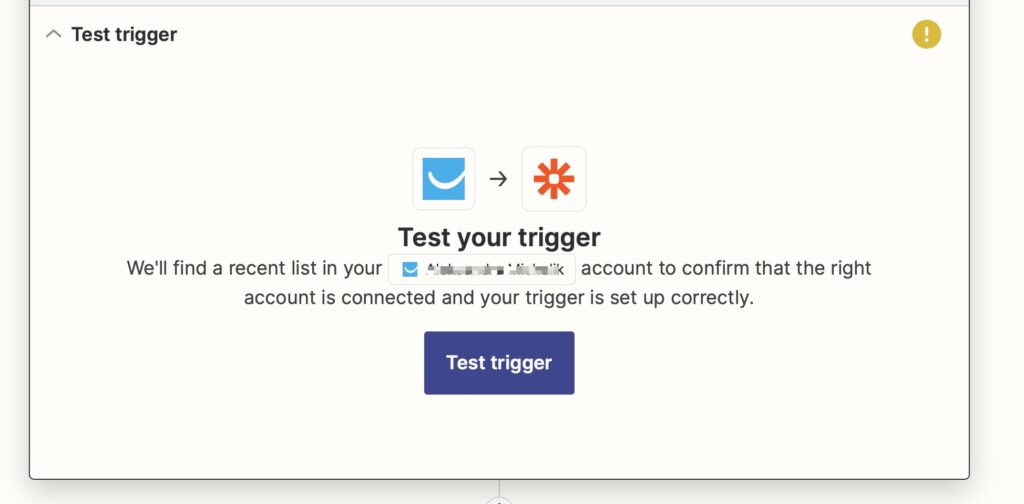
- Click Test trigger button to test your connection.
- To finish making your Zap, click Continue + Close.
Note: Zapier tests your GetResponse triggers by fetching information from your GetResponse account. Depending on the trigger, it’ll be looking for contacts, campaigns, newsletters, autoresponders, landing pages, or forms. Make sure they’re in your GetResponse account for the test to be successful.
Can I connect the GetResponse account before I make a Zap?
Yes, you can also add an account without creating a Zap. In your Zapier account, go to Dashboard>>My Apps and click Add Connection button, search for GetResponse in the search window and select it from the app list. When prompted, enter the API key. GetResponse MAX account holders also need to select the account type (this integration still uses the previous name – Enterprise) and enter the GetResponse MAX domain name.


