How to work with elements in a workflow?
To add elements to your workflow, drag them from the Add elements section on the right and drop them into the workspace. You can drag and drop elements wherever you would like them located in the workflow.
You connect the elements by dragging the connector link through the appropriate connection point located on the element. You can remove an element by selecting it so it is highlighted blue, and then click the trash can icon to remove it from the workspace.
The Properties tab opens automatically as soon as you drop the element to the workspace or click an element that’s already there.
Expand the drop-down menus to select the components you want to add (ex. a newsletter, link, form, etc.)
Can I add comments to the elements in a workflow?
You can add a note (a comment field) to each element in a workflow to add extra information about how and why you’re using them in a workflow. To add a note, select the element and click on the note icon in the top right corner. To close it, click on the x icon or anywhere else in the workspace.
In the comment field, you can type up to 256 characters. If you type in a URL (http:// or https://), we’ll automatically convert it to a hyperlink. You can copy, cut, and paste the contents of your note. Any changes you make are saved automatically (they also appear in the workflow history).
When you add a note to Move to workflow or Copy to workflow elements, a corresponding note is added to the connecting element in a target workflow. Changes you make in one note appear in the other one automatically.
How do I select and move multiple elements?
Click and drag the cursor to select multiple elements and their connections. You can move them where you want them to be in your workflow. You can also press and hold Ctrl, and click elements to select them (for Macs press and hold the command key).
You can copy and paste selected elements. The elements are always pasted at the bottom of the workflow.
You can also use keyboard shortcuts to work with multiple elements at the same time.
PC keyboard shortcuts:
- Ctrl + C (copy)
- Ctrl + V (paste)
- Ctrl +X (cut)
- Ctrl + Z (undo)
- Shift + Ctrl + Z (redo)
- Ctrl + A (select all)
Mac keyboard shortcuts:
- Cmd key + C (copy)
- Cmd + V (paste)
- Cmd +X (cut)
- Cmd + Z (undo)
- Cmd + Function + Z (redo)
- Cmd + A (select all)
How do I use the zoom tool?
Sometimes workflows can be elaborate and extend beyond visible workspace. Use the zoom tool to resize the workflow.
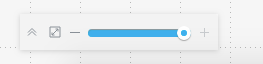
It allows you to:
- View the workflow at different magnification levels. Use the zoom slider to zoom in and out.
- Pan to view different parts of the workflow. Expand the zoom tool to view the pan window. The white rectangle corresponds to what’s currently visible in your workspace. Click and hold the rectangle to pan across your workflow.
- Use the fit view tool to automatically adjust the zoom for you to be able to see the entire workflow.
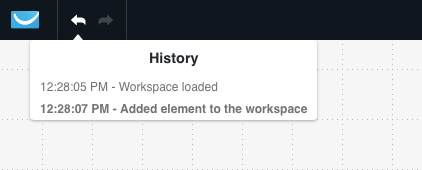
How can I check the history of the changes I’ve made?
Click the arrow in the top bar. Use the undo or redo arrow icons, or simply select the step you want to return to. You can return to the step when your workspace loads, or undo and redo any of your changes.