How to add WooCommerce customers to GetResponse in legacy WordPress plugin? Video
The following article applies to our legacy plugin.
We have created a brand new integration which is described here.
Our built-in integration with WooCommerce lets you export customers, add customers to a contact list at checkout, and send ecommerce data to GetResponse.
To make sure all the customer information and ecommerce data are sent to the right place in GetResponse, keep in mind that customers can be added to one list at a time. You can select a different list at any point.
Before you begin
- Install the GetResponse for WordPress,
- Make sure you’ve activated the WooCommerce plugin in WordPress.
Creating a store
To send the ecommerce data to GetResponse, you’ll need to create a GetResponse store first. This is where all the data about products, purchases, product categories, and carts will be sent to.
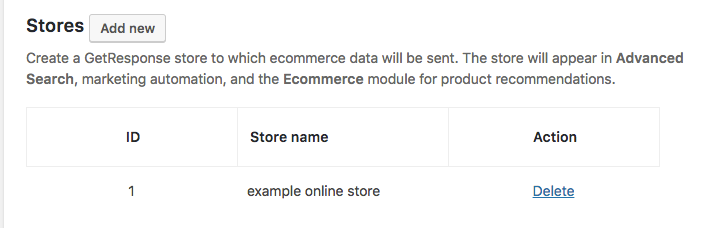
To create a GetResponse store,
1. Select the WooCommerce Integration tab within GetResponse for WordPress.
2. Click the Add new button.
3. Enter a store name in the field available (use a name that you’ll be able to recognize).
4. Click Submit.
In the plugin, you can select the store you’ve created as a target store when exporting WooCommerce customers and enabling the option to send ecommerce data from your online store to a GetResponse store.
In GetResponse, the store will appear in:
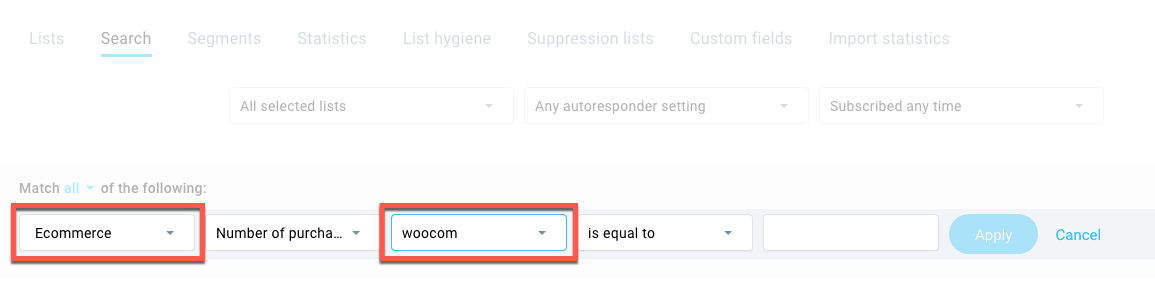
- marketing automation (in Purchase and Abandoned cart conditions),

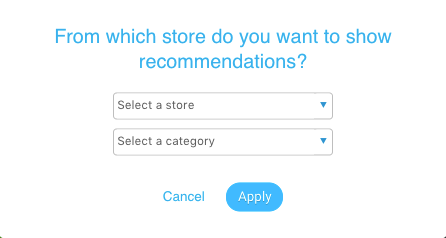
- the Ecommerce module for product recommendations.
Exporting customers
You can grow your contact list in GetResponse by adding a contact from your WooCommerce store. You can also update contact information (custom fields) and export existing purchase history for your customers. Here’s how:
- Select the WooCommerce Integration tab within GetResponse for WordPress.
Select the list to which new contacts will be added. If there’s an active autoresponder in the list, you can select to add the contacts to an autoresponder cycle. - To include purchase history data, check the Include ecommerce data in this export box. (optional). If you select this option, you’ll also need to select the GetResponse store to which you want us to send data.
- Choose if you want to update contact information.
- (Optional) Check the Performance optimization box only if you have crontab access and can schedule time-based automated tasks. Your export won’t be affected if you don’t.
- Click Export.
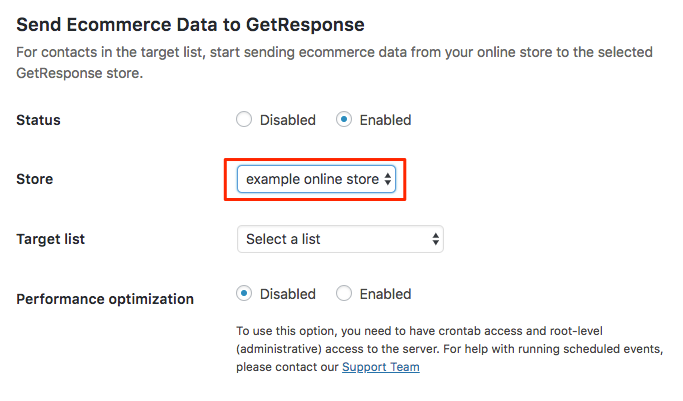
Sending Ecommerce Data to GetResponse
GetResponse for WordPress lets you track orders (product data, such as type, variant, category), order value, carts, purchase history.
To do this,
1. Select the WooCommerce Integration tab within GetResponse for WordPress.
2. Check the Enabled button.
3. Select the store in GetResponse that will store all the data.
4. Select a contact list (ecommerce data is updated for people in a specific list, so keep track of which list you’re adding WooCommerce contacts to).
5. (Optional) Check the Performance optimization box only if you have crotnab access and can schedule time-based automated tasks. Sending ecommerce data is not affected if you don’t.
6. Click Save changes.
Note: sending ecommerce data will only work if your GetResponse subscriber is registered on your WordPress page as a customer. It means that they need to have an account on your WordPress page and need to log in to it before adding products to the cart.
What types of products can I import?
We only import products which have a name set up.
Also, the products for import need have the “in stock” flag, be published and have the type of “variable” or “simple”.
Adding customers at checkout
With our plugin, you can add customers by adding the opt-in box on the checkout page. This way all customers who are completing their purchase go to your list. This option lets you add contacts, and update contact information (custom fields). Here’s how:
- Select the WooCommerce Integration tab within GetResponse for WordPress.
- Check the Enabled button.
- Select a list to which new contacts will be added. If there’s an active autoresponder in the list, you can select to add the contacts to an autoresponder cycle.
- Select a contact list (ecommerce data is updated for people in a specific list, so keep track of which list you’re adding WooCommerce contacts to).
- Optionally, edit the text you want to appear next to the subscription checkbox and select the default subscription option.
- Choose if you want to update contact information.
- Click Save changes.


