Want to capture more email subscribers on your website? Maybe you want to promote your upcoming webinar? Or perhaps you’d like to offer a special discount to your online store shoppers? If you’re trying to achieve any of these goals, it sounds like you need popups.
Popups are essential in marketing, despite their reputation. The average conversion rate for a popup is around 3%. But if you’re willing to put in a little work, you can target your audience with laser-focus precision, achieving conversion rates above 5% or even 10%.
Popups are also very easy to create and manage. Once you’ve installed a line of code on your website, you fully control how and where your popup window is displayed (and don’t worry, you don’t have to write that line of code, we’ll handle that part!). Want to adjust your popup or the offer quickly? You can do that, all by yourself, without having to chat to your developer.
Sound promising? Great! In this article, I’ll show you how to create a popup that converts in five easy-to-follow steps. All of it shouldn’t take more than 30 minutes of your time. Let’s go!
If you’re looking for inspiration, you’ll benefit from reading this post listing some of the best popup examples we’ve seen on the web. And if you need a refresher, this guide explains what popups are and how they work exactly.
How to create a popup form in 5 easy steps
- Pick a popup builder
- Define your goal
- Pick up a popup template and add your content
- Choose how and to whom your popup will be shown
- Preview and publish
Looking for a visual guide on how to create a popup in minutes? Click here to watch our video tutorial and get creating!
Step 1. Pick a popup builder
If you’re a marketer like me, you probably value efficiency. That’s why before you begin creating popups, I suggest that you start by finding a reliable popup builder that’ll help you run your campaigns efficiently.
While it’s possible to code your popup forms using HTML and CSS, I wouldn’t advise that you go down this path unless you’re very technical.
These days, popup form builders come with a variety of helpful features that’d be hard to implement if you were to do it yourself. Plus, many of them, including the Popup Creator from GetResponse, are completely free to use.
Inside most popup form creators, you’ll find:
- Prebuilt popup form templates that help you speed up your design process
- Targeting options that let you reach even the most specific audience
- Editing and previewing capabilities that’ll help you ensure your popup forms look great no matter where or when they’re displayed
- Integration settings that let you connect your popup tool with your preferred email marketing software or CRM
Naturally, the above capabilities will vary between different popup form builders. You’ll want to review which tool will work for your specific use case and offer the best value for your budget.
You’ll also want to ensure your popup form creator integrates with the other tools you already use for your marketing campaigns, like your CRM or email newsletter software.
For example, the already mentioned GetResponse Free Popup Creator integrates directly with the rest of our marketing tools and other top marketing software available on the market.
Of course, there are other great tools on the market. If you’d like to shop around, we recently reviewed these best popup software tools. These reviews will hopefully help you save time and money when picking the best tool for your needs.
Step 2. Define your goal
Once you’ve chosen your popup builder, it’s time to define the goal you want to achieve with the popup. This will help you choose the right popup form template for your needs.
Popups typically help achieve the following goals:
- Collecting email signups
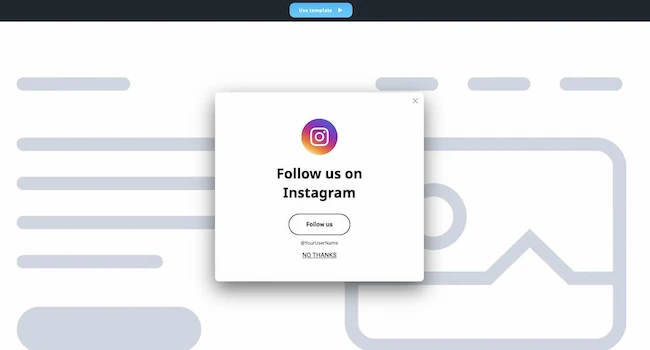
- Promoting an offer or an event
- Saving abandoned carts
If you want to collect signups for your email marketing list, you’ll want to use a popup form that includes the input fields, such as name and email address.
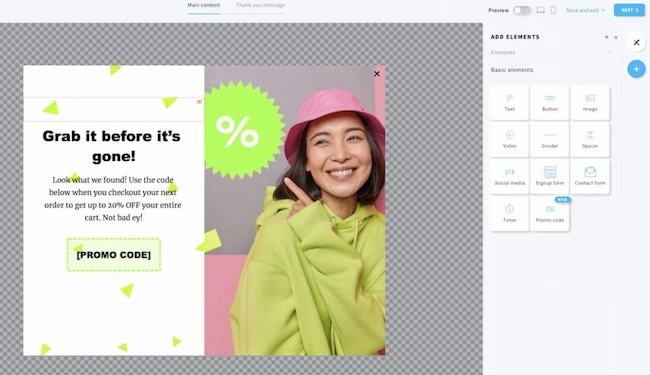
If you’re promoting an offer, it’s enough to have a popup window with an image, text, and a call to action (CTA) button leading to your sales page.
And if you’re looking to use popups to save abandoned carts, you’ll want to use a popup that can present a special discount code and a CTA.
Your goal should also help you determine when your popup should be displayed. As you’ll learn in step four, there are various targeting options you can use to make your popup forms most efficient.
Pro tip: It might be tempting to use popups to collect as much information about your visitors as possible. But consider the fact that each additional input field is likely going to decrease your popup’s conversion rate. In our recent Email Marketing Benchmarks report, we found that forms with more than four input fields result in significantly smaller conversion rates.
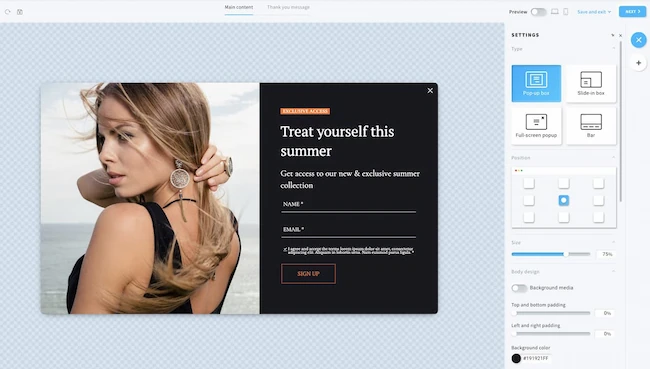
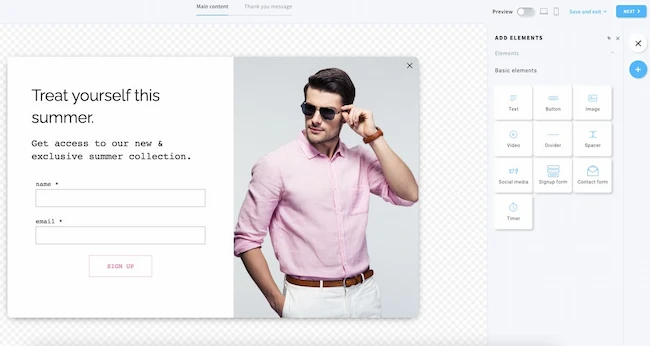
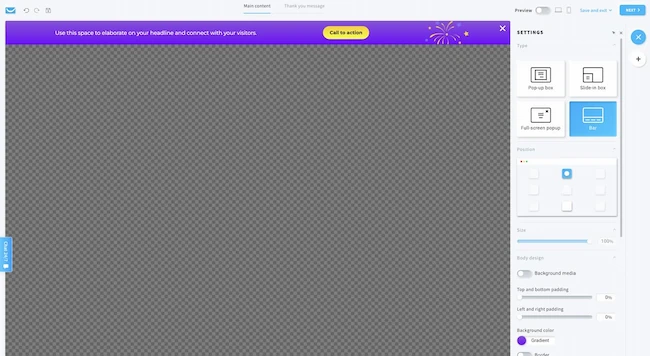
Step 3. Choose a popup template and add your content
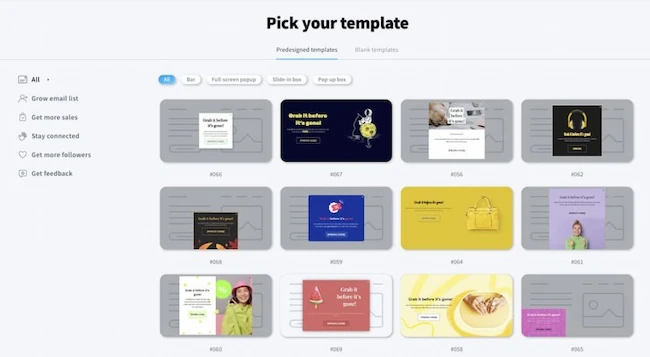
After defining your goal, it’s time to choose your popup template and add your content.
Most popup builders offer a variety of templates, so feel free to spend a few minutes browsing through them. Keep in mind that you’ll be able to customize the template fully (using a drag-and-drop editor), so don’t worry if the template you choose doesn’t match your branding right away.
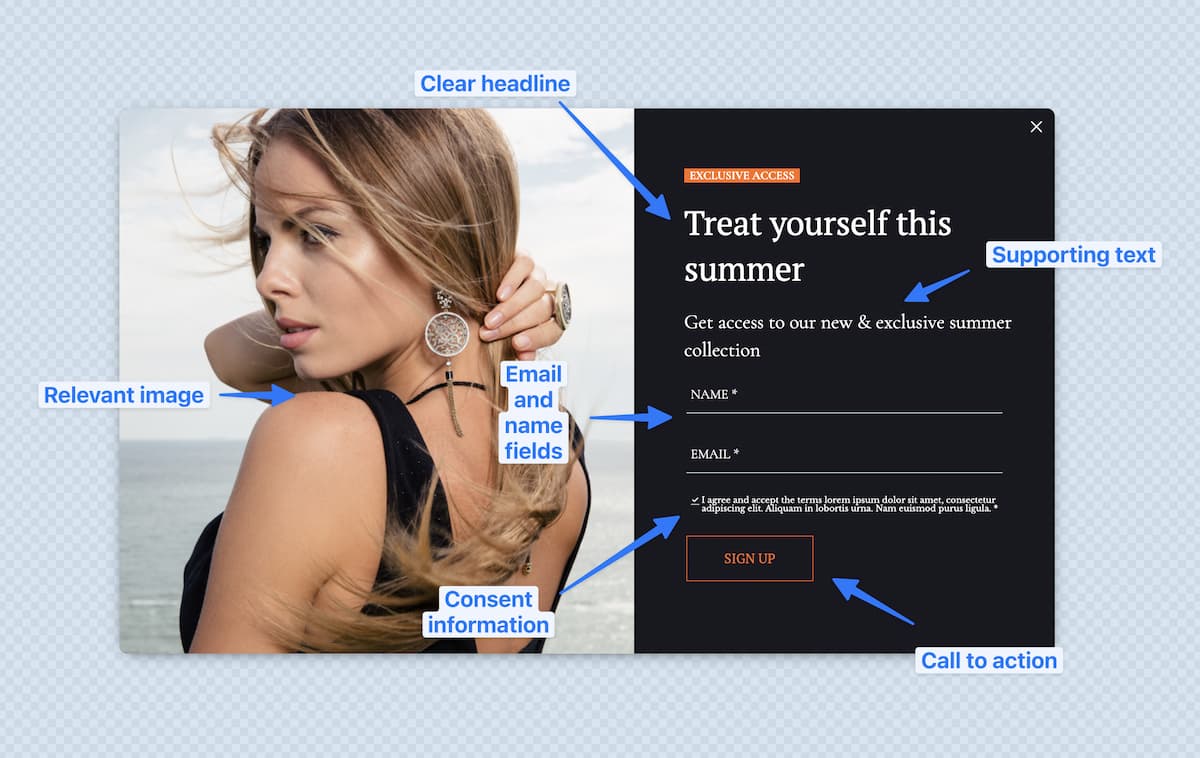
Once you’ve selected the template, it’s time to edit it and add your content. Most popups include:
- A clear headline stating the offer
- Supporting text that explains the offer in more detail
- An image that’s relevant to the offer
- Name and email field, if the popup’s goal is to collect email signups
- CTA button either to submit the form or to move to the offer page
- Consent information describing how the data will be processed and by whom
- Unchecked checkbox letting the visitors confirm that they want to opt into the list
Some popup forms also include social proof and trust symbols (such as badges or logos of companies you’ve worked with) or elements increasing the sense of urgency (like a countdown timer)
As for popup design, you’ll want to keep the following best practices in mind:
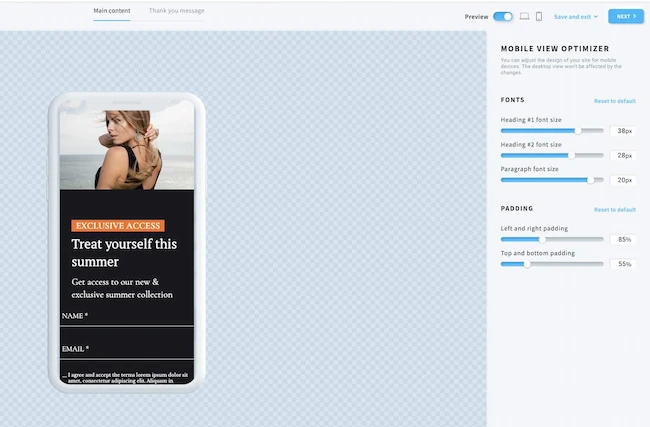
- Adjust the size of your popup window to the device it’ll be displayed on. On mobile devices, make your font smaller (but still legible), skip nonessential images, and try to keep the window’s size small enough so that it won’t require scrolling on a smaller screen.
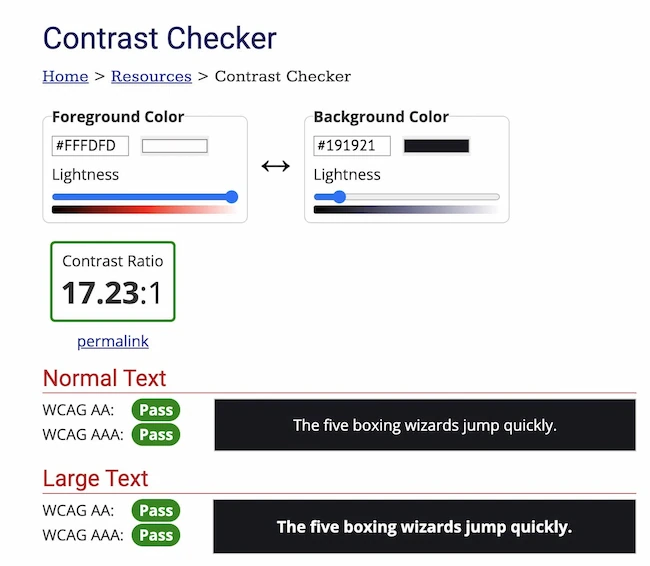
- Make sure your popups have enough contrast. Use tools like WebAIM to confirm that your background color and text look good together and are accessible to all your visitors.
- Compress your images. Before adding your images, make sure they’re saved using the latest formats (e.g., .jpg) and that they’ve been compressed to load fast on the web.
- Choose your images strategically. You’ll want to ensure your images are relevant and don’t distract your visitors from the action you want them to take.
To learn more about this, you may want to read our post on How to Craft the Perfect Newsletter Signup Forms.
Pro tip: If design isn’t your strong suit, simply go with a template and customize its content. Typically, popup form templates are designed by professional designers and UX experts who’ve been doing this for years. These great popup designs will come in handy, too.
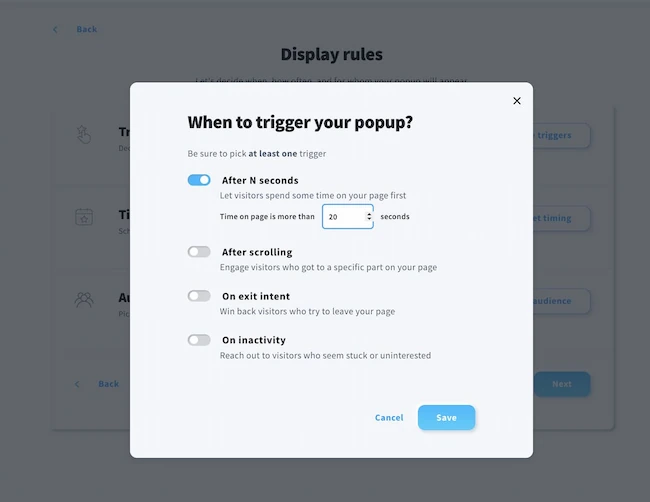
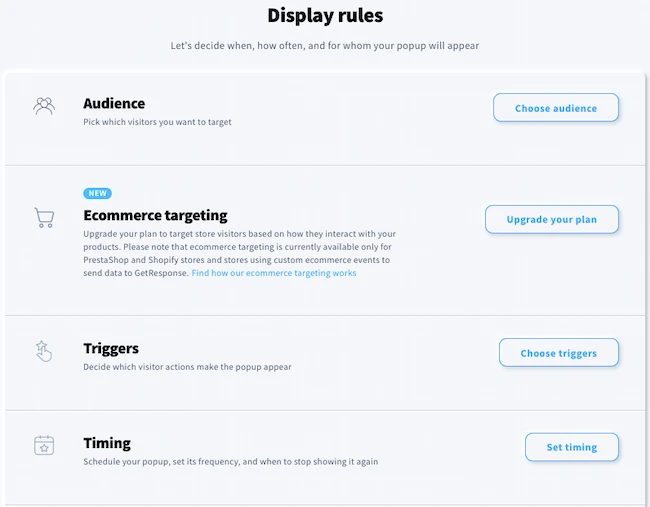
Step 4. Choose how and to whom your popup will be shown
When I said that popup builders are efficient, I didn’t just mean that they come with prebuilt templates. The true power of popup builders is in the display and targeting capabilities they offer.
Most popup builders offer several types of popups:
- Entry popups that appear as soon as a visitor lands on the website
- Exit-intent popups that appear when a user moves their mouse-pointer away from the main window, potentially trying to close the tab
- Time-delayed popups that appear after a user spent a particular amount of time on the page
- Scroll popups that appear after a user scrolled a portion of a page
- On-click popups that appear after a user clicks on a popup button
- Event-triggered popups that appear after an event in your store or website took place
In addition, you’ll often find bar popups that resemble a bar more than a typical popup window and stay fixed to the top or bottom of the page.
As you can probably tell from the descriptions, these popups take into consideration the different forms of user engagement. Because of this, you’ll notice that entry popups show up more often than time-delayed popups, but at the same time, their conversion rate is typically smaller.
You can further narrow down who’ll see your popups by specifying:
- Which specific page(s) your popup window should or shouldn’t be displayed on
- How often the popup form will be displayed (e.g., once a day at maximum)
- When the popup form should stop displaying (e.g., after a user submits the form)
- What type of visitors should see your popup form (new vs. returning visitors)
- What devices your popup form should be displayed on (mobile vs. desktop)
- In which countries should your popup be visible
As you can see, there are many ways you can target your popups. It may be even a bit overwhelming at first. That’s why my best advice is to start small.
Consider the goal you chose in step two and move from there. If your offer’s relevant to everyone who visits your website, you can show the popup to everyone. Ideally, you’ll give your visitors enough time to access the content they came for and only then show them your popup.
Pro tip: While the design and targeting of your popups will have a major impact on your campaigns’ success, the offer you present is likely the most important element of the puzzle. To ensure your popups convert, you’ll want to offer them something of real value for which they’d be willing to leave their contact details. This study shows what types of content (aka lead magnets) work for marketers like yourself.
Step 5. Preview and publish it on your website
Before your new popup goes live, it’s time to do the final checks.
In your popup builder, preview your popup form and see how it looks when displayed on desktop and mobile devices.
If it looks OK, click save and head over to the installation step.
Most popup builders will generate a piece of Javascript code you’ll then need to install on your website.
Here’s the best way to do this:
- If you have a WordPress site, head over to the Appearance > Theme file editor > Theme header, and paste your Javascript code at the bottom, right before the </head> part.
- If you have a site that’s built using some other website builder, find a block that lets you enter your custom code and paste it there.
- Use a tool like Google Tag Manager that can install external Javascript code on your website for you.
We cover the first option in this video tutorial.
Alternatively, you can ask your developer or tech team to do this part for you. This is a very easy step and you’ll only need to do it once, as long as the code’s present throughout your website.
Pro tip: Remember that you can always optimize your popups after you hit publish. You can refine your message, design, and targeting to ensure your popups reach the most-promising audience.
Start building your first popup today
Hopefully, you’ve found this article helpful and are ready to create and launch your first popup form.
As you learned today, the process is fairly simple, and the only technical part is the installation bit.
Since we’ve covered it in our detailed walkthrough, there should be nothing stopping you from building your email list or promoting your offers using popups.
So go ahead and create a popup using the tool you’ve selected in step one, and if it happens to be the GetResponse Free Popup Creator – we’d be happy to support you and your business!
